Thinking about wall wash painting? Our pros share secrets for a beautiful, layered look. Learn the right techniques from our team and avoid common, blotchy mistakes.
Key Takeaways
- **Visible Translucence:** You've got to see the base coat. The top layer should be visibly sheer, not opaque. It's supposed to tint the wall, not cover it up.
- **Flawless Blending:** No hard edges. No obvious marks from rags or brushes. The entire wall should look like one single, cohesive piece of art.
- **Consistent Pattern:** Whether you want a cloudy look or faint streaks, the pattern can't be random in the wrong way. It needs to be consistent in its style across the whole wall. No bare spots or dense clumps.
Key Takeaways
Wall Wash Painting: Pro Tips for Flawless Finishes
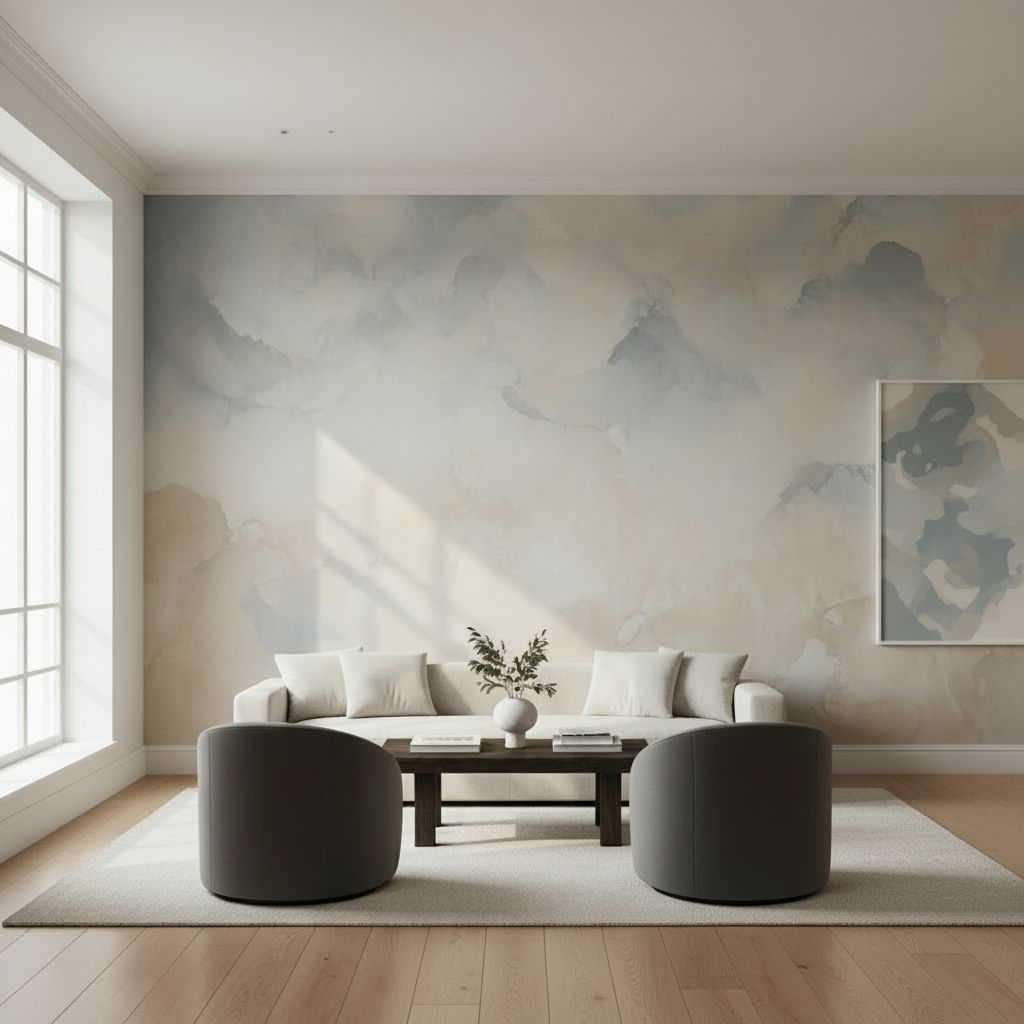
Wall wash painting isn't just paint—it's an art form that brings a soft, layered, watercolor look to your walls. Unlike a solid coat of paint, this technique uses thinned glazes to build incredible depth and texture, letting the base color peek through.
Beyond changing color, this method brings movement and soul to a flat, boring surface. Done right, the finish is stunning. It can look like soft clouds or the beautiful patina on an old Italian villa. But honestly? The line between a masterpiece and a splotchy mess is razor-thin. It all comes down to skill, preparation, and the right stuff.
As a nationwide team of expert inspectors with 20+ years of experience, we see this all the time. It's what separates a true artisan from everyone else.
What Defines a Professional Wall Wash Finish?
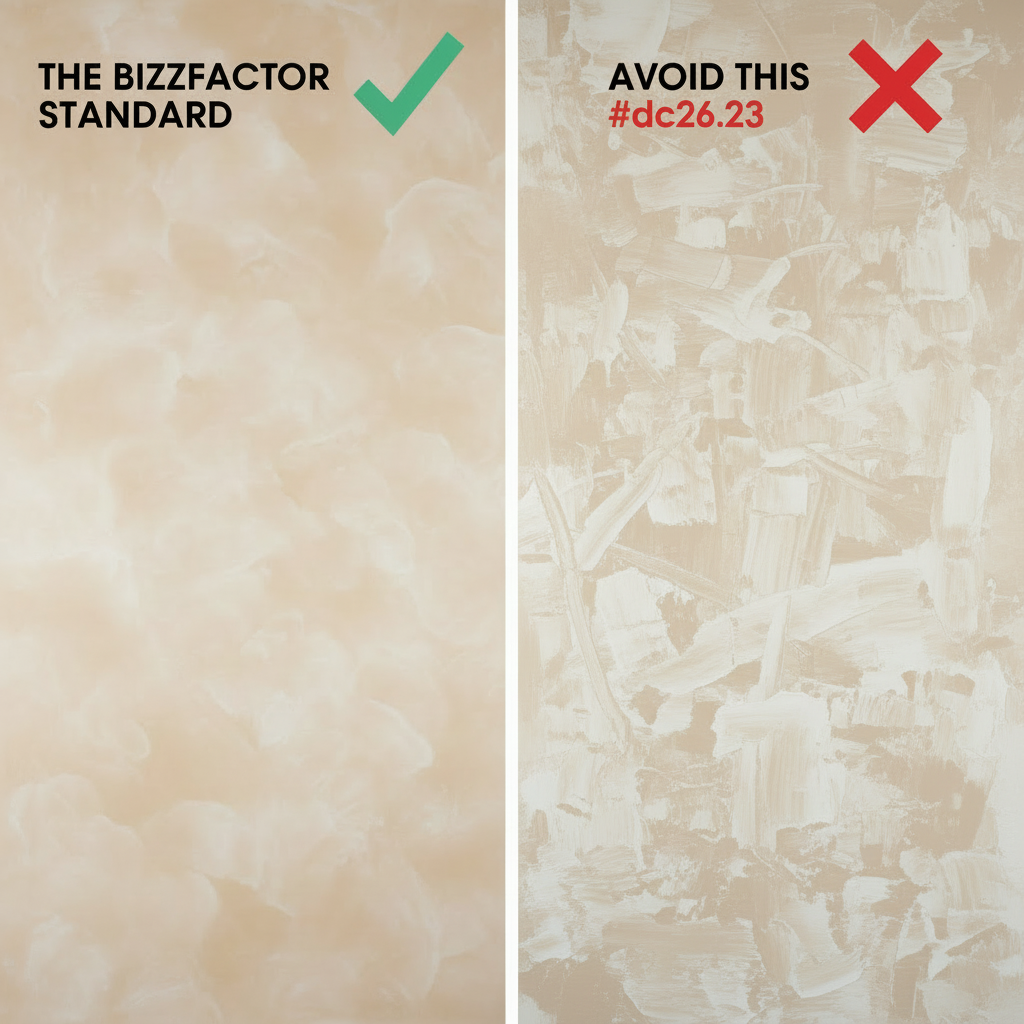
A professional wall wash finish is a layered, translucent paint effect that looks completely seamless and intentional. Our team of certified inspectors defines it by its soft, ethereal quality—free from any blotches, harsh lines, or ugly evidence of where the painter started and stopped their work.
Frankly, you shouldn't be able to tell how it was done. The final effect needs to feel organic and soft, drawing your eye without screaming for attention. Our BizzFactor Standard is simple: if you can see the painter's lap marks, it's a failure.
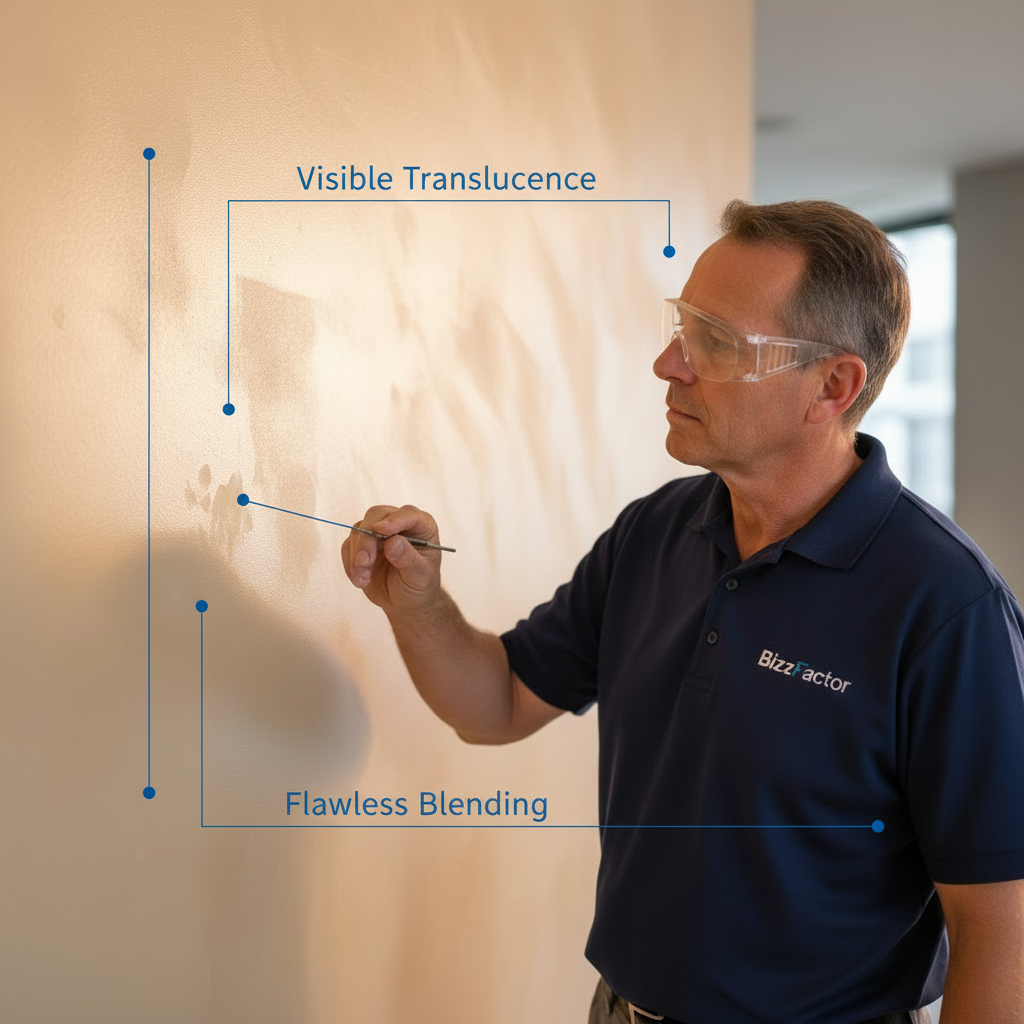
Here are the key quality signs our inspectors look for on every job:
- **Visible Translucence:** You've got to see the base coat. The top layer should be visibly sheer, not opaque. It's supposed to tint the wall, not cover it up.
- **Flawless Blending:** No hard edges. No obvious marks from rags or brushes. The entire wall should look like one single, cohesive piece of art.
- **Consistent Pattern:** Whether you want a cloudy look or faint streaks, the pattern can't be random in the wrong way. It needs to be consistent in its style across the whole wall. No bare spots or dense clumps.
⚠️ The Overworking Trap: Chasing the Wet Edge
Look, here's a trap even seasoned pros fall into. They get obsessed with eliminating every tiny lap mark and 'chase the wet edge.' What does this mean? They keep fussing with the glaze as it starts to dry. Big mistake. This just pulls the color off and creates muddy, overworked blotches. And those blotches are *way* more noticeable than a subtle transition line. You're better off working fast and living with a tiny imperfection than creating a huge, smeared mess.
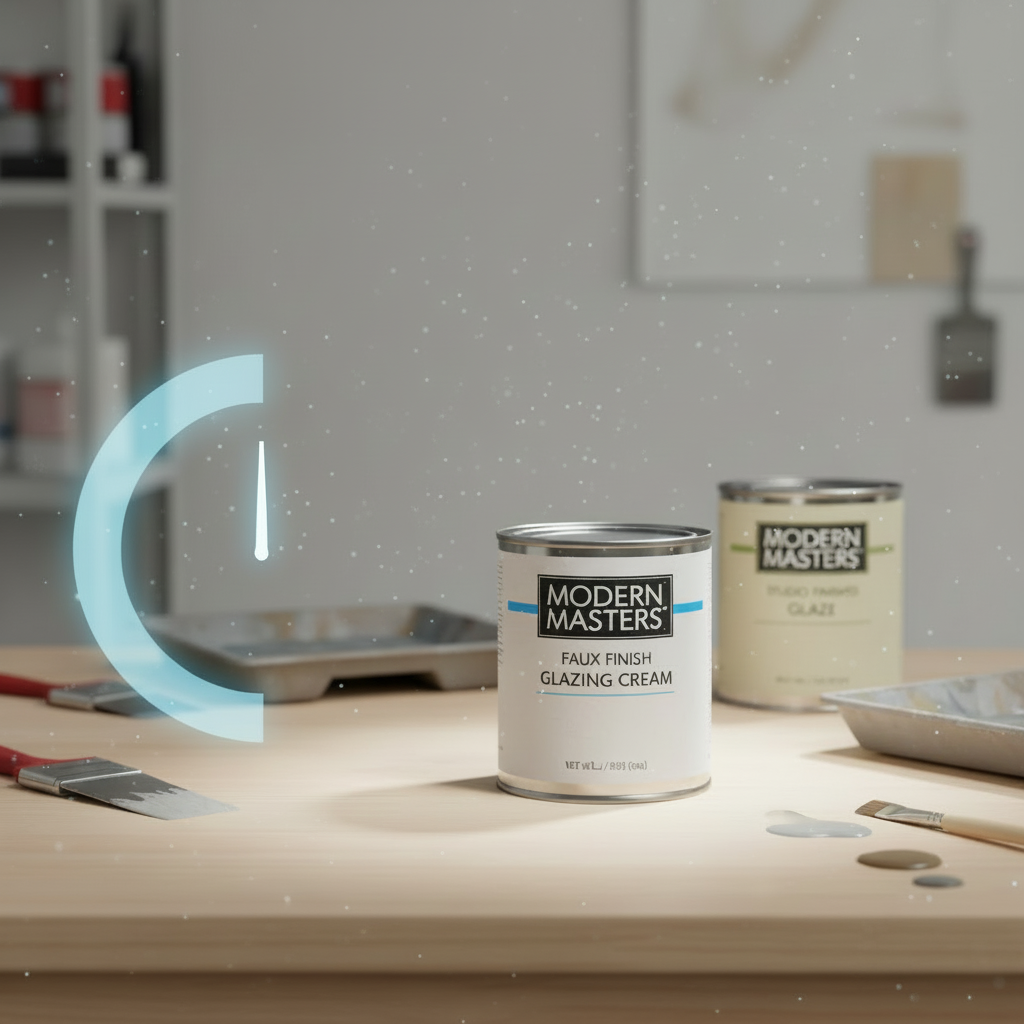
Glaze Wars: Modern Masters vs. Benjamin Moore
So, which glaze should you use? Benjamin Moore's Studio Finishes Glaze is a decent product—we've seen it used well. But its fast drying time is brutal, especially on big walls. You just don't have enough time to work.
In our experience, most contractors make this same mistake—they go with whatever's cheapest or most familiar. But our pros consistently recommend **Modern Masters Faux Finish Glazing Cream**. Its 'open time' (how long it stays wet and workable) is far superior. It gives you the time you need to create that seamless, cloud-like finish without panicking. It's also creamier than cheaper options like Valspar's, which means fewer drips and more control. Is it a bit more expensive? Yes. But think of it as an insurance policy against a terrible, blotchy finish.
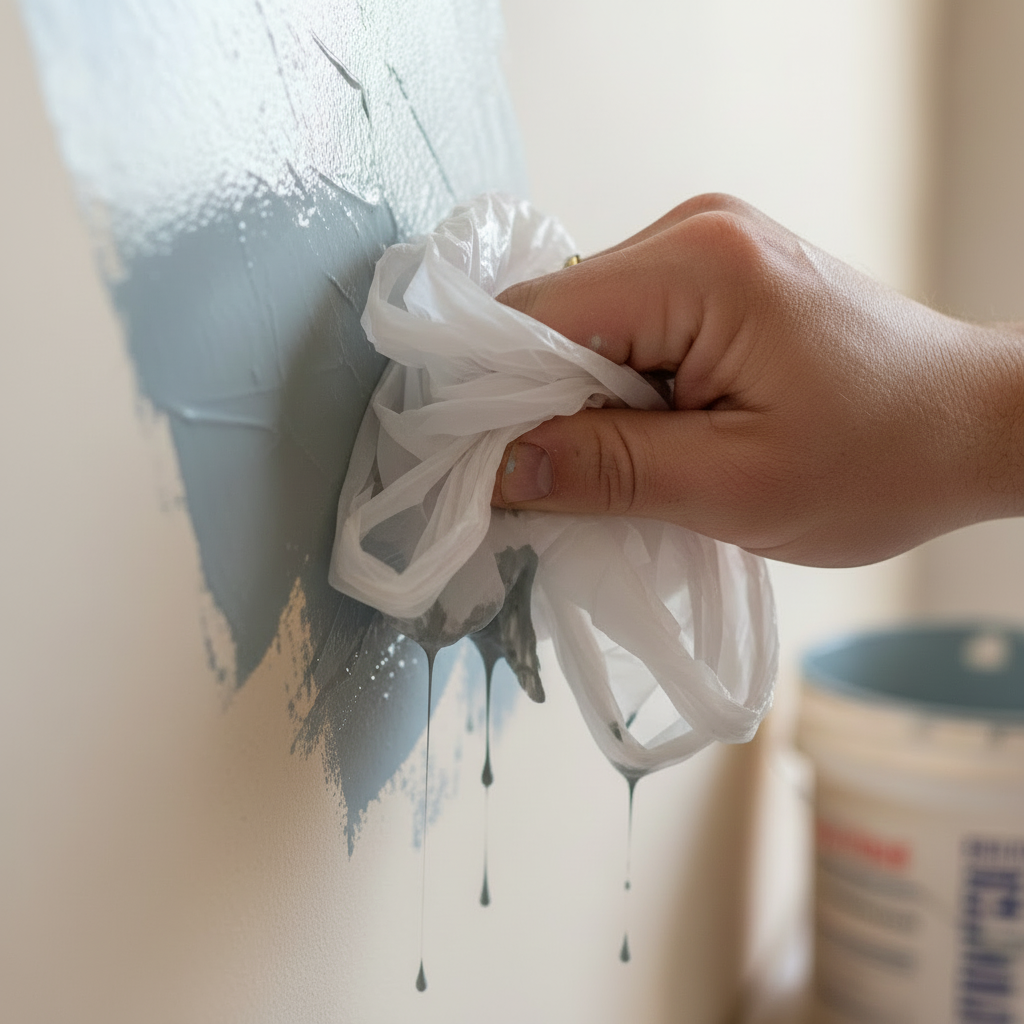
The Secret Weapon Most Pros Won't Share
You can forget those pricey sea sponges and fancy rags. The real secret weapon for a random, organic wall wash finish? A simple plastic grocery bag. Seriously. Just bunch it up.
Its crinkled, non-absorbent surface dabs the glaze in a beautifully unpredictable pattern that sponges just can't replicate. It completely eliminates that repetitive, 'stamped' look that just screams DIY. You can't beat it for creating a truly natural effect.
Substrates and Formulations: Choosing the Right Wash
Choosing the right wash paint means matching the formula to the surface—what our team calls the 'substrate.' Our licensed pros know that acrylic glazes are perfect for interior drywall, but using that same glaze on wood is a huge mistake. Wood requires specialized, penetrating oil-based or hybrid formulas to avoid peeling.
For Your Interior Drywall and Plaster
Most of the time, you'll be working on drywall. Here's what the pros know that DIY guides don't tell you: start with a quality base coat (an eggshell from Sherwin-Williams works great) and let it cure. Then you apply the top layer. But you don't buy this off the shelf. This is a custom mix—a clear acrylic glazing medium combined with a small amount of paint to get that perfect translucency.
Quick question: What if your walls have old patches or imperfections? You must seal them first. A product like **Zinsser Gardz** is what our team uses. It creates a uniform surface so the glaze absorbs evenly instead of creating dark spots.
For Wood (Don't Make This Mistake)
Washing wood is much more like staining than painting. The whole point is to tint the wood while letting that beautiful grain shine through. Don't even *think* about using a standard acrylic wall glaze on wood. We've seen it countless times on inspections—it just sits on top and peels right off later. It's a guaranteed failure.
Instead, our pros use either oil-based glazes or tough water-based hybrids made for trim and furniture. And the prep work is non-negotiable. Every piece of wood must be perfectly sanded and cleaned so the wash can penetrate the grain evenly.
Real-World Fail: The 'Accidental' Accent Wall
Our team was in Scottsdale last spring inspecting a new $2M home where the client wanted a 'soft cloud' effect. Honestly? This is where most people make their first mistake. The painter—who admitted he'd never done one before—used a regular paint roller. He kept trying to fix spots after the glaze started drying.
Sound familiar? The result was a disaster. It was a splotchy, uneven mess with harsh lines where the roller stopped. It didn't look like ethereal clouds; it looked like a terrible patch job. To meet our BizzFactor Standard, we recommended having the painter sand the entire 18-foot wall smooth, re-prime with a shellac-based sealer, and bring in a two-person team to re-apply the finish with the proper wet-edge technique.
The Non-Negotiable Wall Wash Application Process
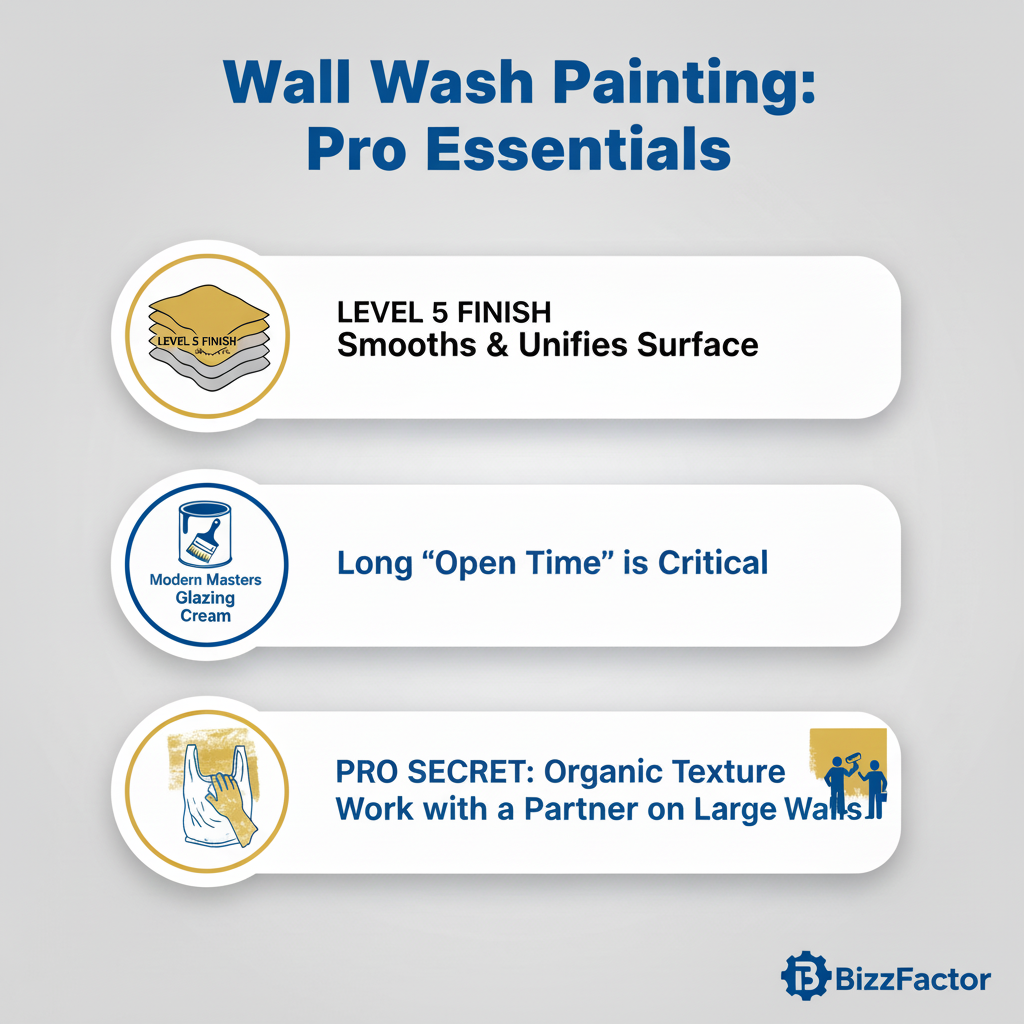
A flawless wall wash application isn't just about painting—it's a race against time that demands meticulous prep and a solid game plan. This non-negotiable process requires a perfectly smooth wall (a Level 5 drywall finish), client-approved samples, a swift wet-edge technique, and a protective final clear coat.
So what's the solution? Speed and technique are everything.
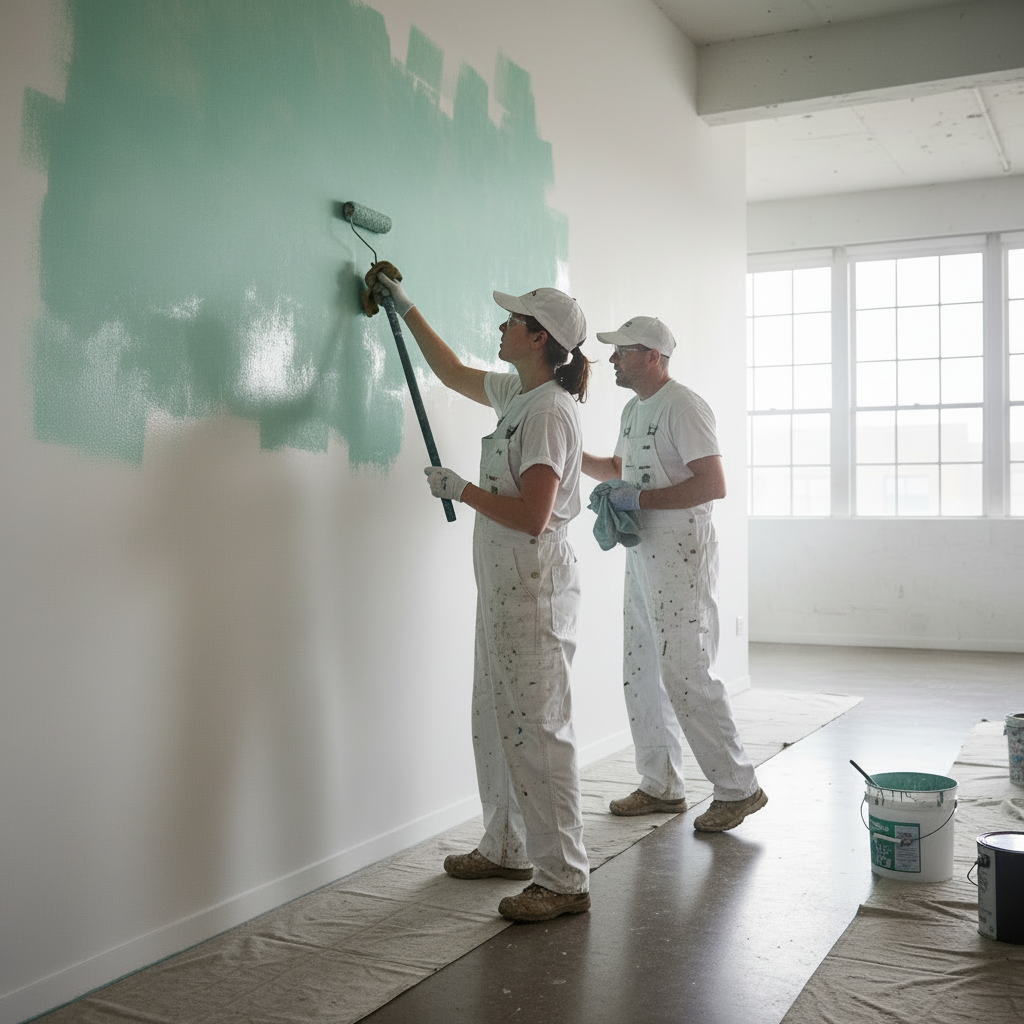
1. **Elite Surface Prep:** A wash finish will magnify every single flaw on your wall. You can't hide anything. The wall needs to be a minimum of a Level 4 drywall finish, but our team recommends a Level 5 (a full skim coat) for perfect results. All bumps and dings must be patched, sanded smooth, and primed a day in advance.
2. **Color & Sample Board Creation:** This is the artistic part. A true pro will mix their glaze on-site, testing different ratios of glaze to paint. And they MUST create a physical sample board (at least 2'x2') for you to sign off on. This is the only way to see how the color will actually look in your home's light. Don't skip this.
3. **Masterful Wet-Edge Application:** Here's the catch: the glaze dries fast. You can't stop in the middle of a wall. The key is maintaining a 'wet edge'—blending a new section of glaze into the last one before it gets tacky. For any wall bigger than a small closet, this really needs two painters working together—one applying glaze, the other right behind them softening and blending with tools like cheesecloth or special brushes.
4. **Seal it for Protection:** While not always done, a high-end job should always include a protective topcoat. For a delicate wash, our pros use a dead-flat water-based varnish, such as **General Finishes High Performance Water Based Topcoat**. This makes the wall washable and scratch-resistant without adding any shine that would ruin the soft, matte effect. It's a small step that protects a big investment.
In-Depth Look
Detailed illustration of key concepts
Visual Guide
Infographic illustration for this topic
Side-by-Side Comparison
Visual comparison of options and alternatives
Sources & References
- The Secrets of Pro Painters: Mastering Interior Painting Techniques
- A Pro Painter's Top House Painting Tips and Tricks | HGTV Home Tips
- How to paint a room like a professional | House & Garden
- Painting 101: The Complete Guide On How To Paint A Room
- Painting Walls LIke a Professional Painter: Start to Finish - YouTube
- Best Interior & Exterior Paint Buying Guide - Consumer Reports
- Best Industrial Painting Brands: A 2025 Comparison Guide
- Best Paint for Commercial Buildings - Miko LLC
- Building Codes, Standards, and Regulations: Frequently Asked ...
- [PDF] Residential Construction Performance Guidelines Manual
Need Professional Help?
Find top-rated house painters experts in your area