Seamlessly repair water-damaged ceilings with this pro guide. Learn to identify leaks, choose the right primer, and prep surfaces for a lasting fix.
Key Takeaways
- **Superior Room Protection:** All furnishings are either removed entirely or meticulously covered with robust, new 3-mil plastic sheeting. Floors are shielded with durable canvas drop cloths, never thin plastic. Doorways are effectively sealed with plastic barriers to meticulously contain dust and debris, ensuring a pristine work environment and protecting adjacent areas.
- **Aggressive Scraping and Advanced Cleaning:** Utilizing a professional-grade painter's 5-in-1 tool, all loose, bubbling, or delaminating paint is carefully scraped away until a solid, stable substrate is reached. The area is then rigorously cleaned with a high-performance TSP (trisodium phosphate) substitute to eradicate grease, grime, and any residual contaminants, ensuring optimal primer adhesion and preventing future adhesion failures.
- **Precision Repair and Flawless Sanding:** Minor divots, nail holes, and surface imperfections are filled with a top-tier lightweight joint compound. For larger holes or significant cracks, a self-adhesive fiberglass mesh drywall tape is expertly incorporated to reinforce the repair and prevent future recurrence of cracking. Once completely dry, the patched areas are sanded perfectly flush with the surrounding surface using a pole sander equipped with fine-grit sandpaper for an impeccably smooth, undetectable finish unattainable by hand.
- **Oil-Based Primers (Moderate Stains):** Products like **KILZ Original** are robust options for moderate water stains, delivering strong adhesion and effective stain-blocking capabilities.
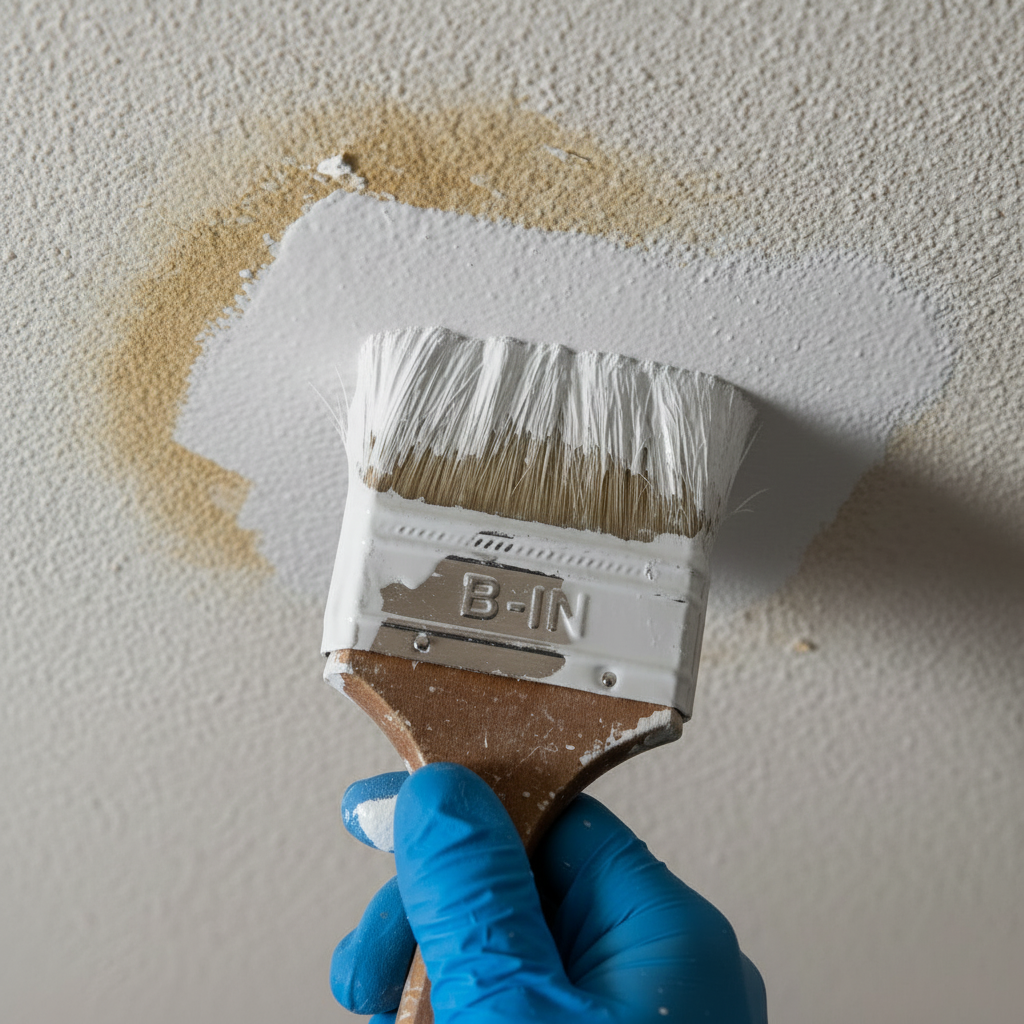
- **Shellac-Based Primers (Ultimate Solution):** Severe damage, tannin bleed, smoke odors — **Zinsser B-I-N** handles all of it. It's what our pros reach for automatically on tough jobs. We've used it to block pet odors that had saturated drywall for years. If it can seal *that*, it can seal anything.
Key Takeaways
Fixing and Painting a Water-Damaged Ceiling: A Pro's Guide to Lasting Repair
See that brown splotch on your ceiling? Yeah, don't just paint over it. I've watched homeowners waste $800 doing exactly that — only to have the stain bleed back through in three weeks. (Ask me how I know.)
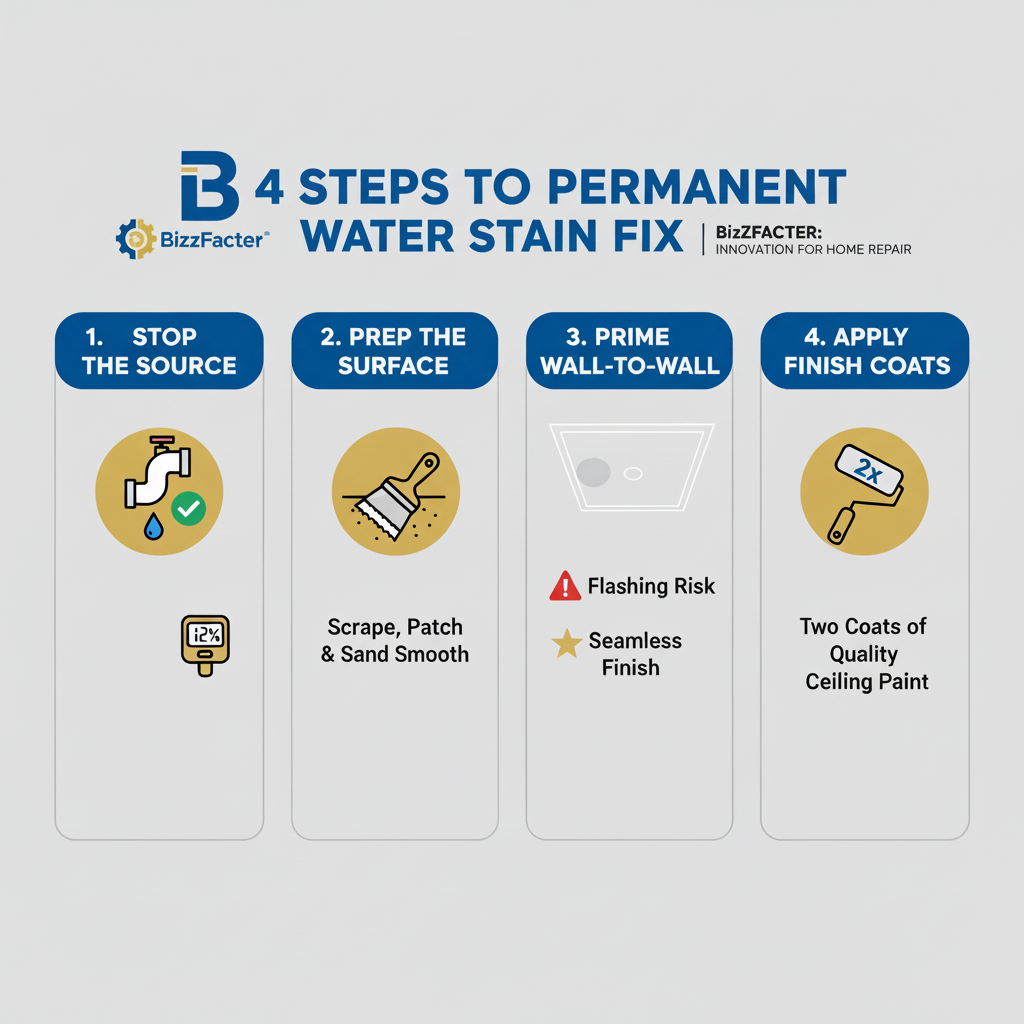
Water damage means moisture got in somewhere, and until you fix *that*, you're basically decorating a ticking time bomb. The real fix? Find the leak. Dry everything completely. Prep the surface like your reputation depends on it. Prime with something that actually blocks stains. Then — and only then — paint it properly.
Skip any of those steps and you'll be repainting next year.
Step 1: Pinpoint and Permanently Resolve the Moisture Source
Before a single brushstroke can be applied, it's **absolutely critical** to verify that the moisture source has been fully identified and rectified. At BizzFactor, our seasoned professionals have witnessed countless painting failures because the root cause of the water damage remained unaddressed. A truly reputable painting contractor will insist on confirming the complete cessation of the leak before commencing any cosmetic work, thereby preserving your investment of time and money.
Common Origins of Ceiling Water Damage:
1. **Direct Leaks:** Usually pretty obvious. Burst pipe. Roof leak. HVAC drip pan overflowing in the attic. Most of these need a [licensed plumber](https://bizzfactor.com/categories/plumbers), [certified roofer](https://bizzfactor.com/categories/roofers), or [HVAC tech](https://bizzfactor.com/categories/hvac-services) — not a painter. And here's what matters: the ceiling's gotta be **bone dry** before you do anything else. Our crews use moisture meters to confirm readings under 15%. Paint over damp drywall? You're asking for mold.
2. **Condensation:** Sneaky one. Happens constantly in bathrooms and kitchens where warm, humid air hits a cold ceiling. Solution? Better ventilation — which might mean installing or upgrading an exhaust fan. **But here's the thing: if you've got a fan and don't actually *run* it, you've accomplished nothing.** Turn it on during showers. Leave it running 20-30 minutes after. Otherwise you're just creating a mold farm.
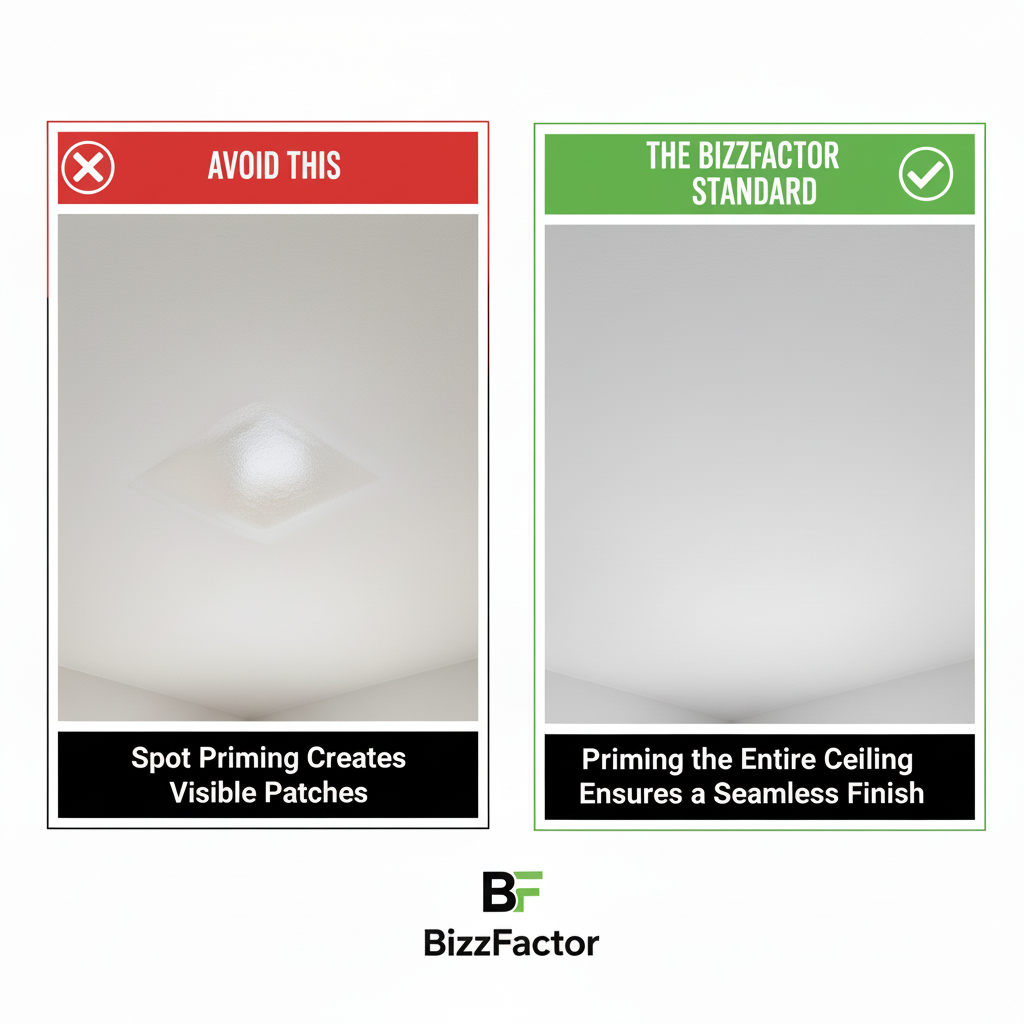
⚠️ The #1 Pitfall for Amateurs: The Myth of Spot Priming
Don't just prime the stain and call it good. Seriously, don't. I know it seems logical — "Why prime the whole ceiling when only this one spot is damaged?" — but that's how you end up with a ceiling that looks worse than before. That's the real issue. The spot you primed will have different texture and absorbency than the rest. Under certain light (especially natural light from windows), it'll "photograph" — contractors' term for when repaired areas show through the paint like a ghost.
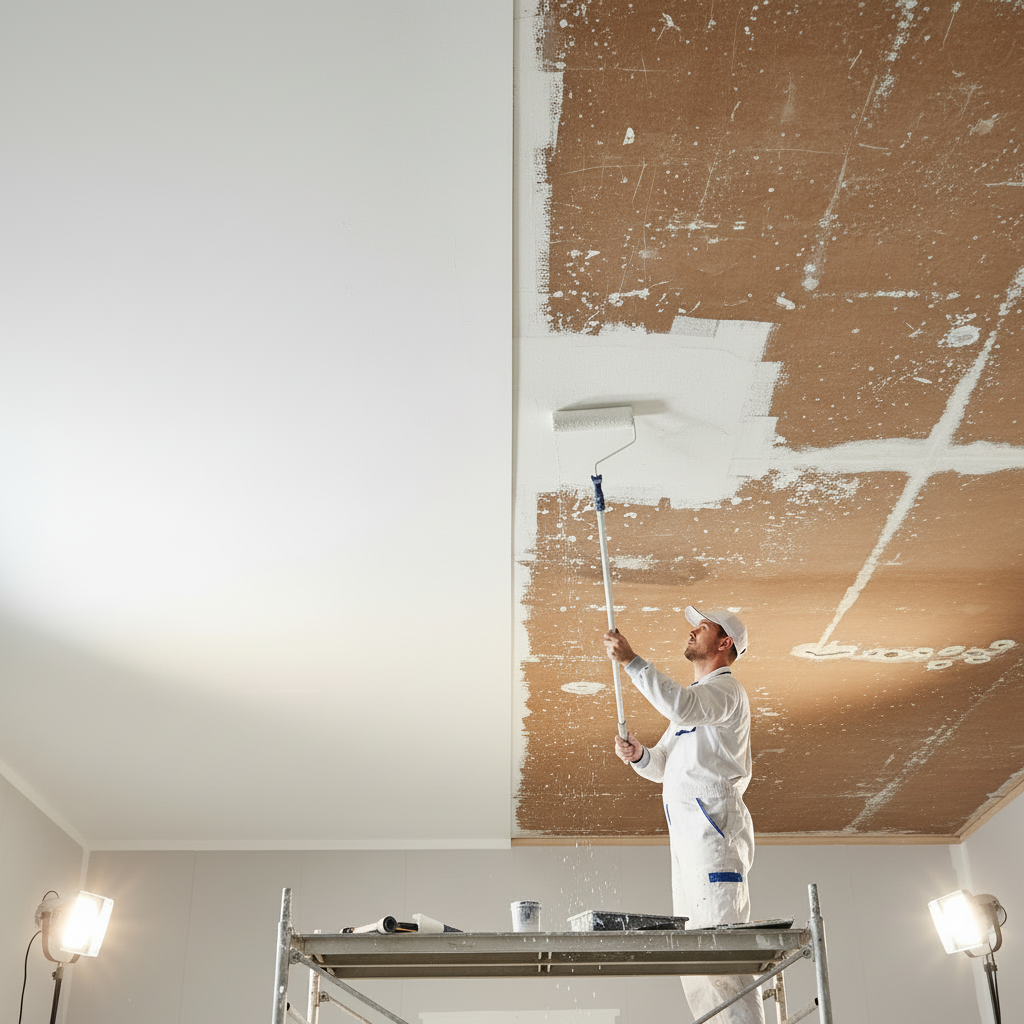
Want it to look professional? Prime the **entire ceiling** wall-to-wall after repairs.
Our Expert-Endorsed Primer for Stubborn Water Stains
Look, most water-based "all-in-one" primers are fine for small stuff. For serious water damage? They're useless. After testing probably a dozen products over the years, our crews won't use anything except **Zinsser B-I-N Shellac-Based Primer** for heavy stains.
Fair warning — this stuff reeks. The fumes are brutal (you absolutely need a NIOSH-approved respirator, not one of those cheap dust masks from the hardware store). But it creates an impenetrable seal that locks in stains, odors, tannin bleed — everything. The smell clears in a few hours. The stain stays gone forever.
Worth it.
Step 2: Pro-Level Surface Preparation – The Foundation of a Durable Fix
Surface prep is where amateurs reveal themselves. I'm talking about the difference between a repair that lasts three months versus one that lasts fifteen years. For our licensed techs, prep work typically eats up around 70% of total project time. It matters more than you'd think. You can use the world's most expensive paint — if the surface isn't prepped correctly, you'll get bubbling, peeling, bleed-through, all of it.
The contractors who rush this step? They're the ones who disappear when you call six months later.
BizzFactor's Comprehensive Surface Preparation Checklist:
- **Superior Room Protection:** All furnishings are either removed entirely or meticulously covered with robust, new 3-mil plastic sheeting. Floors are shielded with durable canvas drop cloths, never thin plastic. Doorways are effectively sealed with plastic barriers to meticulously contain dust and debris, ensuring a pristine work environment and protecting adjacent areas.
- **Aggressive Scraping and Advanced Cleaning:** Utilizing a professional-grade painter's 5-in-1 tool, all loose, bubbling, or delaminating paint is carefully scraped away until a solid, stable substrate is reached. The area is then rigorously cleaned with a high-performance TSP (trisodium phosphate) substitute to eradicate grease, grime, and any residual contaminants, ensuring optimal primer adhesion and preventing future adhesion failures.
- **Precision Repair and Flawless Sanding:** Minor divots, nail holes, and surface imperfections are filled with a top-tier lightweight joint compound. For larger holes or significant cracks, a self-adhesive fiberglass mesh drywall tape is expertly incorporated to reinforce the repair and prevent future recurrence of cracking. Once completely dry, the patched areas are sanded perfectly flush with the surrounding surface using a pole sander equipped with fine-grit sandpaper for an impeccably smooth, undetectable finish unattainable by hand.
Case Study: A Dallas Home's Recurring Nightmare Eradicated
We got called to a house in East Dallas where the homeowner had repainted their master bath ceiling *three times* in twelve months. Same problem every time — bubbling paint, dark brown stains bleeding through within weeks. Frustrating doesn't even cover it. She'd probably spent $1,200 between materials and her time.
Took us about fifteen minutes to diagnose the actual problems (plural). First: the exhaust fan was venting into the attic instead of outside, so all that shower steam was just condensing on the ceiling drywall. Second: every painter she'd hired used cheap latex primer that couldn't block the tannin stains from the original water damage. Tannins just kept bleeding through.
Our fix? Rerouted the [exhaust fan properly](https://bizzfactor.com/services/exhaust-fan-installation), hit the ceiling with two coats of B-I-N shellac primer, then applied quality topcoats. That was four years ago. Still perfect.
Step 3: Expert Priming and Flawless Topcoat Application
Primer and paint selection isn't something you want to cheap out on. Seems obvious, but I've seen way too many jobs fail because someone grabbed whatever was on sale at the big box store. Elite [house painters](https://bizzfactor.com/categories/house-painters) — especially those certified by the Painting Contractors Association — understand you can't compromise here and expect professional results.
Our standard approach: dedicated stain-blocking primer, then two full coats of premium ultra-flat ceiling paint. That's how you get a finish that hides imperfections and actually stays on the ceiling.
Choosing the Optimal Primer for Your Project:
Cheap latex primer on water stains? Don't bother. It won't hold. The stain will bleed through in weeks, sometimes days. What you need depends on severity:
- **Oil-Based Primers (Moderate Stains):** Products like **KILZ Original** are robust options for moderate water stains, delivering strong adhesion and effective stain-blocking capabilities.
- **Shellac-Based Primers (Ultimate Solution):** Severe damage, tannin bleed, smoke odors — **Zinsser B-I-N** handles all of it. It's what our pros reach for automatically on tough jobs. We've used it to block pet odors that had saturated drywall for years. If it can seal *that*, it can seal anything.
- **Mold-Inhibiting Primers (Damp Environments):** In perpetually moisture-prone areas such as bathrooms and kitchens, incorporating a primer fortified with a mildewcide, such as KILZ Mold & Mildew, provides an essential, proactive layer of protection against future mold and mildew growth.
Applying the Top Coat for an Impeccable, Flawless Finish
Don't use wall paint on ceilings. Just don't. Ceiling paint is specifically formulated flatter (hides imperfections better), thicker (less splatter), and designed for better light diffusion. The brands our crews trust? Benjamin Moore Waterborne Ceiling Paint and BEHR Ultra Pure White. Both deliver excellent coverage without needing three coats.
Application technique matters as much as product choice:
1. **Precision Cutting In:** The perimeter of the ceiling and areas meticulously around light fixtures and vents are precisely painted first using a high-quality 2.5-inch angled brush, ensuring crisp lines.
2. **Strategic Rolling in Sections:** Paint is applied to the main ceiling area in manageable 3x3 foot sections, employing a consistent zig-zag or 'W' pattern to ensure uniform coverage and avoid holidays.
3. **Maintaining a Continuous Wet Edge:** A crucial professional technique is to always slightly overlap the previously painted section while it's still wet. This allows the sections to seamlessly 'melt' together, producing a smooth, uniform finish across the entire ceiling, completely free of distracting roller marks or streaks.
Setting the Benchmark: What to Expect from a Professional Painter
Real professionalism in painting goes way beyond slapping paint on walls. After two decades running BizzFactor, we've seen what separates exceptional [local house painters](https://bizzfactor.com/find-a-pro/house-painters) from the ones who leave you with buyer's remorse. You're entitled to transparency and actual expertise — not excuses. For finding highly-rated pros in your area, check our directory of [certified house painters](https://bizzfactor.com/categories/house-painters).
Essential Criteria to Demand from Your Painting Contractor:
Before you hand anyone a deposit, insist on these three things:
1. **Detailed, Transparent, and Itemized Quote:** Never accept a vague "Paint ceiling" estimate. The quote **must explicitly outline all preparatory steps, specify the exact primer and paint products (including brand, product name, and sheen), and confirm the precise number of coats to be applied.** This ensures clarity and prevents hidden costs.
2. **Verifiable Proof of Comprehensive Insurance:** Always request a current certificate of liability insurance.
In-Depth Look
Detailed illustration of key concepts
Visual Guide
Infographic illustration for this topic
Side-by-Side Comparison
Visual comparison of options and alternatives
Sources & References
- How to paint a ceiling – 5 tips and best practice
- Pro Tips on How to Paint a Ceiling
- How to paint a ceiling, and 5 vital mistakes to avoid
- How to Paint a Ceiling: Techniques, Tips & Tricks
- Best Interior & Exterior Paint Buying Guide - Consumer Reports
- Best Paint for Commercial Buildings - Miko LLC
- Best Industrial Painting Brands: A 2025 Comparison Guide
- [PDF] INDUSTRY STANDARDS - Painting Contractors Association
- Building Codes, Standards, and Regulations: Frequently Asked ...
Frequently Asked Questions
Need Professional Help?
Find top-rated house painters experts in your area