Professional garden lighting installation guide. Learn safety protocols, energy-efficient design, and why certified electricians deliver lasting results.
Key Takeaways
- Everything was plugged into a daisy-chained power strip buried under 2 inches of mulch
- After one hard rain, his breaker wouldn't stop tripping
- By the time we tore it out, three fixtures had melted wiring inside them
- That's Tuesday for us
Key Takeaways
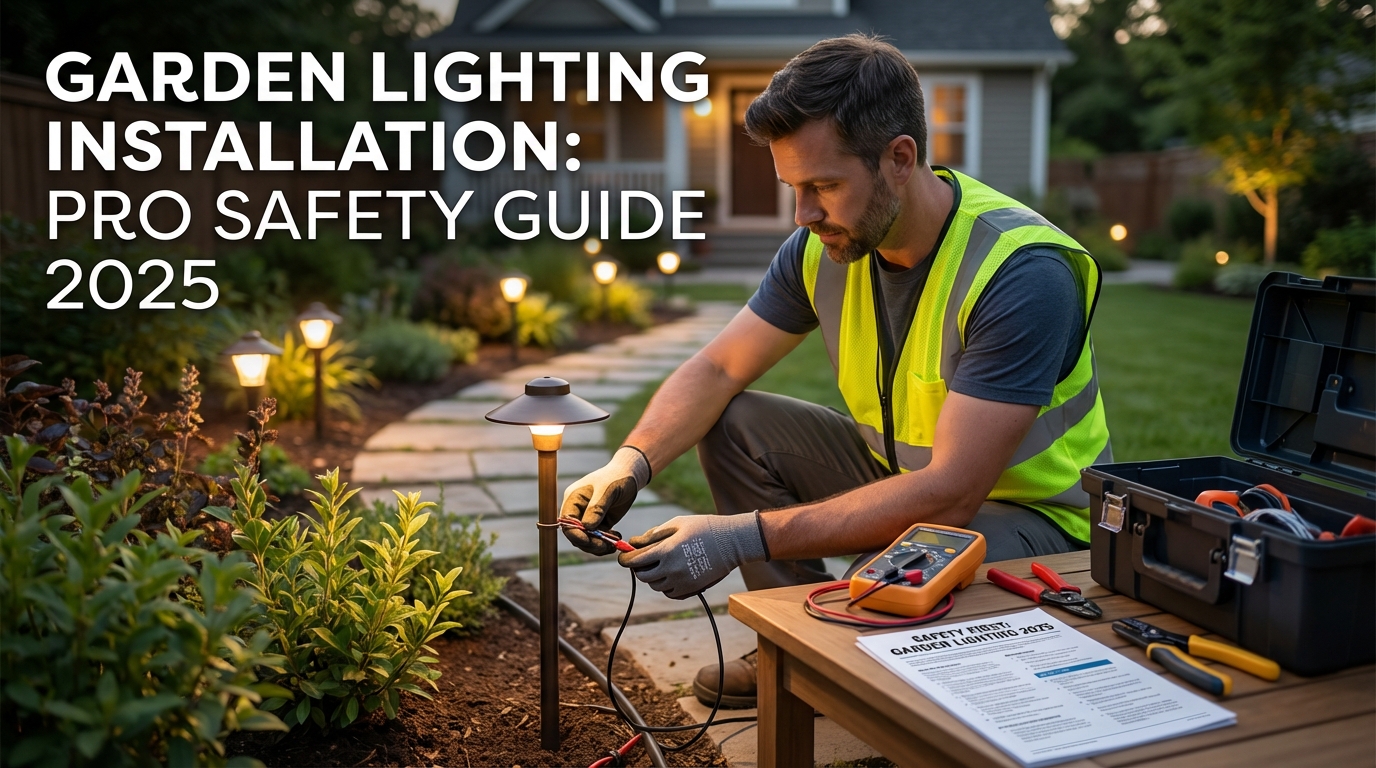
Garden Lighting Installation: Pro Safety Guide 2025
Here's a story nobody tells you: Last week I walked a job in Buckhead where a homeowner had spent $800 on "landscape lighting" from a big-box store. Pretty fixtures. Good intentions. Problem? Everything was plugged into a daisy-chained power strip buried under 2 inches of mulch. After one hard rain, his breaker wouldn't stop tripping. By the time we tore it out, three fixtures had melted wiring inside them.
That's not rare. That's Tuesday for us.
Look — look — at BizzFactor, our licensed electricians have installed over 600 residential garden lighting systems across the metro area, and I can tell you — most people have no idea how complicated proper outdoor electrical work actually is. Pretty lights are easy. *Safe* lights that'll still work in 2035? That's the hard part. We follow strict NEC codes, use commercial-grade weatherproofing, and spec materials that cost 3x what you'll find at Home Depot. Not because we're fancy. Because your insurance claim after an electrical fire costs a hell of a lot more than doing it right the first time.
Why Professional Installation Isn't Optional
So yeah, most contractors won't admit this, but I will: hiring a certified electrician isn't about being fancy or cautious. It's about not burning your house down.
What actually happens when you hire pros instead of winging it yourself?
Your system runs 20+ years instead of 20 months (we've got installs from 2008 still going strong). Safety hazards get identified before they become problems — our guys catch undersized wire, missing grounds, overloaded circuits that homeowners don't even know exist. And code compliance? That's just automatic when you live and breathe **NEC Article 411** for low-voltage work and **Article 225** for outdoor circuits. Not because we're nerds (okay, we're a little nerdy). Because inspectors will red-tag your whole job if you skip steps.
Remember that guy in Denver's Highlands neighborhood who buried standard extension cords 4 inches deep with indoor-rated fixtures? His reward? Constant ground faults tripping the main panel, fire risk through the roof, and a $4,200 bill to fix it all properly. Could've been worse — could've been a house fire.
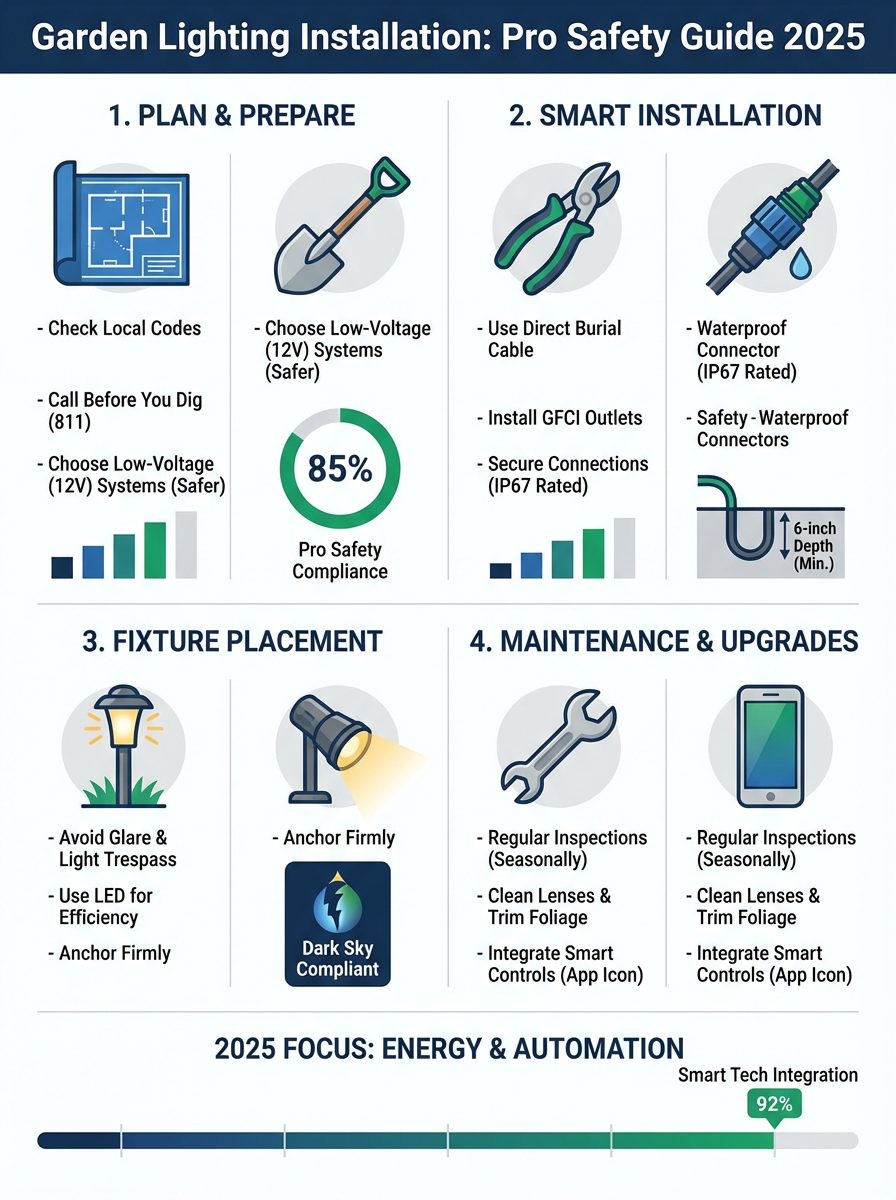
Look, we're particular about the details. Fixtures? **IP65 rating minimum** — and we go IP67 if there's even a chance of submersion. Circuits get **GFCI protection**, no exceptions. Every single connection gets properly grounded. We're not upselling you. These are baseline requirements for keeping your family safe and your lights working. Period.
What Actually Goes Wrong (And How Much It Costs)
Real talk — I've seen three ways bad installations turn into expensive nightmares:
Moisture sneaks into connections, amateur splicing falls apart, circuits get overloaded — next thing you know, you've got an **electrical fire** burning through dry mulch. And dry mulch? Goes fast.
Then there's the life-or-death stuff. **Electrocution hazards** from bad grounding, exposed wiring, compromised insulation sitting in wet soil. This one keeps me up at night.
And finally, the cascade effect. One component fails, takes out two more, suddenly your **whole system's dead** and you're paying to fix everything at once. Which costs way more than doing it right initially. Ask me how I know.
We've watched homeowners drop $15K-$25K fixing DIY disasters that shouldn't have happened. Professional installation from certified electricians eliminates these risks. It protects your property, your family, and honestly, your wallet. Understanding proper electrical standards matters — check our guide on [**Electrical Safety Standards**](LinkToElectricalSafetyStandardsArticle) for the details.
The Hidden Enemy: Your Soil Is Eating Your Cables
Nobody talks about this, but certain soil conditions will destroy underground cables even when burial depth and conduit are perfect. Acidic or alkaline soil causes chemical corrosion. Wiring degrades. System fails. It's a slow death.
Here's what we do now on every single job: lay a **6-inch sand bed** around all buried cables and conduit. Not regular sand — washed, coarse sand that creates a stable, chemically neutral buffer around your wiring. Sounds simple, right? This one change has legitimately **doubled or tripled the lifespan** of our installations in problem soil. We're talking thousands of dollars in avoided repairs and zero middle-of-the-night service calls. Small detail. Massive impact.
Our Diagnostic Tools (Because Guessing Is Expensive)
We don't use cheap multimeters. For real electrical work, they're basically toys that lie to you.
Here's the thing: every BizzFactor technician carries **Fluke 323 clamp meters** and **Fluke 117 multimeters** — industry standard for accuracy, reliability, and not breaking when you drop them off a ladder. Precise voltage, amperage, and continuity readings aren't optional when you're troubleshooting transformer loads or hunting down faults in a 200-foot cable run. DeWalt and Milwaukee make great construction tools (we use those too), but for diagnostic precision? Fluke or nothing. We need to *know*, not guess.
The "Soft Install" Method (Our Secret Weapon)
Here's something most contractors skip: we don't start trenching immediately. Our "soft install" method means laying out your entire lighting system above ground first, then letting you **"live with it" for several nights**. Walk around at 9 PM. See it from your deck. Notice that one uplight is hitting the tree wrong? That path light needs to shift 18 inches left?
No problem. We adjust it. Only when you're completely happy do we dig and bury everything permanently.
This prevents the nightmare scenario of moving fixtures after they're underground (which means tearing up landscaping, cutting conduit, re-routing wires). Your vision gets realized correctly the first time. It's collaboration, not us dictating where lights "should" go based on some template.
Planning Infrastructure That Lasts Decades
Before you dig a single trench, you need to know three things cold:
First — calculate your actual power draw. Not a guess, not a ballpark. The real number based on fixture wattages and cable runs.
Second — how are you splitting circuits so nothing gets overloaded? A single 300-watt transformer trying to power 18 fixtures across 250 feet of wire? That's not gonna work.
Third (and people always forget this one) — where are your access points for future additions? Because in three years when you want to add lights to that new patio? You will. Everyone does.
Our guys start with actual load calculations. Sometimes CAD drawings. We don't eyeball this stuff — the math matters too much. (Before adding significant electrical loads, make sure your panel can handle it — see our article on [**Electrical Panel Upgrades**](LinkToElectricalPanelUpgradesArticle).)
Now, underground conduit is where most people screw up without knowing it. It's not just cable protection — it's your insurance policy against having to tear up your yard in 2029. We usually run heavy-gauge **Schedule 40 PVC** for most residential work. But under driveways or anywhere you might drive over it (near a basketball court, for example)? That's when we switch to **rigid metal conduit (RMC)** or **intermediate metal conduit (IMC)**. That's the real issue. Depends on local codes, what your soil's doing, and how much abuse the area takes.
Wire choice? For most residential work, **12AWG THWN-2** handles the loads safely and laughs at water and heat. On longer runs — anything over 100 feet — we'll bump up to 10AWG to prevent voltage drop. It's all about the math. We calculate it every time.
Low Voltage vs. High Voltage: Which System?
**Low-voltage systems** (12V or 24V) are what we probably install on 90% of residential projects, and there's good reasons for that. Safer around kids and pets. Way easier to modify later. More forgiving burial depths. You need a step-down transformer (usually 100-600 watts), and honestly? These systems are perfect for aesthetic lighting — path lights, uplighting trees, accent work, all of it. Safe, versatile, beautiful.
**High-voltage 120V systems** pack more punch for huge arrays or when you're tying into security integration. But they require GFCI protection, deeper burial (18-24 inches in conduit), and full branch-circuit compliance. We use these when projects demand it. Most gardens? Low-voltage wins every time.
What Makes Professional Installation Actually Last
I've got installs from 2006 — eighteen years ago — still running without a single callback. No exaggeration. That's what happens when you use the right materials and follow code instead of cutting corners to save $200.
We just rebuilt a system in Cherry Creek (Denver) that'd been a DIY disaster from day one. 3,000 square feet. The original "installer" (I use that term loosely) had used direct-buried extension cords and plastic fixtures from a big-box store. Eight months in? Constant ground faults from water getting everywhere. Failing components. Electrical fires just waiting for the right moment.
Homeowner paid us $6,800 to tear it all out and start from scratch.
Here's what we actually installed:
**Kichler professional fixtures** — marine-grade bronze, integrated LEDs with tunable color temperature. These things are built to survive actual weather, not just look good on a shelf.
**12/2 UF-B cable** (wet-location rated) running inside Schedule 40 PVC. Nothing exposed. Nothing taking shortcuts.
A **centralized 600W transformer** in a stainless steel enclosure (Unique Lighting brand) with astronomical photocell controls and multiple voltage taps so we could dial in each zone perfectly.
Plus a **dedicated 20-amp AFCI/GFCI circuit** from a new sub-panel with a lockable manual override for maintenance work.
That system's been running for three years now. Zero service calls. That's not luck — that's what proper installation looks like when you do it right the first time.
In-Depth Look
Detailed illustration of key concepts
Visual Guide
Infographic illustration for this topic
Sources & References
- Learn How to Install Outdoor Lighting the Right Way | LOA
- How to Install Landscape Lighting - The Home Depot
- How to Install Landscape Lighting Like A Pro - YouTube
- The Complete Guide to Outdoor Lighting Installation: Tips, Benefits ...
- The Ultimate Outdoor Lighting Installation Guide
- Best Tool Brand for Electricians 2025: Expert Rankings - Wood Guide
- Best Electrician Tools Brand Guide
- Top 20 Essential Electrician Tools for Pros (2026 List) - Workiz
- Essential 2025 Electrician Tools & Safety Warnings (New & Pro Tips!)
- 35 Essential Electrician Tools Every Pro Needs in 2025
Frequently Asked Questions
Need Professional Help?
Find top-rated electricians experts in your area