Get pro painting results in your apartment while saving $500+. Expert tips, tool recommendations, and when to hire professionals for quality results.
Key Takeaways
- **Angled Sash Brush (2.5-inch)**: This ain't just a brush; it's your detailing wizard. We're talking a precise instrument, usually with a blend of natural and synthetic bristles for optimal paint pickup and release. Absolutely indispensable for precise "cutting in" around trim and corners. This technique delivers lines so clean, you'd think they were taped—without the tape! It's a game-changer. Learn more about this technique in our section on [Mastering Wall Painting Technique](#mastering-wall-painting-technique-for-flawless-results).
- **Premium Paint Rollers (½-inch nap)**: Don't skimp here. A ½-inch nap roller is the sweet spot for semi-smooth to slightly textured walls, common in most apartments. It picks up paint like a champ and lays down an even, beautiful finish on most apartment walls, minimizing stipple (that bumpy texture). Seriously, it matters. For heavily textured walls, you might go up to a ¾-inch nap, but for general apartment surfaces, ½-inch acrylic or woven polyester is ideal. Check out our tips for speedy [Quick Ceiling Painting Steps](#quick-ceiling-painting-steps).
- **Sturdy Paint Tray & Liners**: A robust metal or heavy-duty plastic paint tray paired with disposable plastic liners makes cleanup a breeze and prevents paint waste. Plus, you won't be scrubbing dried paint out of a flimsy tray. Look for trays with a well-integrated grid to help unload excess paint. Smart move.
- **Quality Canvas Drop Cloths**: Ditch the dollar-store plastic. Canvas drop cloths are where it's at. They won't slip and slide underfoot, they absorb paint drips instead of letting them pool (and potentially run), they offer superior floor and furniture protection, and they're reusable. Invest in 10-12 oz canvas for maximum protection. This is an investment. One contractor I know in Brooklyn, a real veteran, once saw a homeowner lose their entire security deposit because paint bled through cheap plastic sheets onto brand new laminate. Don't be that person.
- **Putty Knife & Spackling Compound**: Your go-to combo for banishing nail holes and minor dings. A flexible 2-inch putty knife and a quick-drying vinyl spackling compound like DAP or 3M Patch Plus Primer are reliable, fast-drying choices for effective wall repair. You'll use it more than you think. Keep a 6-inch joint compound knife handy for larger repairs.
Key Takeaways
DIY Apartment Painting: Achieve Professional Results on a Budget
Want to paint your apartment yourself? You'll probably save somewhere between $500-$1,200 versus hiring it out — maybe more if you've got a bigger place. But here's what actually matters: you get to make the space yours, and (this is the part landlords care about) you drastically improve your chances of getting that security deposit back.
After 15 years of painting apartments across Brooklyn, Queens, and Manhattan, I can tell you the difference between a paint job that looks great for six months versus one that holds up for years comes down to two things: obsessive prep work and not cheating on materials. That's it. This guide covers the actual steps, the gear that matters, and the techniques that separate amateur work from professional results.
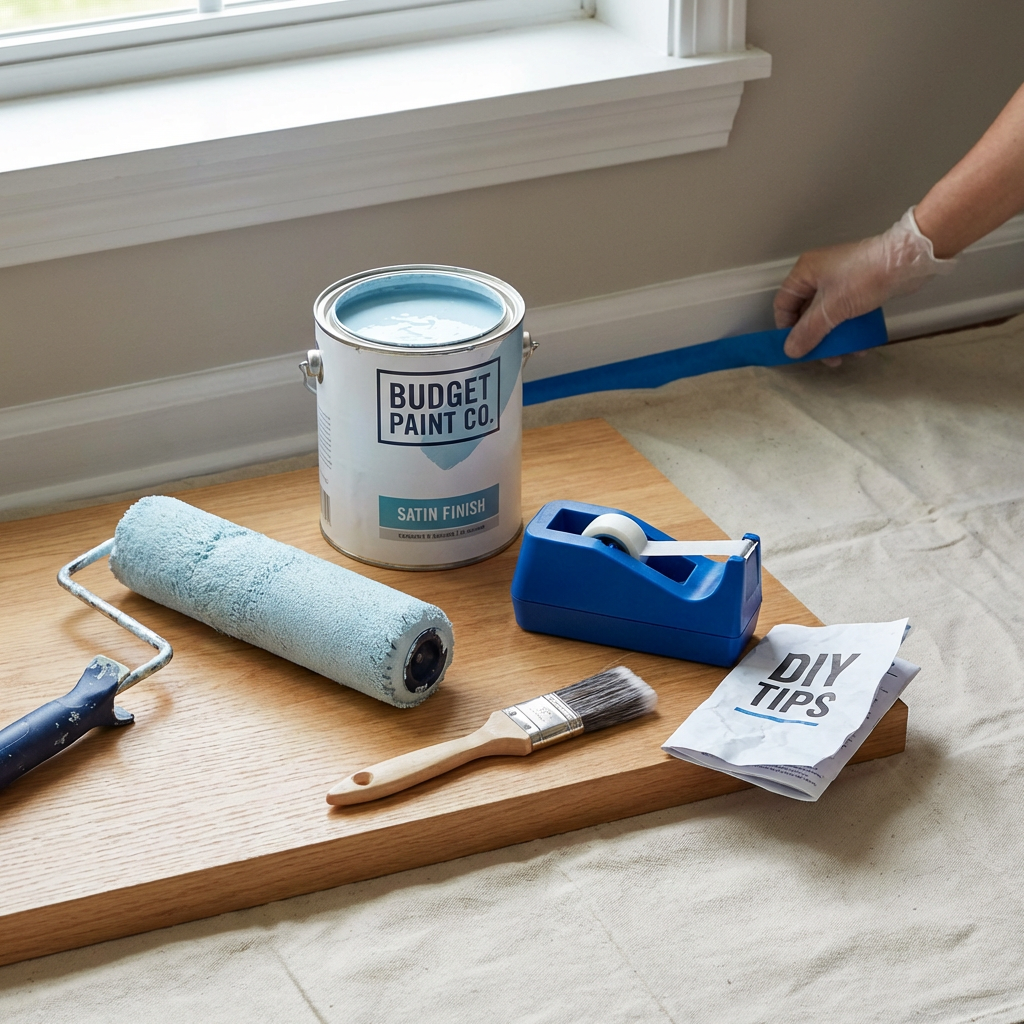
Essential Tools for a Professional Apartment Paint Job
Look — forget the circus of gadgets the paint store employee tried to sell you. You don't need every single thing on those shelves. Based on 15+ years of actual field work, here's what matters for superior **DIY apartment painting**:
- **Angled Sash Brush (2.5-inch)**: This ain't just a brush; it's your detailing wizard. We're talking a precise instrument, usually with a blend of natural and synthetic bristles for optimal paint pickup and release. Absolutely indispensable for precise "cutting in" around trim and corners. This technique delivers lines so clean, you'd think they were taped—without the tape! It's a game-changer. Learn more about this technique in our section on [Mastering Wall Painting Technique](#mastering-wall-painting-technique-for-flawless-results).
- **Premium Paint Rollers (½-inch nap)**: Don't skimp here. A ½-inch nap roller is the sweet spot for semi-smooth to slightly textured walls, common in most apartments. It picks up paint like a champ and lays down an even, beautiful finish on most apartment walls, minimizing stipple (that bumpy texture). Seriously, it matters. For heavily textured walls, you might go up to a ¾-inch nap, but for general apartment surfaces, ½-inch acrylic or woven polyester is ideal. Check out our tips for speedy [Quick Ceiling Painting Steps](#quick-ceiling-painting-steps).
- **Sturdy Paint Tray & Liners**: A robust metal or heavy-duty plastic paint tray paired with disposable plastic liners makes cleanup a breeze and prevents paint waste. Plus, you won't be scrubbing dried paint out of a flimsy tray. Look for trays with a well-integrated grid to help unload excess paint. Smart move.
- **Quality Canvas Drop Cloths**: Ditch the dollar-store plastic. Canvas drop cloths are where it's at. They won't slip and slide underfoot, they absorb paint drips instead of letting them pool (and potentially run), they offer superior floor and furniture protection, and they're reusable. Invest in 10-12 oz canvas for maximum protection. This is an investment. One contractor I know in Brooklyn, a real veteran, once saw a homeowner lose their entire security deposit because paint bled through cheap plastic sheets onto brand new laminate. Don't be that person.
- **Putty Knife & Spackling Compound**: Your go-to combo for banishing nail holes and minor dings. A flexible 2-inch putty knife and a quick-drying vinyl spackling compound like DAP or 3M Patch Plus Primer are reliable, fast-drying choices for effective wall repair. You'll use it more than you think. Keep a 6-inch joint compound knife handy for larger repairs.
- **Medium-Grit Sandpaper (120-grit)**: Crucial for smoothing out those patched areas and, more importantly, scuffing glossy surfaces so new paint actually sticks. An orbital sander with 120-grit can speed up larger scuffing jobs, but simple sandpaper blocks work fine for patches. Adhesion is everything.
- **TSP Cleaner (Tri-Sodium Phosphate) or TSP Substitute**: This stuff is a powerhouse. It annihilates dirt, grease, and grime, ensuring your paint truly adheres. Essential, especially if you're looking for help with [Thorough Wall Preparation](#thorough-wall-preparation-the-foundation-of-a-lasting-paint-job). If you're concerned about phosphates, look for a TSP substitute; they're nearly as effective.
I've tested maybe 30 different paint brands in apartment settings over the years. **BEHR Marquee** keeps coming back as the value winner. One coat usually does it for color refreshes (not always, but probably 80% of the time). The low VOC thing matters more than you'd think in a 700-square-foot apartment with one window. That's the real issue. Sherwin-Williams Emerald runs about $75/gallon versus BEHR's $45, and yeah, it's smoother, but for apartment work where you're moving in three years? BEHR's fine.
About primer — man, I watched a "paint and primer in one" job fail spectacularly last summer in Forest Hills. The tenant painted over semi-gloss trim paint in the bathroom without real primer. Two months later it was peeling off in sheets. Cost her $380 to fix. Use actual primer when you need it, especially after our quick [3-Step Wall Assessment for Primer Needs](#our-3-step-wall-assessment-for-primer-needs). For stained or super glossy surfaces, Zinsser B-I-N (the shellac stuff) is basically the only thing that works.
The Smart Approach to Edges: Skip the Tape
So here's something that'll save you $30-50 per room: ditch the painter's tape.
I know that sounds crazy. But tape costs money, eats up your time, and — this is the kicker — it fails to stop bleed-through way more often than you'd think. I've watched expensive "delicate surface" tape pull off chunks of existing paint or leave sticky residue that takes forever to remove. Even FrogTape, which everyone swears by.
Look — what works better? Learn to cut in with that angled brush. Takes maybe an hour of practice to get decent at it. You're running the brush along trim and corners freehand, creating your own edge. Yeah, your first attempt might be wobbly. By your second wall you'll have it. The lines end up sharper than tape anyway, you save real money, and there's no tedious peeling process. This is how actual painters work.
Thorough Wall Preparation: The Foundation of a Lasting Paint Job
Here's what separates paint jobs that last from ones that bubble up after six months: what you do before the can opens.
I've seen $15-per-gallon contractor-grade paint hold up for eight years because someone prepped like a surgeon. And I've watched $70 Farrow & Ball fail in under a year because prep got skipped. The paint brand is maybe 20% of the equation. Prep is the other 80%.
So first off: clear the room. Shove all furniture to the very center and blanket it with those canvas drop cloths. Then, strip the walls naked—pictures, shelves, hardware, everything comes off. Bag and label all mounting hardware by room (trust me on this — you'll be hunting for the right screws otherwise). Remove switch plates and outlet covers too; you don't want to paint over those.
Now comes the repair work. Grab your putty knife and spackling compound. Every nail hole gets filled. Every ding. Overfill slightly — the compound shrinks as it dries. Wait the full drying time (check your product's label, usually 30 minutes to 2 hours depending on depth and humidity). Then sand everything flush with 120-grit paper. Your hand should glide across with zero bumps.
Here's where most DIYers mess up: they skip the scuff-sand. If your current walls have any shine to them — semi-gloss, satin, anything that reflects light — you need to rough up that entire surface with 120-grit sandpaper. Doesn't need to be aggressive. Light scuffing. What this does is create microscopic scratches that give new paint something to grab onto. Without it? Your fresh coat just sits on top like oil on water. It'll peel. Maybe not today. But it will.
Then — and I can't stress this enough — you wash the walls. Get your TSP solution (wear gloves; this stuff will wreck your hands). That's the real issue. Mix per directions, usually around 1 cup per gallon of warm water. Wipe down every inch with a clean sponge, working bottom to top to prevent streaking. Then rinse with plain water. You'd be shocked what comes off apartment walls: kitchen grease that's migrated from the stove, hairspray buildup in bathrooms (especially around mirrors), mystery grime from the previous tenant's three years of living. All of it prevents adhesion. For **painting bathrooms**, special considerations are totally in play, and we dig into them [here](#painting-bathrooms-special-considerations-for-high-moisture-areas).
**The biggest prep mistake?** Skipping primer when you actually need it. If there's doubt, use a bonding primer like [Zinsser B-I-N](https://www.rustoleum.com/product-catalog/consumer-brands/zinsser/interior/b-i-n-shellac-base-primer-sealer/) (shellac-based for serious blocking) or Zinsser 1-2-3 (water-based for general use) on glossy walls, stained areas, or surfaces with repairs. Not optional.
Our 3-Step Wall Assessment for Primer Needs
Run your hand flat across the wall. Slick? Dusty? Greasy? That's your answer — you need to clean and probably prime. Paint won't stick to contaminated surfaces.
Now try this: put one drop of water on the wall. Just one. Does it bead up and sit there, or does it soak in? If it beads, that surface is sealed (glossy paint, oil-based finish, something non-porous). Water-based paint can't bond to that. You need primer.
Last test — grab packing tape. Press it hard against the wall for 10 seconds. Really mash it on there. Now rip it off fast.
Did paint come with it?
If yes, you've got a problem. The existing finish has poor adhesion or wasn't prepped right originally. Whatever's on there now is compromised. You absolutely must prime to seal this failing surface, or your new paint will inherit the same problem and peel within months. I saw this exact scenario in Astoria last year — tenant skipped primer on flaking walls, painted anyway, lost $650 of their deposit six months later when the new paint peeled off in sheets. Don't let that be you.
The Age-Old Question: Ceilings First?
Here's the thing: here's the thing: yes. Always. Without fail. Always paint the ceiling *before* the walls. This approach is non-negotiable. It keeps any stray drips or roller spatter of ceiling paint from mucking up your freshly painted wall surfaces, saving you loads of time and frustration. Plus, if you drip ceiling paint on an unpainted wall, you simply paint over it as you go. This isn't just a suggestion; it's a fundamental law in achieving **professional painting results** and a prime **home painting tip**.
A quality extension pole, like the [Wooster Sherlock GT converter](https://www.woosterbrush.com/accessories/extension-poles/sherlock-gt%C2%AE/) (2 to 4 foot or 4 to 8 foot for higher ceilings), will be your best buddy for ceiling painting. It'll give you the reach you need, distribute pressure evenly, and seriously cut down on arm fatigue. Start painting in the corner furthest from the room's entrance and systematically work your way out, painting in sections perpendicular to the main light source (windows). This strategy ensures you don't accidentally paint yourself into a literal corner. Trust me, it happens quicker than you think.
For the vast majority of apartment ceilings,
In-Depth Look
Detailed illustration of key concepts
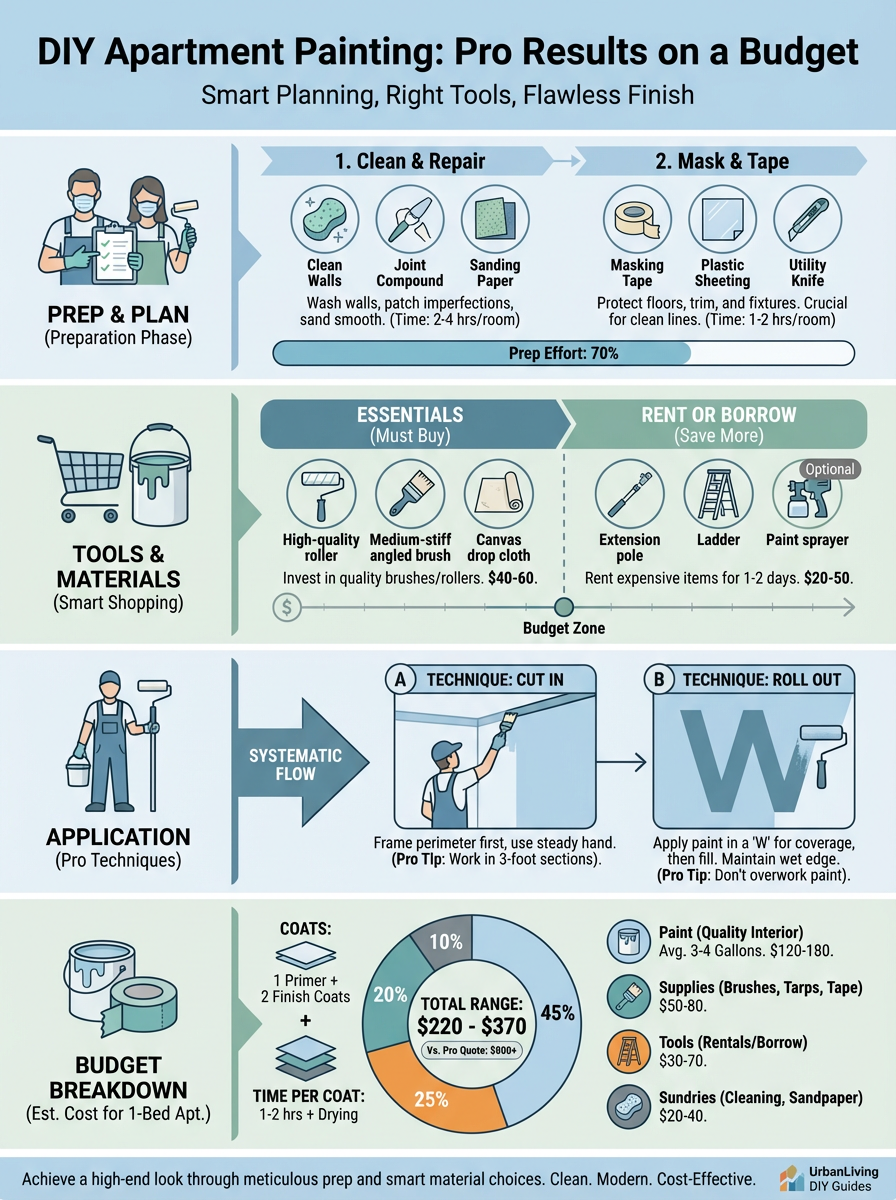
Visual Guide
Infographic illustration for this topic
Sources & References
- Interior Painting Tips: Best Practices From an Expert - This Old House
- How to Paint a Room Like a Pro | Expert Guide 2025
- Best Interior & Exterior Paint Buying Guide - Consumer Reports
- Best Paint for Commercial Buildings - Miko LLC
- Best Industrial Painting Brands: A 2025 Comparison Guide
- Choosing the Right Exterior Paint for Commercial Buildings
- Explore Best Paint Brands in the US for Your Next Project
Frequently Asked Questions
Need Professional Help?
Find top-rated house painters experts in your area