
Learn pro post-painting cleanup secrets. Our certified team shares expert tips for paint spill removal, tool care, and deep cleaning methods that work.
Key Takeaways
- **6-mil plastic sheeting** — drape it over furniture, fixtures, anything you don't want speckled with paint. We're talking 200 microns thick. Drips won't bleed through, and it won't tear when you brush against it for the fifteenth time. Regular polyethylene holds up way better than the bargain-bin stuff.
- **Professional-grade painter's tape** — this isn't optional if you want clean edges. FrogTape Multi-Surface works great (it's got this PaintBlock® Technology that stops bleed-through). Got delicate surfaces? Their Delicate Surface version has lower tack so you're not peeling finish off trim. Learn more about [[Choosing the Right Painter's Tape]] for your specific project needs.
- **A dedicated paint station** — bucket, roller pan, the works. Keeps drips contained in one spot instead of tracking paint all over the house. We're obsessive about this. Organization matters.
- **Separate mixing containers** — never pour directly from the can if you can help it. Work from a smaller bucket. Keeps dust and debris out of your main supply, prevents skinning (that nasty film that forms on top). We use 5-gallon plastic buckets with disposable liners.
Key Takeaways
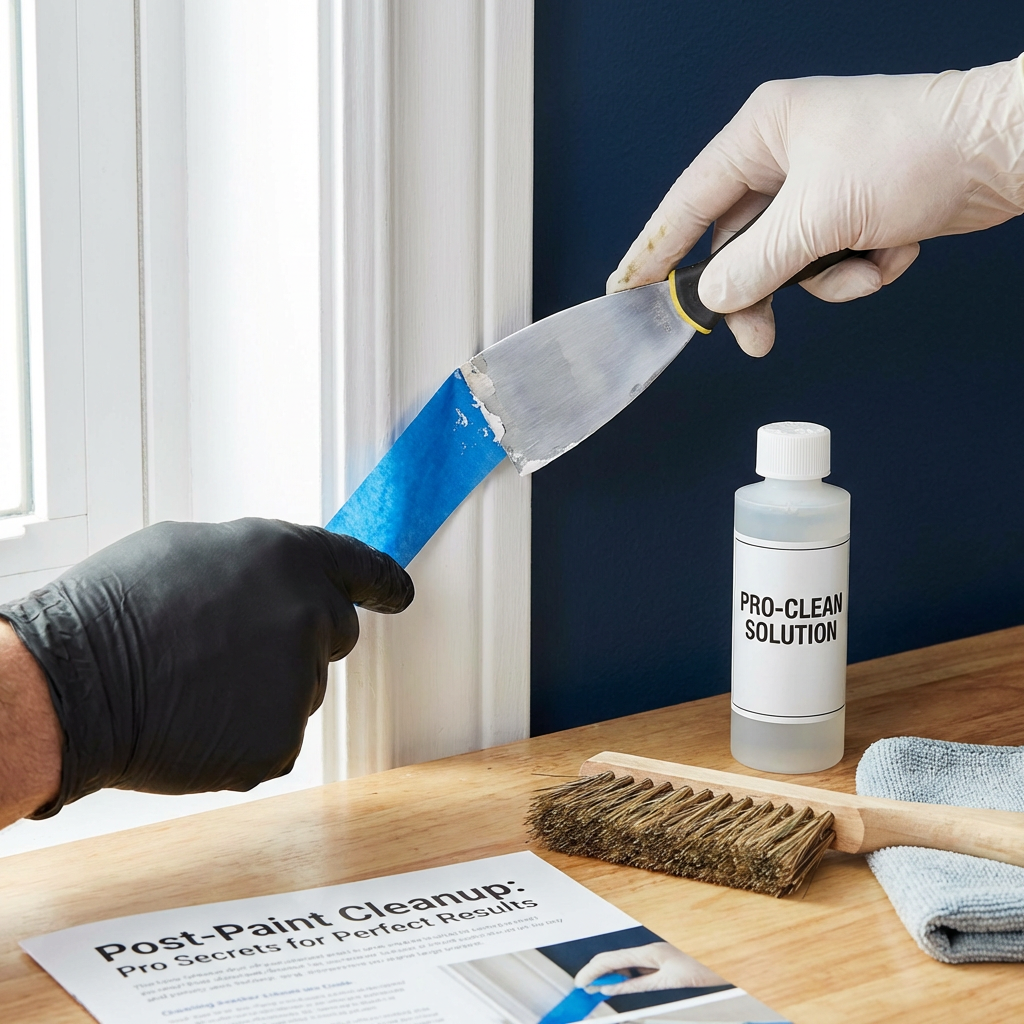
Post-Paint Cleanup: Pro Secrets for Perfect Results and a Pristine Finish
Look, I've done hundreds of paint jobs, and here's what nobody tells you: the cleanup phase? That's where most DIY projects fall apart. It's not some afterthought you rush through on Sunday night.
Four things have to happen — and they have to happen in order. Spills get tackled the *second* they hit the floor (because even thirty seconds can be the difference between easy and impossible). Tools get cleaned while the paint's still wet. That's non-negotiable. All the debris gets cleared systematically — brushes, tape, rollers, drop cloths, all of it. And then — only then — you do the real deep cleaning that makes your space look untouched. Our BizzFactor crews? Usually 2-3 hours for most apartments. Maybe less if nothing went sideways.
We've screwed this up enough times to know exactly what works.
The Setup Nobody Wants to Do (But Should)
Prep work cuts your cleanup time in half. Sometimes more.
I'm not exaggerating — I've seen it shave off 60% of the work, maybe 75% on smaller jobs where you actually thought through the setup. You need three things locked down before a single drop of paint leaves the can: good canvas drop cloths covering everything that matters, 6-mil plastic sealed tight around the edges (no gaps — trust me), and work zones that keep the chaos contained. Smart prep work isn't sexy. But it saves your floors, cuts your cleanup in half, and keeps you from spending money fixing stupid mistakes later. Most homeowners completely underestimate this step, then wonder why their *post-painting cleanup* takes all weekend.
Canvas drop cloths? Non-negotiable in my book. Been at this over 15 years—mostly interior work—and I've watched flimsy plastic alternatives create more problems than they solve. They tear. They bunch up under your feet. They're basically useless.
BEHR PRO 10-ounce canvas drops work better than anything else we've tried (and trust me, we've tried everything). The fibers are woven tight enough that spills get absorbed instead of bleeding through to your floors. That's the real issue. Good 10-ounce cotton canvas can hold something like 20 times its weight in liquid. Won't leak through.
**What you actually need before you start painting:**
- **6-mil plastic sheeting** — drape it over furniture, fixtures, anything you don't want speckled with paint. We're talking 200 microns thick. Drips won't bleed through, and it won't tear when you brush against it for the fifteenth time. Regular polyethylene holds up way better than the bargain-bin stuff.
- **Professional-grade painter's tape** — this isn't optional if you want clean edges. FrogTape Multi-Surface works great (it's got this PaintBlock® Technology that stops bleed-through). Got delicate surfaces? Their Delicate Surface version has lower tack so you're not peeling finish off trim. Learn more about [[Choosing the Right Painter's Tape]] for your specific project needs.
- **A dedicated paint station** — bucket, roller pan, the works. Keeps drips contained in one spot instead of tracking paint all over the house. We're obsessive about this. Organization matters.
- **Separate mixing containers** — never pour directly from the can if you can help it. Work from a smaller bucket. Keeps dust and debris out of your main supply, prevents skinning (that nasty film that forms on top). We use 5-gallon plastic buckets with disposable liners.
Look — last summer, I watched a homeowner in South Park (Houston) try to save maybe $40 by skipping proper floor protection. Just threw down some old bedsheets. The result? Paint splatters on $6,500 worth of satin-finish hardwood. The cleanup bill came to around $1,200 — roughly three times what proper canvas drops would've cost. That's what kills me about shortcuts. This scenario highlights the undeniable [[Benefits of Professional Paint Prep Services]]. Don't skip this step.
**Pro Tip for Post-Paint Cleanup:** Latex paint gives you maybe 5-10 minutes before it starts getting tacky — sometimes closer to 15 if you've added extenders or the humidity's high. That's your window. After that, you're fighting chemistry. Once it cures (anywhere from 4 hours to a full day depending on airflow and moisture), good luck getting it off without damaging whatever's underneath. This is why you can't wait around during the initial *cleanup phase*. Dried paint is a different beast. Especially on porous surfaces where it soaks right in.
**How do you protect floors during painting?** Use heavy-duty canvas drop cloths — 10-ounce weight minimum — and tape them down so they don't shift under your feet. Don't rely on thin plastic sheeting alone on floors. It slides around, creates a slip hazard, and won't absorb anything if you spill. Canvas or paper-backed plastic is what actually works.
Why Speed Matters More Than You Think
So yeah, speed makes all the difference between a quick wipe-down and permanent damage. Wet paint? Easy. Dried paint? Now you're dealing with chemical removers, potential surface damage, and a whole lot of regret. Most DIYers think they can "circle back to it in a minute."
They're wrong.
Here's what we do on every job: keep damp microfiber cloths within arm's reach at all times. Not just for dusting. Microfiber pulls wet paint right into the fabric — it's this thing called capillary action where liquid gets drawn up into all those tiny fibers. Blot a fresh spill, and it's gone in seconds. But let that same paint dry? You're shopping for denatured alcohol or heavy-duty removers, praying you don't wreck the finish underneath during *paint cleanup*. A damp cloth won't even touch dried paint; you'll just push it around like an idiot.
**Latex paint on hardwood? Here's the deal:**
Grab a damp microfiber cloth. Move fast — we're talking under thirty seconds if you can. Blot it, don't wipe. Wiping just spreads it everywhere.
Mix warm water with a couple drops of dish soap. pH-neutral stuff. Get your cloth damp — not soaking wet, just damp enough to work with.
Start at the edges of the spill and work toward the center. Keeps it from spreading. Use clean sections of the cloth as you go.
Do a second pass with a barely-damp cloth to get the soap residue off. (Soap left behind attracts dirt like crazy — we learned this the hard way.)
Dry the area completely. Standing water on hardwood causes swelling and cupping. Not "might cause." *Will* cause.
Oil-based paints? Different story entirely. You'll need mineral spirits or paint thinner, which means you're dealing with serious ventilation issues. I remember a project in the Heights—Houston neighborhood, nice area—where the ventilation was totally inadequate. Seriously. The VOCs from the mineral spirits built up so bad the apartment was uninhabitable for two days. Two days.
Always use NIOSH-approved respirators (N95 or P100 masks work) and get some serious airflow going with exhaust fans. Cross-ventilation isn't optional here. It could literally make you sick. Explore [[Eco-Friendly Paint Removal Techniques]] for safer alternatives if you're concerned about harsh chemicals for *paint cleanup*.
**What's the fastest way to clean paint spills?** Grab a clean, damp microfiber cloth and blot that sucker immediately. Don't wait more than 20-30 seconds if you're dealing with hardwood, stone, or tile—paint starts getting tacky fast, and once it does, you're in for a fight. Quick action means easy *cleanup*. Hesitation means you're scraping and cursing later.
Real-World Recovery: Downtown Disaster & The Cost of Neglecting Cleanup
So I got a call last month from this absolutely panicked homeowner downtown. They'd tried painting their living room over a long weekend — ambitious, sure, but doable. Except they skipped drop cloths entirely. Just went for it. BEHR premium interior latex ended up everywhere: granite countertops, $8,000 engineered hardwood floors, even the baseboards. It was bad.
Four days that paint sat there. Just curing onto granite and hardwood. By the time they called us, standard cleaning wasn't even an option anymore — we broke out Krud Kutter Latex Paint Remover and these specialized plastic scrapers designed not to gouge delicate surfaces (though we still held our breath on every stroke). There was a real chance we'd have to refinish sections of the floor. I mean, $8,000 engineered hardwood doesn't just bounce back from neglect.
What should've been maybe a $200 cleanup? Ended up costing more than triple their original painting estimate. Labor, specialized products, potential refinishing—it all adds up fast when you're in reactive mode instead of preventative. This is exactly why our warranty-backed process makes protection mandatory from day one, not optional. Preventative measures are always cheaper than reactive fixes. Always.
Don't Ruin Your Tools (Seriously)
Your brushes get cleaned the moment you're done with them. Not in an hour. Not after you grab lunch. *Right then.*
Do that, and they'll last you years instead of months. Let paint dry in the bristles? You just bought yourself a new brush. Our crews don't mess around with this — every tool gets cleaned the instant we're done with it (seriously, we time it). It's not about being obsessive. It's about not wasting money buying the same $25 brush three times a year because you got lazy.
A decent Wooster Ultra/Pro brush runs $20-$30. Good roller frames? Even more. The pros I know in Nashville and Austin — they're using the same brushes from 2019 because they clean them right. Once latex paint dries in those bristles, you're done. It's like concrete in there. Might as well throw the thing away and start over. That's not thrifty. That's expensive.
**Cleaning latex paint off your tools:**
Start with a warm water rinse to get the bulk of the paint off. For rollers, use a 5-in-1 tool to scrape off the excess first—saves you time and water.
Then hit it with mild dish soap (Dawn works fine). Work it deep into the bristles with your fingers, flexing them to get the paint out. Don't be gentle here. A brush comb helps too.
Keep rinsing under running water until it runs clear. Squeeze the bristles repeatedly—any soap left behind will mess with your next paint job.
Hang them to dry with bristles pointing down so they keep their shape. Brush spinners are fantastic for getting excess water out fast (cuts drying time way down). Find out more about [[Extending the Life of Your Painting Tools]]. Once they're dry, store brushes in their original cardboard sleeves to maintain shape.
In-Depth Look
Detailed illustration of key concepts
Visual Guide
Infographic illustration for this topic

Sources & References
- Chapter 8: Caring for Your Interior Wall Paint - PPG Paints
- Maintaining Your Newly Painted Home: Tips and Best Practices
- Maintain Painted Walls: Cleaning & Touch-Up Tips
- [PDF] Healthy Indoor Painting Practices
- Best Interior & Exterior Paint Buying Guide - Consumer Reports
- Best Paint for Commercial Buildings - Miko LLC
- Building Codes, Standards, and Regulations: Frequently Asked ...
- Choosing the Right Exterior Paint for Commercial Buildings
Frequently Asked Questions
Need Professional Help?
Find top-rated house painters experts in your area