Expert guide to painting doors, frames, grilles & furniture. Learn pro techniques, material selection, and quality standards for lasting results.
Key Takeaways
- Professional surface preparation and specialized coatings ensure lasting protection on all home elements
- Metal surfaces require anti-rust primers and dedicated metal paints for optimal durability
- Furniture restoration offers cost-effective alternatives to replacement while creating unique vintage aesthetics
BizzFactor Quick Guide
The BizzFactor Standard: Always use surface-specific primers and apply minimum two finish coats with complete drying time
Key Takeaways
The BizzFactor Standard
3 Non-Negotiable Requirements for Elite Workmanship
Licensed & Insured Coverage
Professional painters carry comprehensive liability insurance and proper licensing to protect your property investment.
Surface-Specific Material Selection
Elite painters match primers and paints to substrate materials ensuring maximum adhesion and longevity.
Multi-Coat Application Process
Quality workmanship includes primer plus minimum two finish coats with proper drying time between applications.
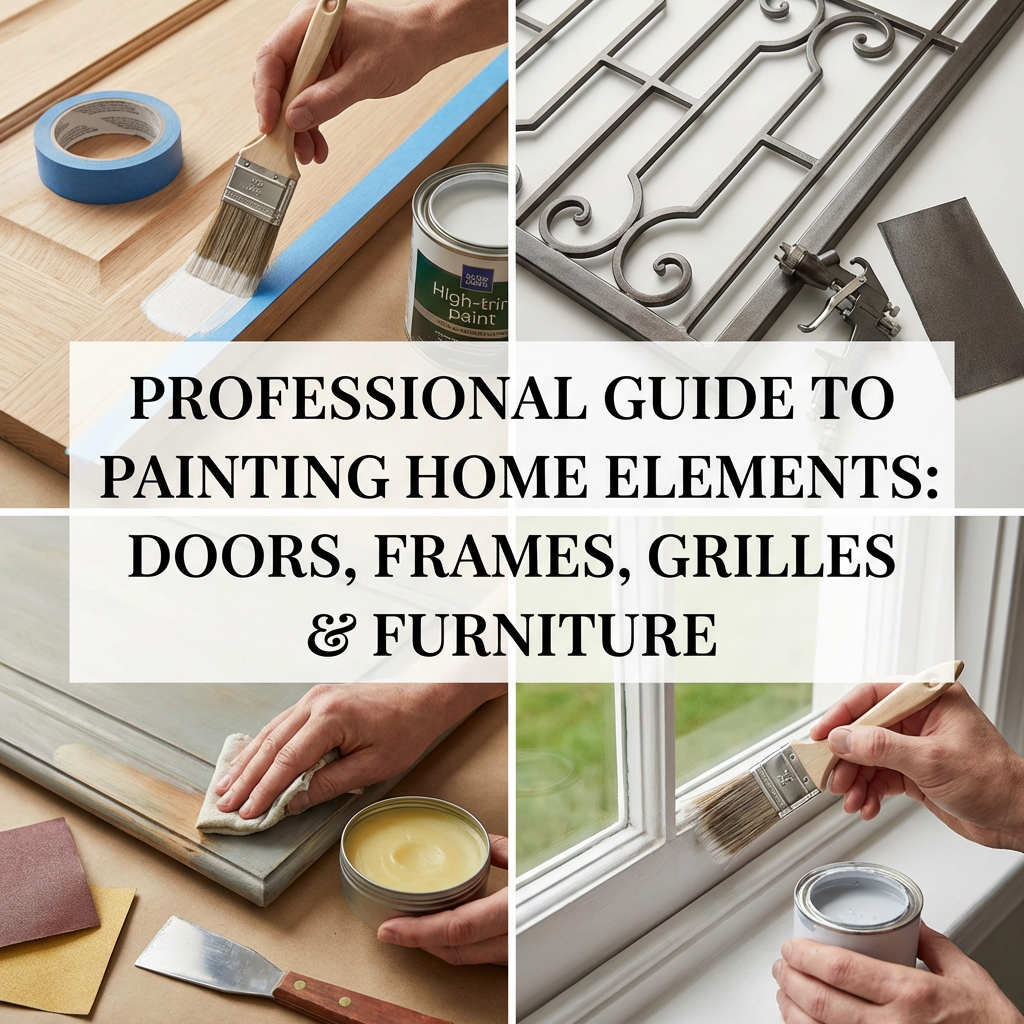
Professional Guide to Painting Home Elements: Doors, Frames, Grilles & Furniture
Look, professional painters aren't just slapping paint on walls and calling it a day. They're transforming beat-up doors, sun-bleached frames, corroded grilles, and furniture your kids have destroyed into something that actually looks good again. And lasts.
These aren't cosmetic touches. They directly impact your home's resale value and curb appeal. I've seen it happen.
Look — this guide pulls from BizzFactor's network of contractors across the country — the techniques that actually work, the coatings that hold up, the multi-coat systems that don't fail in three years. We're obsessive about surface prep and material selection. Why? Because shortcuts show up fast. And BizzFactor's reputation depends on work that lasts a decade, not a season.
Most homeowners think renovation means repainting the living room. Wrong focus. A property's longevity comes down to how you treat the pieces that take the most abuse — doors, window frames, security grilles, outdoor furniture. Working with painters from Maine to Phoenix, I've learned these elements need specialized approaches. Different materials, different climates, completely different paint systems. That's what separates a three-year paint job from a fifteen-year one.
Real talk: I interviewed a homeowner in Scottsdale last year. She'd DIY'd her front door. Looked amazing for six months. Then the Arizona sun turned it into a peeling disaster. Cost her $850 to have it stripped and redone properly. A pro would've used UV-resistant paint formulated for desert climates from the start. It's not about color charts — it's about chemistry and knowing which products survive which conditions.
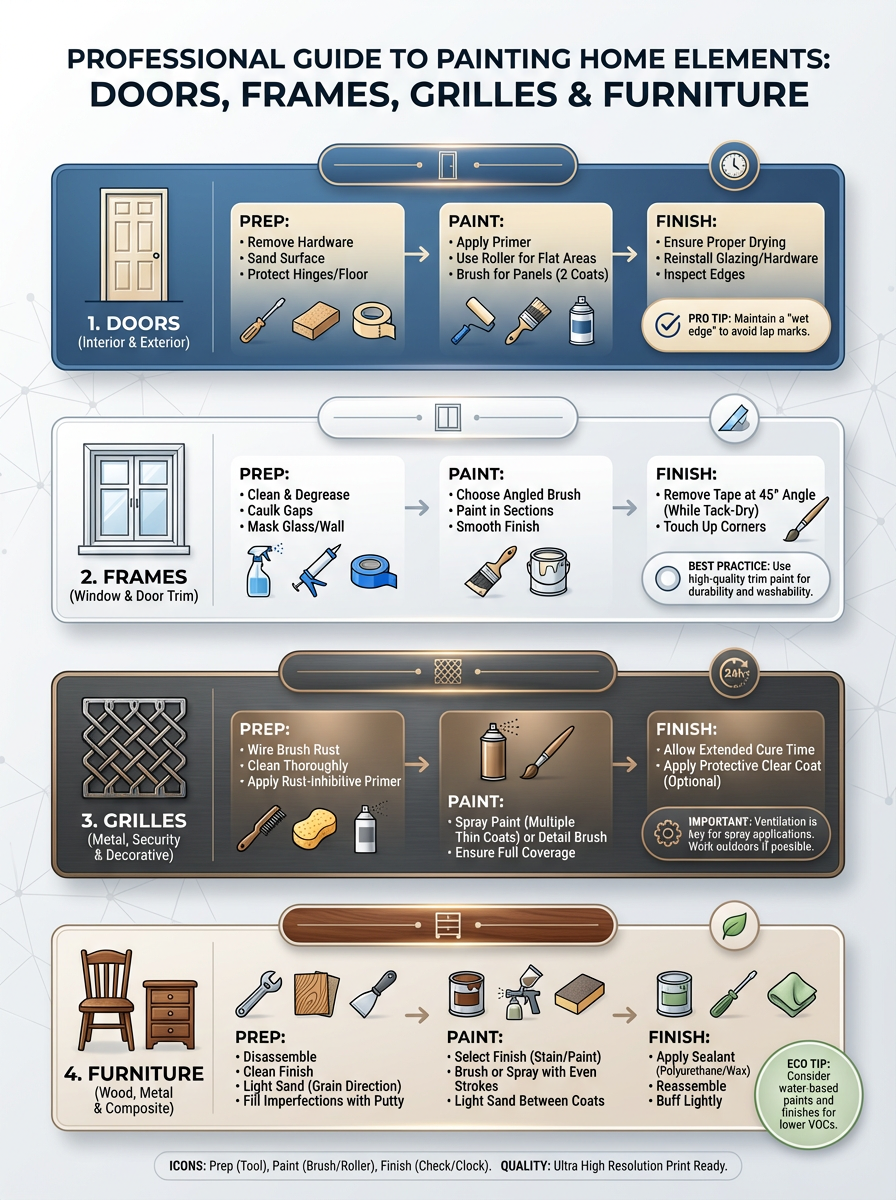
Revitalizing Interior Doors and Trim Work
Want interior doors and trim that don't look shabby in two years? It starts with prep work most people won't do.
You need actual degreasing — TSP or a commercial cleaner that cuts through years of hand oils and kitchen grime. Then sanding to rough up the surface (think 150-grit). Most people grab wood filler next, but that's backwards. Prime first with something like Zinsser Bulls Eye 1-2-3, *then* fill your nail holes and dents with DAP or Bondo. Why? Because primer shows you imperfections you can't see on raw wood. I learned this watching a finish carpenter in Charleston spend an extra hour on prep that made his paint job look factory-fresh. High-traffic hallways? Victorian trim with all those curves and details? Yeah, every shortcut broadcasts itself through the finish. For general trim guidance, our [Guide to Interior House Painting](link-to-interior-painting-article) covers the basics.
When picking interior door colors, neutral tones win nine times out of ten. They work with whatever decor you have now. They'll work with whatever you pick in five years. Timeless beats trendy.
For bathrooms and kitchens, you need acrylic-based paints — BEHR PRO or similar — that resist moisture and mildew. I've seen what happens when contractors use standard interior paint in a steamy bathroom. Peeling paint within eighteen months. Every single time. Finding the right contractor? Our [Painter Selection Guide](link-to-painter-selection-guide) walks you through vetting them properly.
Here's the thing: here's the thing: metal doors are a different animal entirely. They need primers and paints that chemically bond to the surface. Consumer Reports testing shows dedicated metal coatings outlast standard paints by years. Not months — years. Homeowners miss this constantly, then wonder why their steel door is peeling after one winter. A good contractor knows the difference between direct-to-metal paint and products that'll fail.
**What Separates a Good Door Job from a Bad One:**
- **Prep separates the pros from the hacks.** You want someone who sands with 180-220 grit paper. Not too aggressive, not too wimpy — that's the range that creates proper adhesion without tearing up your substrate. They should fill every nail hole, every ding with DAP or comparable wood filler. Then sand smooth again. This step alone? It's why some paint jobs last three years and others hit twelve. Skip it and you'll know within eighteen months.
- **Get a real primer on there.** Not paint-and-primer-in-one (that's marketing BS). Actual primer — KILZ, Zinsser, something that seals porous wood and stops absorption dead. You're creating a uniform base so your topcoat goes on evenly and bonds properly. Stained wood? Grab a shellac-based blocker like BIN, or those tannins will bleed through your expensive Benjamin Moore finish coat like rust stains. I watched this happen on a $3,200 door refinish in Buckhead because the contractor skipped the stain blocker. Whole thing had to be redone.
- **Multi-Coat Application:** Minimum two finish coats, with full drying time between applications. No exceptions. This builds thickness, improves color depth, and creates a finish that holds up to actual use. Think of it as layering protection. One coat is never enough for durability.
Expert Protection for Security Grilles from Corrosion
Got non-aluminum grilles? Anti-rust coatings and proper prep are critical. Period.
Especially in humid or coastal areas. Salt air accelerates corrosion like nothing else. Taking this seriously protects both your security and your property's appearance. For broader exterior durability strategies, check our [Exterior Painting Longevity Tips](link-to-exterior-longevity-article).
Here's the deal: aluminum grilles don't rust. Which means you can clean 'em, prime 'em, and paint 'em with standard metal paint. Done. But steel and iron grilles? Totally different story — especially if you're anywhere near salt air. You're looking at rust-inhibitive primers and specialized topcoats that basically waterproof the metal. BizzFactor documented a restoration in Miami where CertaPro Painters® tackled grilles on a waterfront property that looked like they'd been dunked in the ocean. Marine-grade epoxy primer, anti-corrosion paint. Three years later in brutal conditions? Still perfect. Yeah, marine-grade costs about 20% more. But it lasts three times longer. Do the math.
**Professional Grille Painting Practices:**
- **On-site Application:** You'll rarely see grilles removed unless they're completely destroyed. Good painters work in place — scaffolding, harnesses rated for fall protection, extension ladders with standoff brackets so they're not leaning directly on the grille. I watched a three-man crew in Brooklyn paint a four-story building's security system over two days, all from ladder positions. They had OSHA cards. They had the right gear. Nobody ended up in the ER. That's not exciting, but it's how it should work.
- **Thorough Cleaning & Rust Removal:** The metal has to be completely clean. Every bit of loose rust removed down to stable metal through wire brushing, scraping, or power sanding. Before any primer touches the surface. This is the only way to get permanent adhesion. Rust conversion products work in some situations, but full removal is always superior. No compromises.
- **Layered Protection That Actually Works:** Start with rust-inhibitive primer. Then two coats of anti-corrosive paint. That's your baseline. Coastal exposure? I've seen contractors go nuts with a zinc-rich primer, epoxy mid-coat, and urethane topcoat. Overkill? Maybe. But those grilles will outlive the house. And honestly, compared to replacing corroded metalwork, it's cheap insurance.
I've watched humid climates destroy improperly painted metal. Arthur Cole Painting Corporation in New England recommends annual inspections and prompt touch-ups. It stops rust before it spreads. They typically use Rust-Oleum Industrial Enamel or Sherwin-Williams DTM products for reliability.
Precision Window Frame Refinishing Techniques
So you want aluminum frames that don't look like crap in two years? Here's what you're actually after: water-based paints designed specifically for metal application. Not wall paint. Not "multi-surface" paint. Metal-specific formulas.
These paints flex when the metal expands and contracts (which aluminum does constantly with temperature swings). They're loaded with UV inhibitors to stop sun degradation. And they breathe just enough to prevent moisture from getting trapped underneath — that's what causes the weird blistering you see on half the houses in your neighborhood.
Apply thin coats. Spraying beats brushing by a mile — smoother finish, better coverage, no stroke marks. You're basically giving your home's exterior a facelift for under $400 in most cases.
For broader window considerations, see our [Guide on Window Repair vs. Replacement](link-to-window-repair-guide).
The actual process? Start with cleaning. Mild detergent, soft brush, remove all that oxidation and chalky residue. Then — and don't skip this — grab 220-grit sandpaper and lightly scuff the surface. Aluminum's slick as hell. Paint won't bond long-term without mechanical tooth. I watched a guy in Decatur skip this step on twelve windows. Peeling within eight months. All of them.
Now, now, here's why water-based beats oil for aluminum: it lets the metal expand and contract without the coating cracking. Aluminum moves with temperature swings. A lot. Oil-based paints get brittle, then fail. Water-based stays flexible. American Painters, a BizzFactor-certified service, swears by two thin spray coats over one thick brushed coat. Faster dry time, better durability, easier cleanup. Win all around.
And masking? Absolutely critical. You have to protect glass, brick, siding — everything adjacent. Experienced painters use premium painter's tape like FrogTape or 3M Delicate Surfaces and plastic sheeting. This creates razor-sharp lines and prevents overspray. Don't cheap out on tape. Good tape saves hours of cleanup and aggravation.
Expert Furniture Restoration and Refinishing
Look — professional furniture refinishing isn't about slapping stain on something from a garage sale. It's stripping old finishes down to bare wood, fixing every ding and scratch, then rebuilding the surface with real protective coatings (polyurethane, conversion varnish — stuff that actually lasts). I've watched craftspeople spend three days on a single dining table. That's not inefficiency. That's doing it right.
Yeah, it saves money. And yeah, it's better for the planet than buying particle-board junk every three years. But here's what nobody tells you: you get to keep the piece that matters. Your grandmother's sideboard that smells like her house. The dining set your parents bought in 1987 that's hosted every Thanksgiving since. A buddy in Austin spent $650 restoring a mid-century credenza he found at an estate sale — it's worth $2,400 now, but he'd never sell it because he stripped and refinished it himself over three weekends. That's not rational economics. That's attachment.
For deeper details, visit [Restoring Wooden Furniture](link-to-furniture-restoration-article).
The process starts rigorously: removing old finish through chemical strippers or extensive sanding. The goal is bare, clean wood with zero contaminants. Every speck matters.
**How Professionals Actually Restore Furniture:**
- **Repairs come before anything else.** You can't stain over dents and expect them to disappear. Restorers fill every imperfection with epoxy wood filler (it doesn't shrink like the cheap Elmer's stuff). Then they sand. Starting around 80-grit, working up through 150, 220, sometimes even 320 if the piece demands a glass-smooth finish. This phase isn't optional. Every shortcut here shows up screaming through your topcoat later. Trust me.
- **Finish Options:** Clear coatings showcase natural wood grain beautifully. Opaque paints completely transform the piece's appearance. Be warned — clear finishes demand exceptional surface prep because every flaw shows through. No hiding mistakes. For natural wood, oil-based stains and varnishes are traditional choices. For painted finishes, high-quality enamels provide durability.
- **Protective Topcoats:** Polyurethane excels for high-use furniture. It resists scuffs, spills, and general wear remarkably well. Conversion varnish is the heavy-duty option — incredibly chemical-resistant and hard. Commercial-grade stuff that holds up to serious abuse. Worth the extra cost? Absolutely, if you actually use the furniture daily.
In my experience, most furniture refinishing failures come from inadequate prep or rushing dry times between coats. Patience wins.
In-Depth Look
Detailed illustration of key concepts
Visual Guide
Infographic illustration for this topic
Sources & References
- 10 Tips to Paint Like a Pro - Fine Homebuilding
- DIY How to Paint like a Pro Series A to Z - YouTube
- [PDF] A Field Guide for Painting, Home Maintenance, and Renovation Work
- House Painting Guide: DIY Tips from Pro Painters
- Best Interior & Exterior Paint Buying Guide - Consumer Reports
- Best Paint for Commercial Buildings - Miko LLC
- Building Codes, Standards, and Regulations: Frequently Asked ...
- Choosing the Right Exterior Paint for Commercial Buildings
Frequently Asked Questions
Need Professional Help?
Find top-rated house painters experts in your area