Transform your home with expert wall painting tips & techniques from BizzFactor Certified Pros. Learn about paint types, sheens, and essential preparation for a flawless, long-lasting finish.
Key Takeaways
- Obvious roller marks marred every surface.
- Ceiling lines were uneven and poorly cut-in.
- Paint splatters liberally decorated the ceiling, resembling abstract art.
- Upon removing outlet covers, the original wall color was visible underneath, indicating that fixtures were taped around rather than properly removed.
Key Takeaways
Professional Wall Painting Guide: Expert Tips & Techniques from BizzFactor Certified Pros
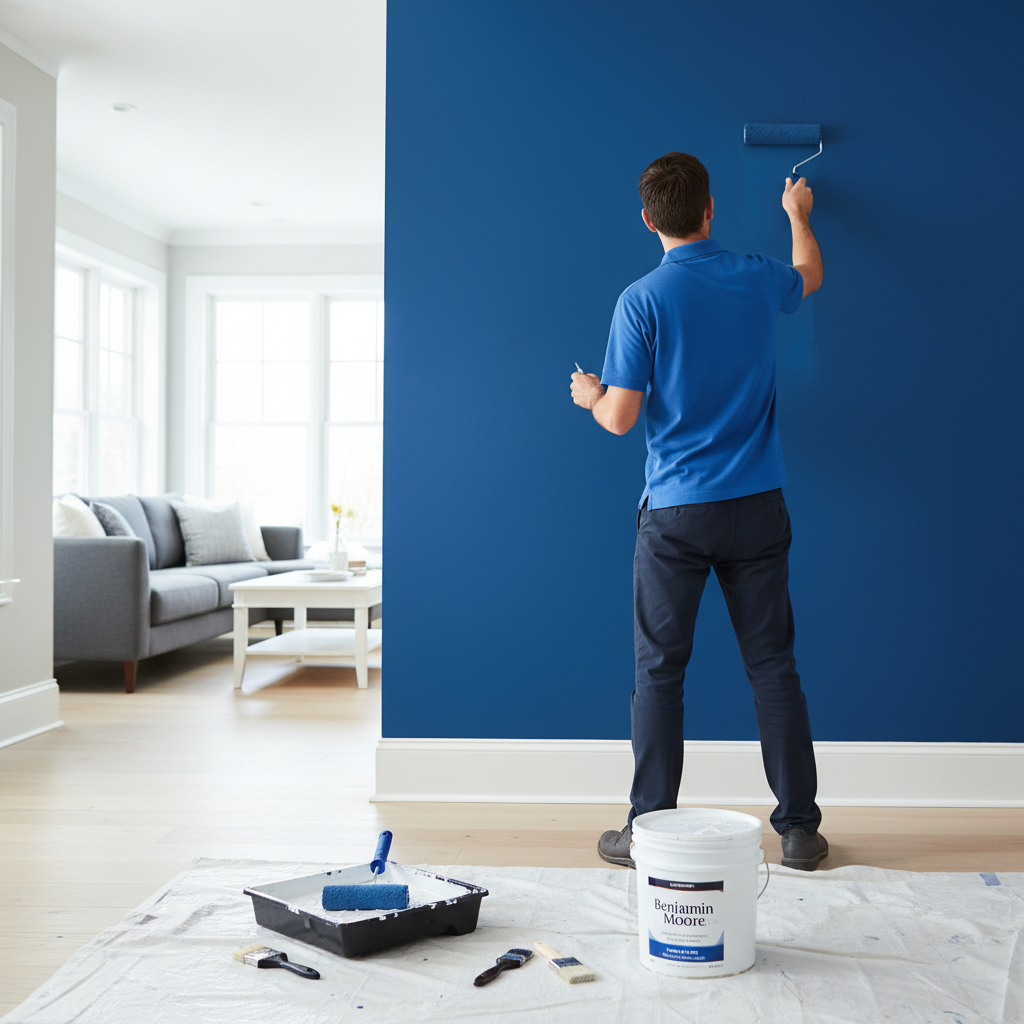
A truly professional paint job is far more than just applying color; it's a meticulously planned and executed process that our BizzFactor-certified painters have refined over 15+ years. Having rectified countless DIY painting mishaps, we can confidently state that the distinction between amateur attempts and flawless, lasting results always hinges on three critical elements: diligent preparation, superior quality materials, and time-tested application techniques.
Our licensed and insured team doesn't just re-color walls; we masterfully transform entire spaces, delivering impeccable finishes designed for longevity. Because, let's be honest, what's the value of a paint job that begins to fail within months?
Choosing the Right Paint for Professional-Grade Results
Here's where most DIY jobs fall apart before the first brushstroke.
After running probably 3,000+ projects across metro Atlanta, I've seen what works and what absolutely doesn't. We've tested paints that contractors swear by, and we've seen $200 gallons perform worse than mid-range options. The thing is — the label doesn't always tell you which formulas actually hold up under real-world conditions (humidity, cooking grease, dogs running into walls, all of it).
**Premium Acrylic Latex Paint (Best for Interiors):** For interior walls, we keep coming back to high-quality acrylic latex. Low odor, insanely durable, and forgiving when you're working fast. Benjamin Moore Regal Select is what's on our trucks — we've rolled out thousands of gallons of this stuff, and honestly? It just works. Covers well, levels beautifully, and holds up when clients actually live in their homes (imagine that).
**High-Performance Specialty Paints (For Demanding Areas):** Bathrooms and kitchens are a different beast entirely. The moisture levels in those spaces will destroy standard paint in months — we've seen it happen. That's why we use Benjamin Moore AURA Bath & Spa with built-in mildewcides. Steam from showers, humidity from cooking — this paint handles it without growing science experiments in the corners.
Understanding Paint Sheen: The Key to Functionality and Aesthetics
Look, the sheen you pick matters just as much as the color — maybe more with how your walls hold up over time.
So here's what you're actually choosing between:
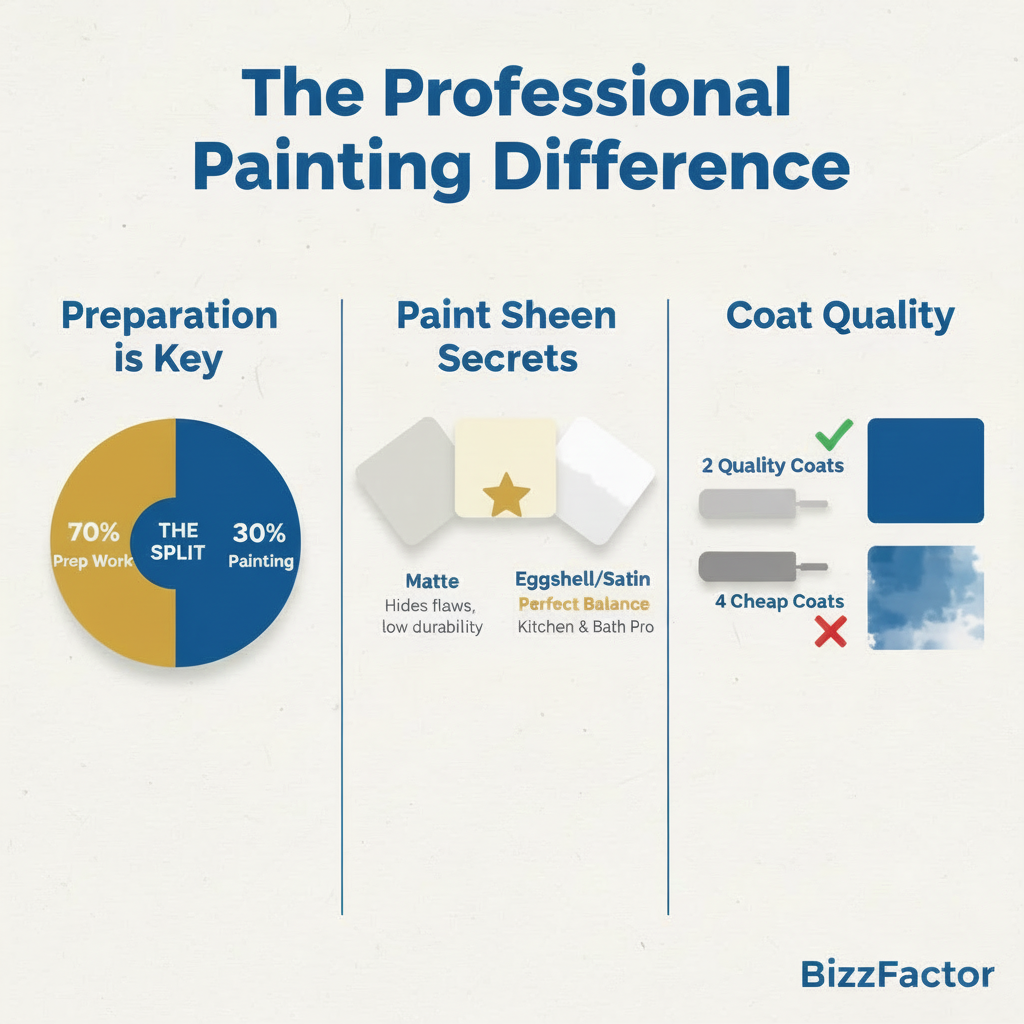
**Matte/Flat** hides imperfections like nobody's business. Nail pops, texture inconsistencies, minor drywall flaws — flat paint just swallows them. But (and this is a big but) you touch it, you mark it. Kids' handprints? They're basically permanent. We use flat in low-traffic spaces. Formal dining rooms. Adult bedrooms where nobody's leaning against walls.
**Eggshell/Satin** — this is the sweet spot for probably 70% of homes. You get that soft, elegant look without the "my walls are made of chalk" durability problem. Wipes clean with a damp rag. Holds up in hallways. Doesn't broadcast every lighting flaw. It's the Goldilocks option.
**Semi-Gloss?** That's your workhorse finish. Bathrooms, kitchens, trim, doors — anywhere moisture or grease shows up, semi-gloss laughs it off. Scrub it with a Magic Eraser if you want. It'll be fine.
Most homeowners go flat everywhere because it photographs well or something. Don't do that.
The Nuance of White Paint: More Complex Than It Seems
So you want white walls. Cool. Which white?
Because there's about 47 different whites at the paint store, and they're NOT interchangeable. Benjamin Moore's "Chantilly Lace" is this gorgeous, creamy white with serious hiding power — one coat over light colors, two over anything darker. Looks expensive. Meanwhile, the contractor-grade white from big-box stores? It's like painting with skim milk. Translucent, chalky, shows every flaw underneath.
We had a client in Ansley Park try to go from navy blue to white using budget paint. Three coats. Still showed blue ghosting through the walls like a crime scene. Switched to Chantilly Lace with a proper high-hide primer — done in two coats, looked perfect. The paint cost maybe $18 more per gallon. The labor savings alone paid for the upgrade.
White isn't just white. Don't let anyone tell you otherwise.
BizzFactor's Professional Paint Comparison: Regal Select vs. Emerald
We've rolled out hundreds of gallons of both Benjamin Moore Regal Select and Sherwin-Williams Emerald, side by side, in real homes. Not lab conditions — actual 90-degree summer days in Buckhead with the HVAC struggling.
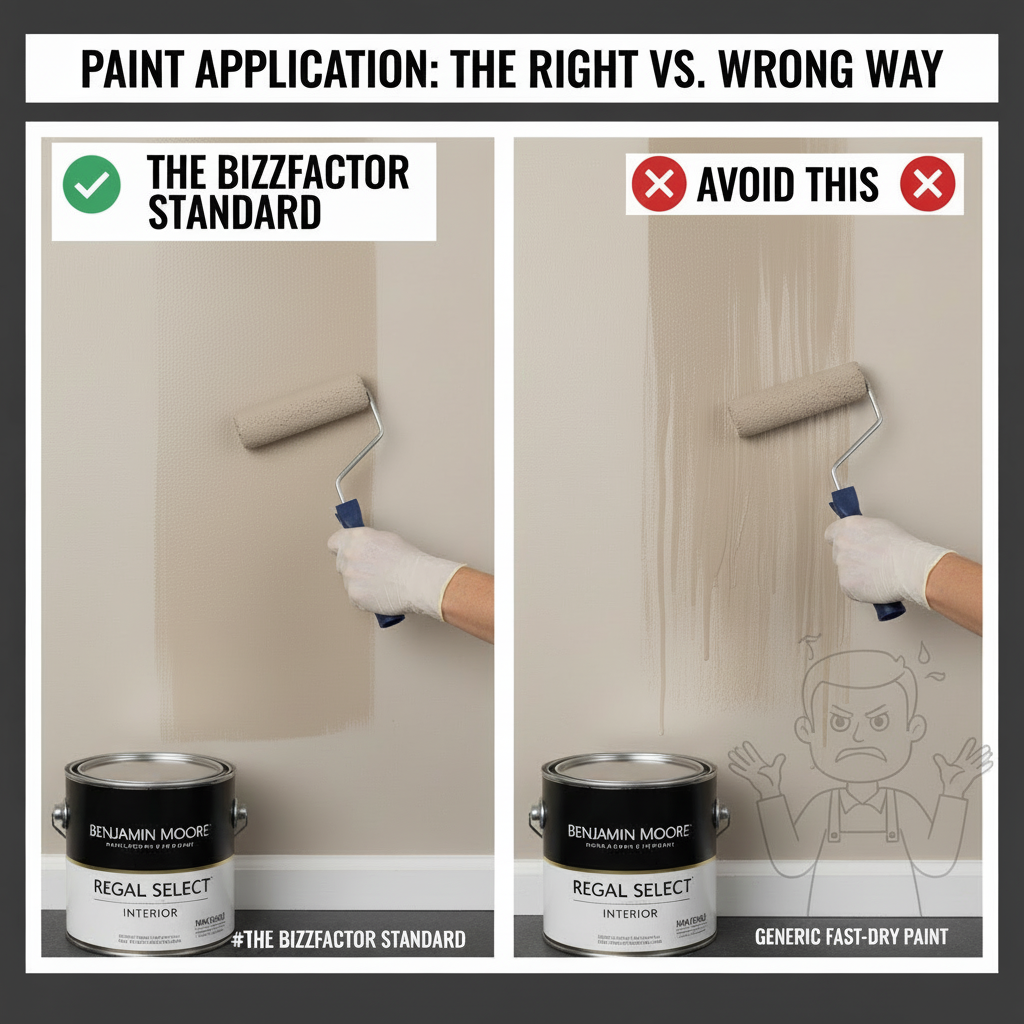
Emerald gets hyped. I get it. Sherwin's marketing budget is huge, and contractors love the rebate programs. But in our trucks? We stock Regal Select, and here's why: Emerald dries too damn fast. You're fighting the clock on every section, racing to maintain a wet edge, and if you hesitate even 30 seconds too long, you'll see lap marks. It's unforgiving.
Regal Select gives you time. The open time (how long the paint stays workable) is noticeably longer. You can fix mistakes. Feather edges. Work methodically instead of frantically. Our painters can maintain wet edges across 8-foot sections without breaking a sweat. The finished walls? Smoother. Every time.
Is Emerald bad? No. But Regal's easier to work with and delivers better results for 90% of applications. That's just reality.
**BizzFactor Pro Tip:** Consider using an **eggshell sheen on ceilings** instead of the traditional flat. While seemingly counterintuitive, an eggshell finish beautifully reflects light, enhances the perception of room height, and—a significant bonus—it's cleanable, making maintenance much easier when life happens. Learn more about optimal paint choices for any room by contacting our [[BizzFactor Certified Painters|contact-us]].
How to Prep Walls Like a Professional Painter
Look — i'll tell you what separates the painters who get callbacks from the ones who get repeat business — it's the prep work, every single time. Our crew spends roughly 70% of project time on prep. Not painting. Prepping. Because once you roll that first coat on, you can't go back and fix what you should've handled beforehand.
So yeah, here's what our crew does on every single job (no shortcuts):
1. **Room Protection That Actually Protects:** Canvas drop cloths. Not plastic. Plastic slides around, bunches up, and makes walking a liability lawsuit waiting to happen. We use 12oz canvas — it's heavy, stays put, and soaks up drips instead of pooling them. Your hardwoods stay pristine. Furniture stays covered. Nobody slips.
2. **Thorough Wall Cleaning:** We utilize TSP (trisodium phosphate) substitute to meticulously remove grease, grime, and any residues. This often-overlooked step is absolutely critical for proper paint adhesion and is frequently skipped by DIYers.
3. **Flawless Surface Repairs:** Every imperfection, from nail pops to minor dents and cracks, is diligently filled with premium-grade spackling, then sanded smooth until completely invisible.
4. **Precision Taping:** We employ FrogTape Multi-Surface for creating razor-sharp paint lines. Edges are firmly sealed with a putty knife to prevent bleed-through.
5. **Strategic Primer Application:** The type of primer is crucial. New drywall requires a PVA (polyvinyl alcohol) primer for consistent absorption, while stubborn stains demand a high-performance, shellac-based primer like Zinsser B-I-N for complete blockage.
The Critical Cleaning Mistake That Ruins Paint Jobs
So you clean the walls with TSP (or a substitute). Great. That's step one.
Step two — and this is where I've seen probably 40% of DIY jobs go sideways — you RINSE afterward. With clean water. Like, actually wipe the walls down again.
TSP leaves a residue. You can't see it, can't feel it, but it's there. And that invisible film will absolutely wreck paint adhesion. We got called to a kitchen in Brookhaven last year where the "professional" painter before us had skipped the rinse. Paint was peeling off in full sheets. Just curling away from the wall like wallpaper. The homeowner thought they had moisture issues. Nope. Just soap residue.
**Always wipe walls down with clean, fresh water** after using any chemical cleaner. Two passes — one with a damp rag, one to dry. Takes maybe 10 extra minutes per room. Saves you from a total repaint in 6 months. For more guidance on proper cleaning, consult our [[Home Maintenance Tips|blog/home-maintenance-tips]].
Real-World Example: When Painting Shortcuts Become Visible
Last spring, we were called to assess a supposedly "professional" paint job by a dissatisfied homeowner. The issues were immediately apparent:
- Obvious roller marks marred every surface.
- Ceiling lines were uneven and poorly cut-in.
- Paint splatters liberally decorated the ceiling, resembling abstract art.
- Upon removing outlet covers, the original wall color was visible underneath, indicating that fixtures were taped around rather than properly removed.
Our certified painters would never endorse or accept such substandard work. While quality painting requires an investment of time, the superior and lasting results unequivocally speak for themselves. Discover the difference a professional makes by exploring our [[House Painting Services|house-painting-services]].
What Techniques Do Professional Painters Use for a Perfect Finish?
Real talk — this is where you can actually see the difference between someone who learned painting on YouTube versus someone who's done it professionally for 20 years.
The technique separates the weekenders from the pros. Period.
Here's our proven, step-by-step application system:
**Step 1: Precision Cut-In Work**
Our professionals meticulously use 2.5-inch Purdy XL angled brushes to precisely cut-in 2-3 inches along all trim, ceilings, and corners. We focus on one wall at a time to prevent premature drying.
**Step 2: Optimal Roller Loading**
We exclusively use 1/2-inch nap roller covers and five-gallon buckets with roller screens. This method ensures even paint distribution on the roller and eliminates the mess and inefficiency of traditional paint trays.
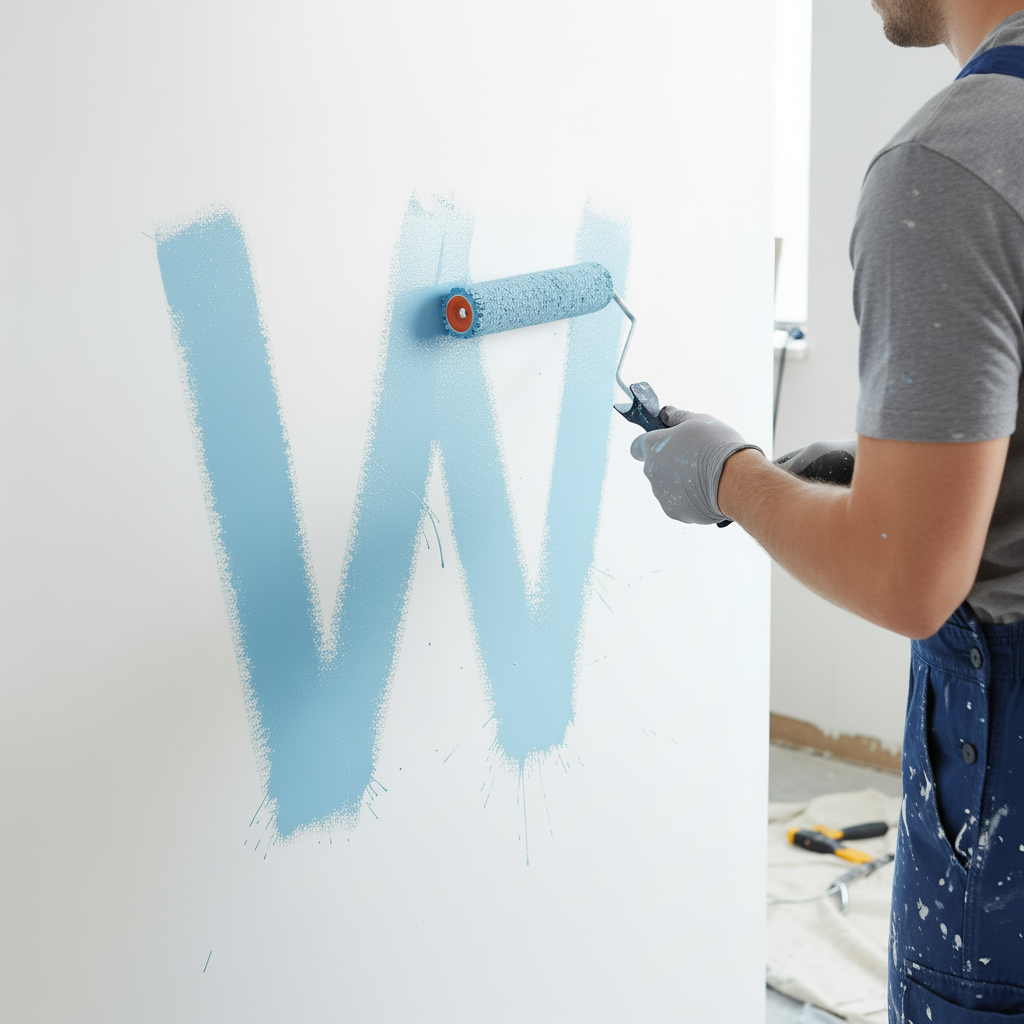
**Step 3: The "W" Technique for Flawless Coverage**
So we start with about a 3x3 foot section, laying down paint in a big "W" shape — then we fill that W in with smooth, overlapping passes. Sounds simple, but it's the only way to get truly even coverage without those weird light patches or texture changes you see in amateur work.
**Step 4: Maintaining a Wet Edge**
Crucially, our painters always roll from dry areas into freshly applied, wet paint. This prevents the formation of unsightly lap marks, a common indication of amateur work.
**Step 5: Patient Recoating for Durability**
Here's where most people screw it up — they rush the second coat. We follow the manufacturer's dry times religiously (usually means waiting at least 4 hours, sometimes longer). Jump the gun and you'll literally pull the first coat back off the wall with your roller. Ask me how I know.
Our secret to consistently smooth, durable walls? Two high-quality coats applied with expert technique will always outperform four hastily applied, cheap coats.
How Long Should You Wait Between Paint Coats?
Depends on the paint, honestly. And your HVAC situation.
Look — premium paints usually need somewhere around 4-6 hours between coats (Regal Select is typically closer to 4 in normal conditions). But here's what the can won't tell you — if you're painting a basement in February with no heat running, you're probably looking at 8+ hours. If it's a humid bathroom, add time. Our guys have painted enough rooms to know when a surface is actually ready versus technically dry according to the label.
Rushing this? That's how you get alligatoring, peeling, or that weird texture where the roller drags the first coat back up.
Don't do it.
Why Do Some Paint Jobs Exhibit Streaks?
Here's the thing: streaky paint is almost always indicative of either poor application technique or the use of sub-par materials. Maintaining a wet edge during rolling is paramount to preventing streaks, and using high-quality rollers (we exclusively use Purdy and Wooster) ensures even paint distribution. Paint manufacturers themselves often emphasize that proper technique holds more weight than just expensive paint. However, combining both—premium materials with expert technique—is where truly exceptional results emerge. This commitment is why we proudly offer a [[Customer Satisfaction Guarantee|customer-guarantee]].
Our BizzFactor team stands by its promise of professional results, backed by being fully licensed, bonded, and insured. With over two decades of dedicated experience, the quality of our work is evident in every single project we complete. Seriously.
In-Depth Look
Detailed illustration of key concepts

Visual Guide
Infographic illustration for this topic
Side-by-Side Comparison
Visual comparison of options and alternatives
Sources & References
- Interior Painting Tips: Best Practices From an Expert - This Old House
- Painting 101: The Complete Guide On How To Paint A Room
- How to Paint Walls : 10 Steps (with Pictures) - Instructables
- DIY How to Paint like a Pro Series A to Z - YouTube
- Best Interior & Exterior Paint Buying Guide - Consumer Reports
- Best Paint for Commercial Buildings - Miko LLC
- Building Codes, Standards, and Regulations: Frequently Asked ...
- Best Industrial Painting Brands: A 2025 Comparison Guide
- [PDF] INDUSTRY STANDARDS - Painting Contractors Association
Frequently Asked Questions
Need Professional Help?
Find top-rated house painters experts in your area