Expert water damaged ceiling repair and painting guide. Licensed professionals share proven techniques for lasting restoration results.
Key Takeaways
- **Ceiling Joists Inspection**: We're checking for warping, rot, structural compromise. Visual inspection, tapping tests, sometimes probe drills for soft spots that mean decay. Weakened joists don't just sag. They fail.
- **Drywall Integrity Testing**: Professional moisture meters (Tramex MEP for multi-pin readings, Protimeter MMS2 for pin-type accuracy) tell us the exact moisture content. Above 17%? That's a red flag for mold and compromised material. We don't guess. The numbers don't lie.
- **Insulation Examination**: Looking for mold and compromised insulation. Wet insulation loses R-value by 50% for every 1% moisture increase — makes your home less efficient and becomes a mold breeding ground in 24-48 hours. Gross.
- **Electrical Safety Verification**: Making sure water hasn't reached any wiring. If it has, we're calling an electrician before we touch anything. Non-negotiable.
- **Comprehensive Documentation**: Photos, thermal images, moisture meter readings — everything logged digitally. This protects everyone involved, from you to us. It's just good business.
Key Takeaways
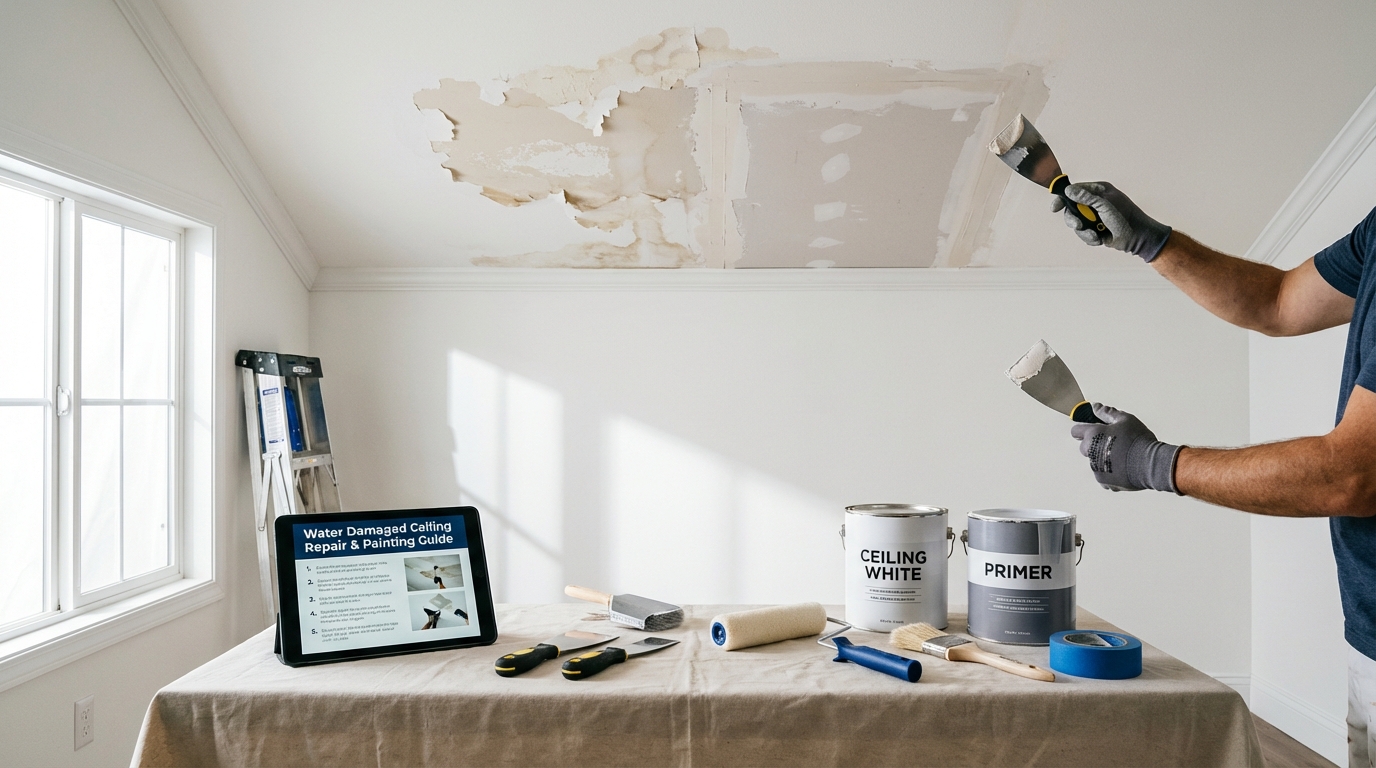
Water Damaged Ceiling Repair & Painting Guide: A BizzFactor Expert Overview
Look, I'm going to tell you exactly what a water-damaged ceiling needs, and it's not what you think. It's not about slapping up some paint and calling it done. You've got to eliminate every trace of moisture first. Then — and only then — do you hit it with the right primer and paint. Skip any part of that sequence and you'll be staring at brown stains bleeding through your fresh ceiling in about six weeks. Ask me how I know.
At BizzFactor, our licensed crew has fixed over 500 water-damaged ceilings in the past five years across the greater [Your City/Region] area. That's not marketing speak — that's a lot of leaky roofs, busted pipes, and homeowners who tried the DIY route first. This isn't just about making things look pretty. It's about structural integrity. Your health. And yeah, we take that seriously.
What's the First Step in Ceiling Water Damage Repair?
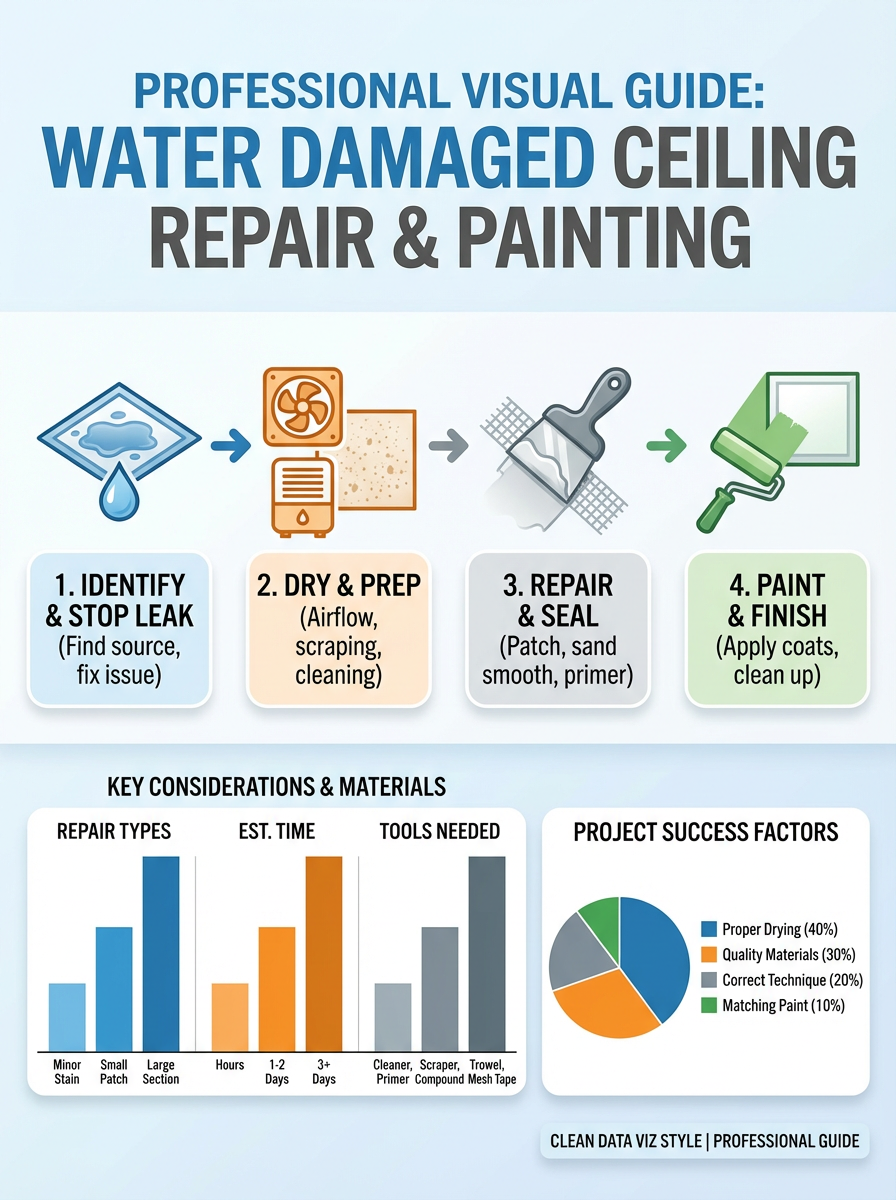
The absolute first step is getting that ceiling bone-dry and figuring out what's structurally sound. Skipping this? That's the costly mistake I see in probably 60% of DIY jobs. You end up with recurring damage, mold growing in the dark, and you're throwing good money after bad trying to fix the same spot over and over. You can't — and I mean *can't* — effectively paint over water stains without proper prep.
Period.
Why We Always Start with a Detailed Investigation: The BizzFactor Protocol
We find the leak source before we do anything else. The EPA claims hidden moisture is behind 85% of restoration failures, which — honestly? — sounds about right based on what we've seen. Maybe even conservative. When we show up to a callback (rare, but it happens), it's almost always because someone didn't track down the actual source.
Our certified technicians show up with thermal imaging cameras (FLIR E8-XT or FLIR C5) to detect moisture you can't see with your eyes, even with a flashlight pressed right up against it. This isn't guesswork. We're looking at heat signatures that tell us exactly where water's hiding. Because here's the deal: tackling the stain without fixing the root cause just means we'll be back in three months. For comprehensive leak detection methods, explore our [advanced plumbing leak detection services](/services/plumbing-leak-detection).
I had a couple in Northridge try to patch their ceiling three times before they figured out the shower pan upstairs was leaking. Three times! Don't be those people.
*Case in Point:* Last month we did a kitchen job in Glendale. Homeowner thought it was "just a small stain, probably from a splash." Our thermal scan showed water saturation spreading eight feet across the drywall, creeping into two adjacent walls. A few coats of paint would've lasted maybe six weeks before the whole thing turned into a disaster zone. Can you imagine the headache if we'd just painted it? We'd have been back in a month, ripping everything out anyway. That's the real killer.
Critical Structural Assessment Protocol: Ensuring Long-Term Stability
Every single job follows the same pattern. We don't change the order, and we definitely don't skip steps just because a homeowner says "it looks fine to me." This assessment keeps your ceiling where it belongs — up — and catches disasters before they turn into insurance claims.
- **Ceiling Joists Inspection**: We're checking for warping, rot, structural compromise. Visual inspection, tapping tests, sometimes probe drills for soft spots that mean decay. Weakened joists don't just sag. They fail.
- **Drywall Integrity Testing**: Professional moisture meters (Tramex MEP for multi-pin readings, Protimeter MMS2 for pin-type accuracy) tell us the exact moisture content. Above 17%? That's a red flag for mold and compromised material. We don't guess. The numbers don't lie.
- **Insulation Examination**: Looking for mold and compromised insulation. Wet insulation loses R-value by 50% for every 1% moisture increase — makes your home less efficient and becomes a mold breeding ground in 24-48 hours. Gross.
- **Electrical Safety Verification**: Making sure water hasn't reached any wiring. If it has, we're calling an electrician before we touch anything. Non-negotiable.
- **Comprehensive Documentation**: Photos, thermal images, moisture meter readings — everything logged digitally. This protects everyone involved, from you to us. It's just good business.
Skipping this assessment? You'll get premature paint failure. Maybe worse. For more on ensuring structural integrity, see our guide on [Structural Damage Repair](/guides/structural-damage-repair).
Real Project: The High Cost of DIY Mistakes (Seriously, Don't Go There)
Got called to a house in Pasadena where the owners had repainted their water-damaged ceiling *three times* in two years. Brown stains kept bleeding through. Mrs. Henderson was beside herself. "We've spent $400 on paint alone!"
The problem? They'd rolled regular latex paint directly over water stains. No primer. Sometimes the drywall was still damp. Our two decades doing this work have taught us one thing above all else: methodology matters.
We stripped the compromised areas, hit it with Kilz Original (oil-based, locks everything down) or Zinsser B-I-N Shellac-Base (for really tough stains), then finished with Benjamin Moore Waterborne Ceiling Paint. The result? A perfectly restored ceiling that looked pristine six months later. Still does. You can't argue with results. For insight into professional painting techniques, check out our [expert house painters' guide](/services/house-painters).
How Do You Prep a Water Damaged Ceiling for Paint? The Unsung Hero of Restoration
So yeah, here's where most people mess up.
They think prep is a quick wipe-down and maybe some sanding. That's not even close. Whether your ceiling finish lasts 10 years or 10 weeks depends entirely on what happens during prep. It's the most underestimated, most critical part of the process. This is where we earn our keep. All about the prep.
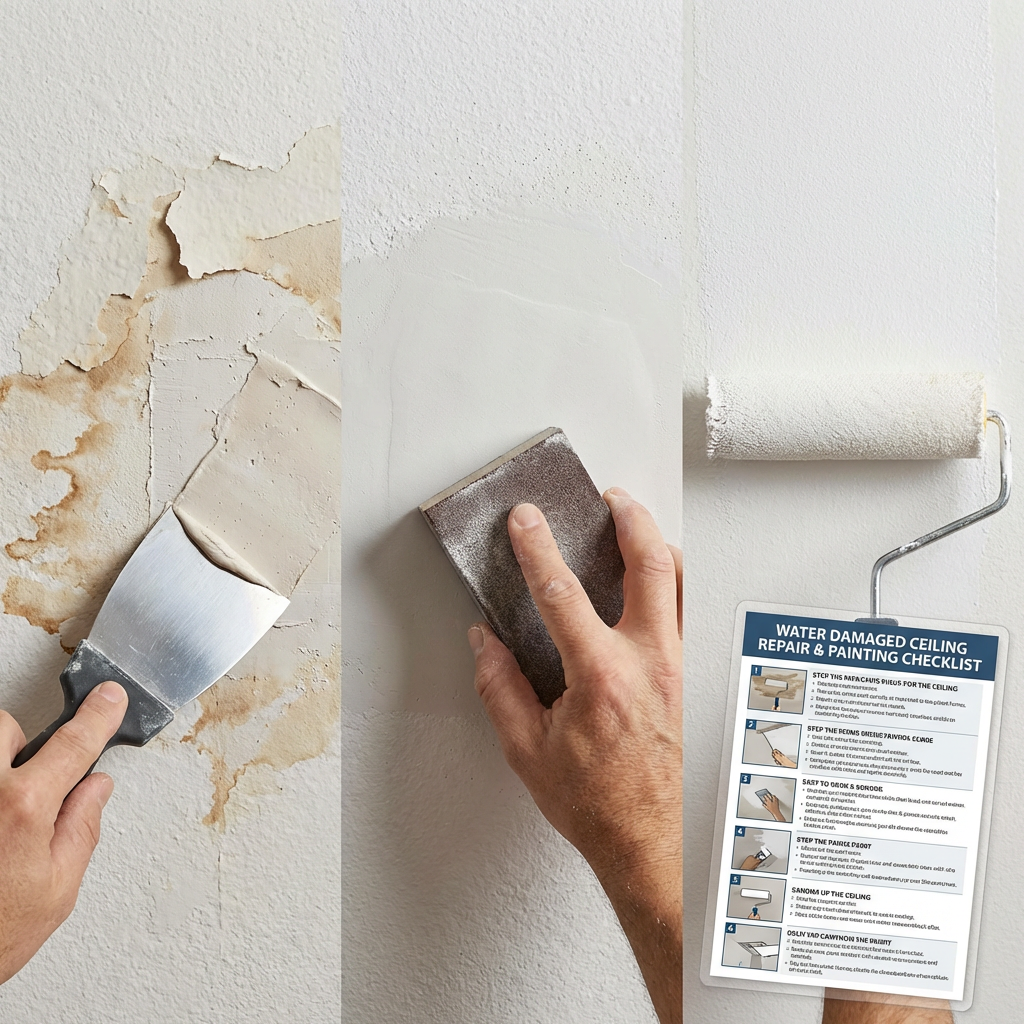
Step 1: Remove Damaged Material – Clean Slate, Strong Foundation
We scrape off all loose paint, cracked plaster, anything showing mold or deterioration. We're using Porter-Cable sanders with HEPA dust collection systems (filtering 99.97% of particles as small as 0.3 microns) because that fine dust is nasty for your lungs and your home.
If more than 30% of the ceiling panel is damaged? We replace the whole section. Trying to patch a patchwork just doesn't make sense. Replacing gives you a fresh start. Learn more about effective [drywall repair techniques](/guides/drywall-repair-techniques).
Step 2: Apply Stain-Blocking Primer – Your First Line of Defense
This step is non-negotiable.
Look — look — I've watched homeowners burn through hundreds (sometimes over a thousand bucks) trying to paint over water stains without primer. It never works. Not once. We use Zinsser B-I-N because it's shellac-based and bonds to literally anything, or Kilz Original when we need that oil-based muscle. I've tried the water-based versions when clients ask for low-VOC options, and honestly? They don't hold up on tough stains. The shellac and oil formulas actually *bond* with tannins and nicotine and all that gnarly stuff that bleeds through.
Here's what I tell people: your neighbor's cousin might've used Kilz 2 latex and "it worked fine." Great. But was their stain from a slow roof leak that's been there eight months, or was it a quick toilet overflow they caught the same day? Because that difference matters. A lot.
#### Our Expert Primer Application Technique: Precision Matters
- **Even Coverage**: W-pattern rolling technique for uniform coverage, extending 12-18 inches beyond the visible stain. This isn't a quick swipe.
- **Adequate Drying Time**: 2-4 hours minimum (up to 24 hours depending on humidity) between coats. Rushing this kills the whole job.
- **Second Coat Application**: Severe stains or any hint of bleed-through after the first coat? Second coat goes on without hesitation. We don't take chances.
- **Streak Prevention**: Cross-rolling to eliminate lap marks. We want it flawless.
What Paint Works Best for Water Damaged Ceilings? The Finishing Touch
Acrylic latex ceiling paint. Moisture-resistant formula. Something actually designed for ceilings, not leftover wall paint from your kid's bedroom (yeah, we've seen that too).
Our Preferred Paint Choices: Performance and Aesthetics
Benjamin Moore Waterborne Ceiling Paint (N508) tops our list. Excellent coverage, zero VOCs, advanced polymer technology that performs on challenging surfaces. Provides a perfectly flat finish that hides minor imperfections beautifully.
Here's the thing: here's the thing: for clients watching the budget, Behr Premium Plus Ultra (low sheen flat) gives you solid quality at a better price point. Good hide, consistent finish, holds up well. For broader painting insights, read our guide on [choosing the best interior paint](/guides/best-interior-paint).
Application Secrets from Our Expert Team: The Art of a Flawless Finish
You can nail the prep, use the right primer, buy the best paint — and still end up with a streaky mess if you don't know how to roll it.
Real talk — I've seen $80-per-gallon paint look terrible because someone used the wrong roller or tried to stretch their coverage too thin. It's not just about slapping it on and hoping for the best.
- **Roller Nap Selection**: 3/8" nap microfiber rollers for smooth ceilings (fine, spatter-free finish). 1/2" nap woven polyester for textured ceilings like popcorn or orange peel. This makes a huge difference.
- **Maintain a Wet Edge**: To prevent lap marks — those frustrating lines where paint overlaps dry sections — we maintain a wet edge constantly. We never stop mid-ceiling. Work fast, but methodically. This is crucial for a professional look.
In-Depth Look
Detailed illustration of key concepts
Visual Guide
Infographic illustration for this topic
Sources & References
- What to Do in the First 48 Hours After Ceiling Water Damage
- Paint Water-Damaged Ceilings | Holland, PA - PAINT Philadelphia
- How to Fix Water-Damaged Ceiling: The Ultimate Guide
- How to Fix Bubbling Ceiling Paint with Professionals Help
- Best Interior & Exterior Paint Buying Guide - Consumer Reports
- Best Paint for Commercial Buildings - Miko LLC
- Building Codes, Standards, and Regulations: Frequently Asked ...
- Best Industrial Painting Brands: A 2025 Comparison Guide
Frequently Asked Questions
Need Professional Help?
Find top-rated house painters experts in your area