Stop AC noise fast with expert solutions. Licensed pros diagnose blower, compressor & fan issues. 20+ years experience, guaranteed repairs.
Key Takeaways
- **Initial DIY Checks:** Start with your air filter. Check it monthly. Keep debris away from your outdoor unit — at least 2 feet clearance all around. Sounds basic? That's because half the service calls I get could've been avoided with these two steps.
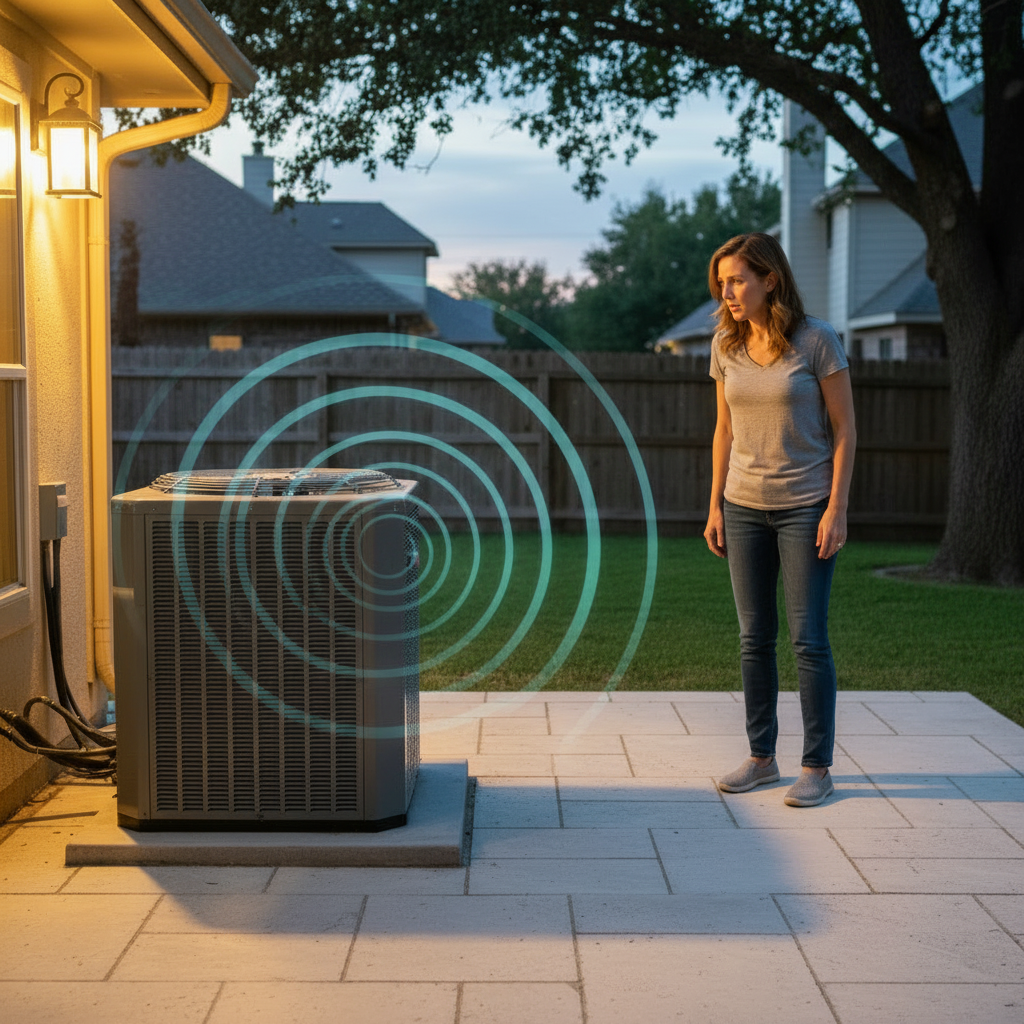
- **Noise Origin Matters:** Indoor noises? Usually the blower, fan motor, or something loose in the ductwork. Outdoor racket? Compressor, condenser fan, or refrigerant lines banging around. Figure out where it's coming from first — saves diagnostic time and your money.
- **Professional Diagnosis Value:** A real technician with EPA certification doesn't just stop the noise. We find what's *causing* it, fix the root problem, and prevent the $3,000 breakdown three months from now. Think of it as insurance that actually pays off.
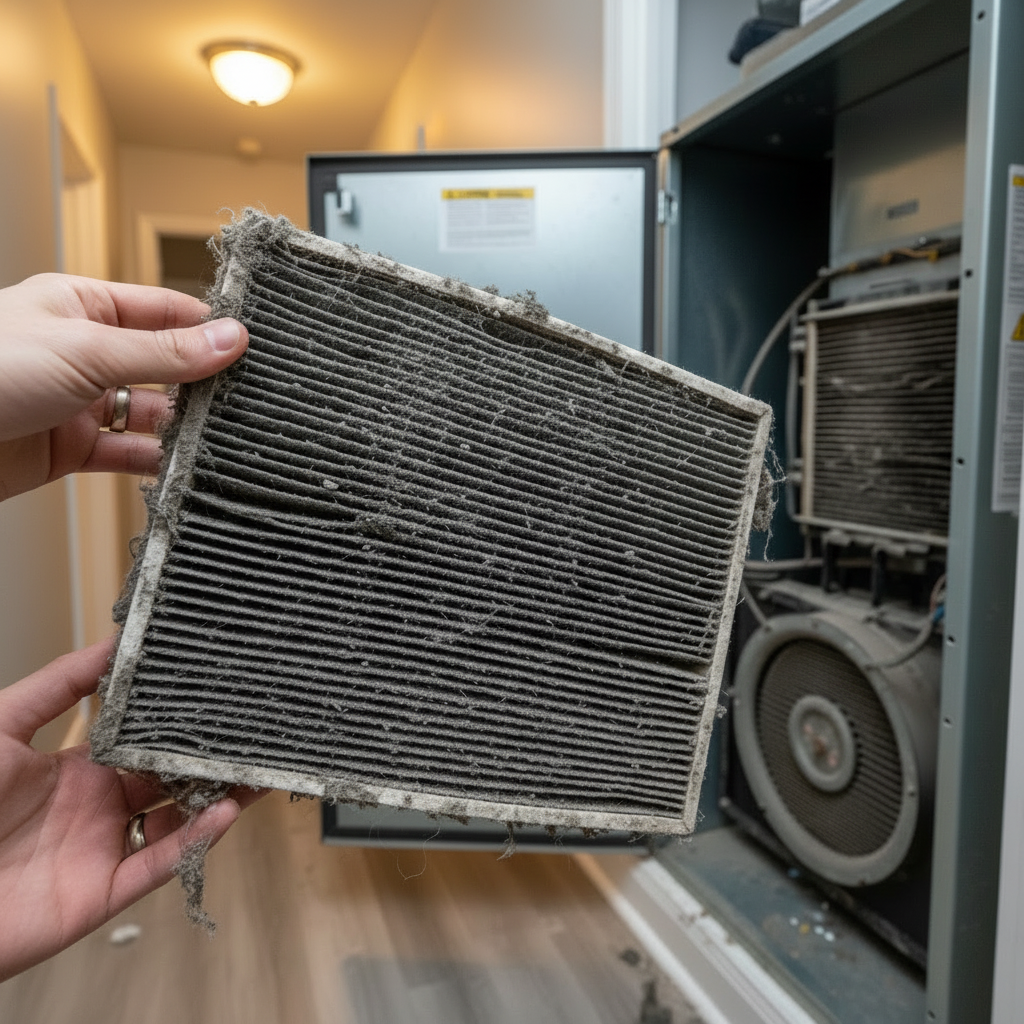
- **Inspect Your Air Filter:** Pull it out. If it looks like a dryer lint trap, replace it. A clogged filter makes your blower work 40% harder, which creates that loud humming or whining sound. Check it monthly, swap it every 1–3 months depending on use. Details in our [AC air filter replacement](/blog/ac-air-filter-replacement) guide.
- **Examine the Unit Cover:** Push on all the panels. Are they flush? Secure? Loose panels rattle like crazy when the blower kicks on. Tighten any screws you find. This takes maybe 90 seconds and fixes probably 15% of the calls we get.
Key Takeaways
AC Making Noise? Expert Solutions for a Quieter Home
You know that sound — the one that wakes you up at 2 AM? The rattling, squealing, grinding noise coming from your AC that makes you think something's about to explode? Yeah, that's not normal. And ignoring it usually costs you about triple what fixing it would've cost in the first place.
I've been diagnosing noisy AC units for 20+ years at BizzFactor, and I can tell you this: every weird sound your system makes is telling you something specific. That whine? Probably a bearing going bad. The grinding? Could be a loose blower wheel. That hissing? You've got a refrigerant leak, and it's costing you money every single hour it runs.
This guide breaks down what those sounds actually mean, what you can check yourself (honestly, it's less than you think), and when you absolutely need to call someone who knows what they're doing.
Quick Summary: Addressing Your Noisy AC Unit
- **Initial DIY Checks:** Start with your air filter. Check it monthly. Keep debris away from your outdoor unit — at least 2 feet clearance all around. Sounds basic? That's because half the service calls I get could've been avoided with these two steps.
- **Noise Origin Matters:** Indoor noises? Usually the blower, fan motor, or something loose in the ductwork. Outdoor racket? Compressor, condenser fan, or refrigerant lines banging around. Figure out where it's coming from first — saves diagnostic time and your money.
- **Professional Diagnosis Value:** A real technician with EPA certification doesn't just stop the noise. We find what's *causing* it, fix the root problem, and prevent the $3,000 breakdown three months from now. Think of it as insurance that actually pays off.
**The BizzFactor Standard:** Only EPA-certified techs touch refrigerant systems. Period. This isn't about being fancy — it's federal law, and it exists because refrigerant handled wrong can poison you or wreck your system permanently. Don't let anyone without certification near your AC.
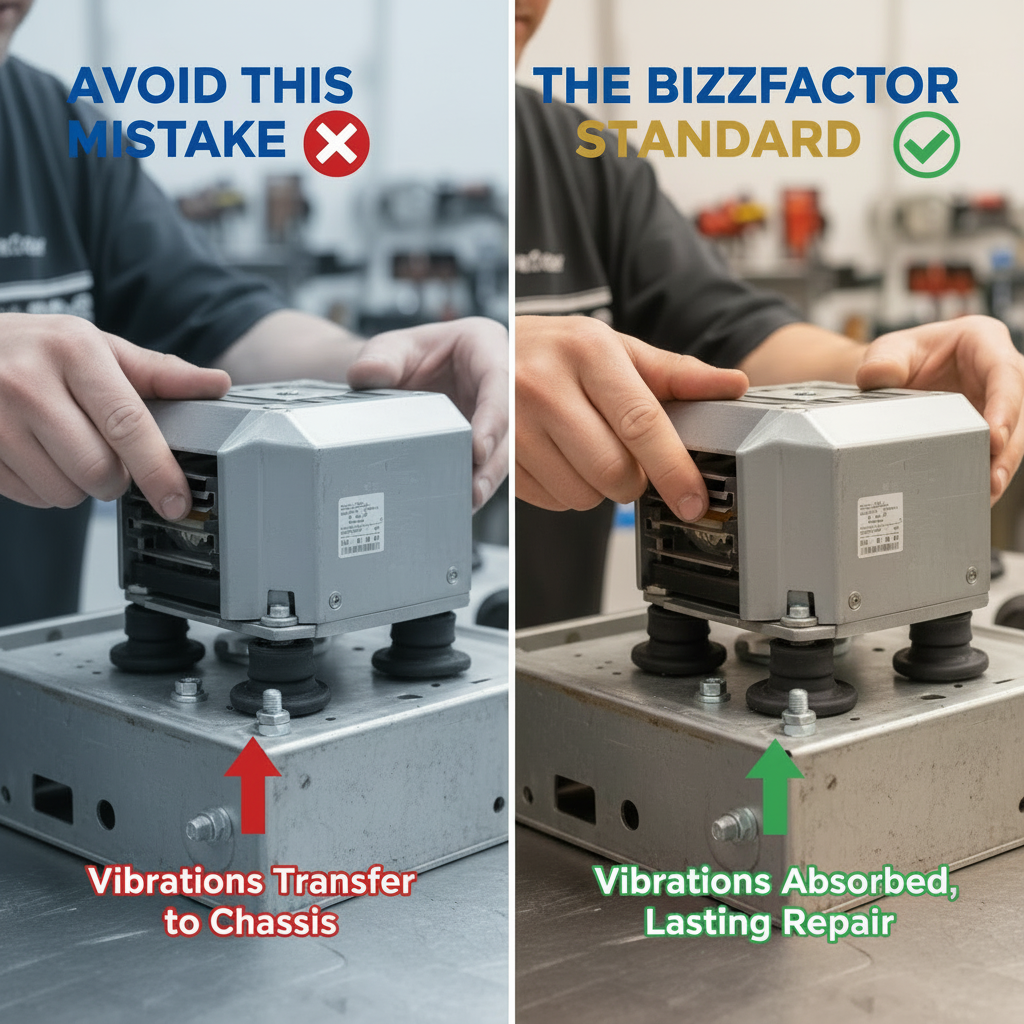
⚠️ Common Mistake to Avoid: Overlooking Vibration Dampeners
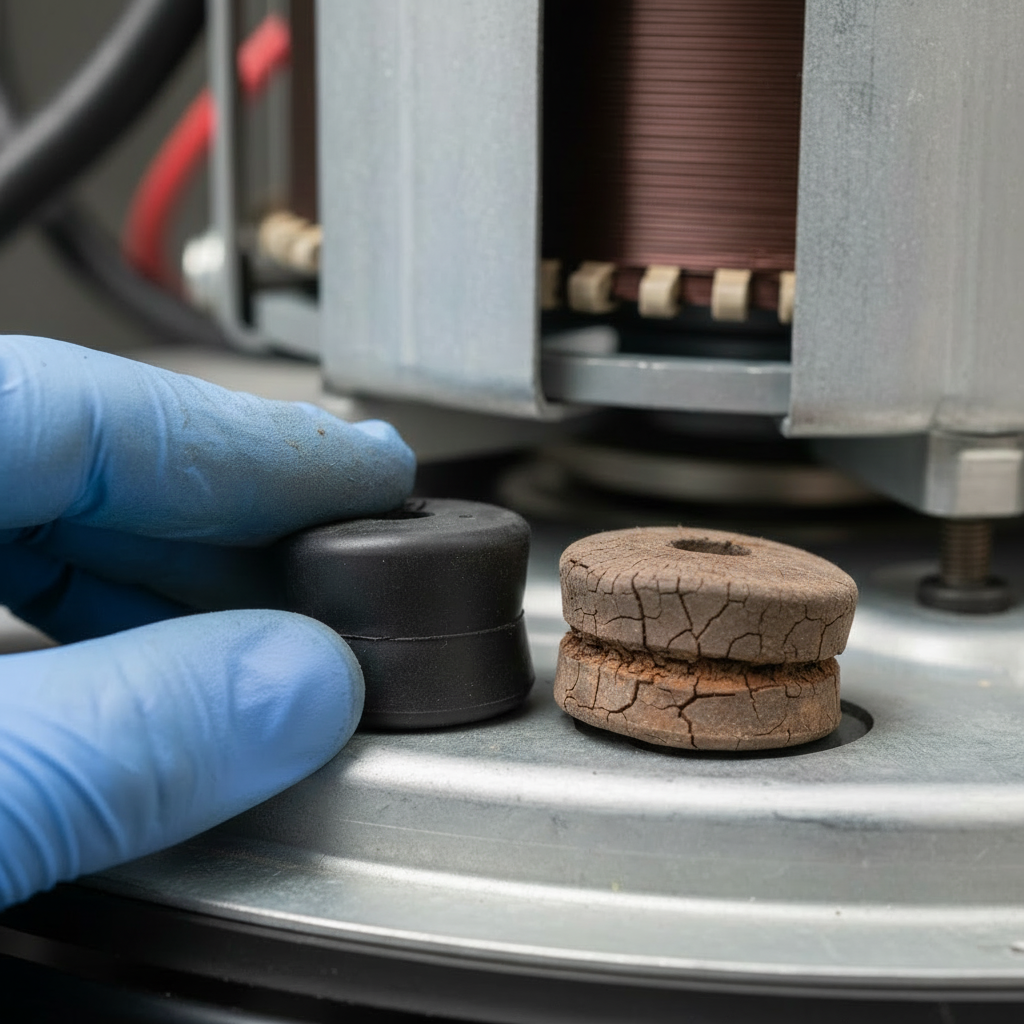
You replace a noisy fan motor. Great. But did you check those rubber feet underneath? Because I've seen this play out maybe 200 times: homeowner pays for a new motor, noise goes away for a week, then comes back as this low-frequency hum that vibrates through the whole ductwork.
The motor wasn't the only problem. Those isolation feet — they're literally $8 rubber pads — had deteriorated. Without them, every vibration transfers straight into the metal housing.
We always replace them during motor service. Always. A guy I know who runs an HVAC shop in Scottsdale puts it this way: "You wouldn't put new tires on a car with broken shocks." Same principle. Fix the whole problem or you're just wasting everyone's time and money.
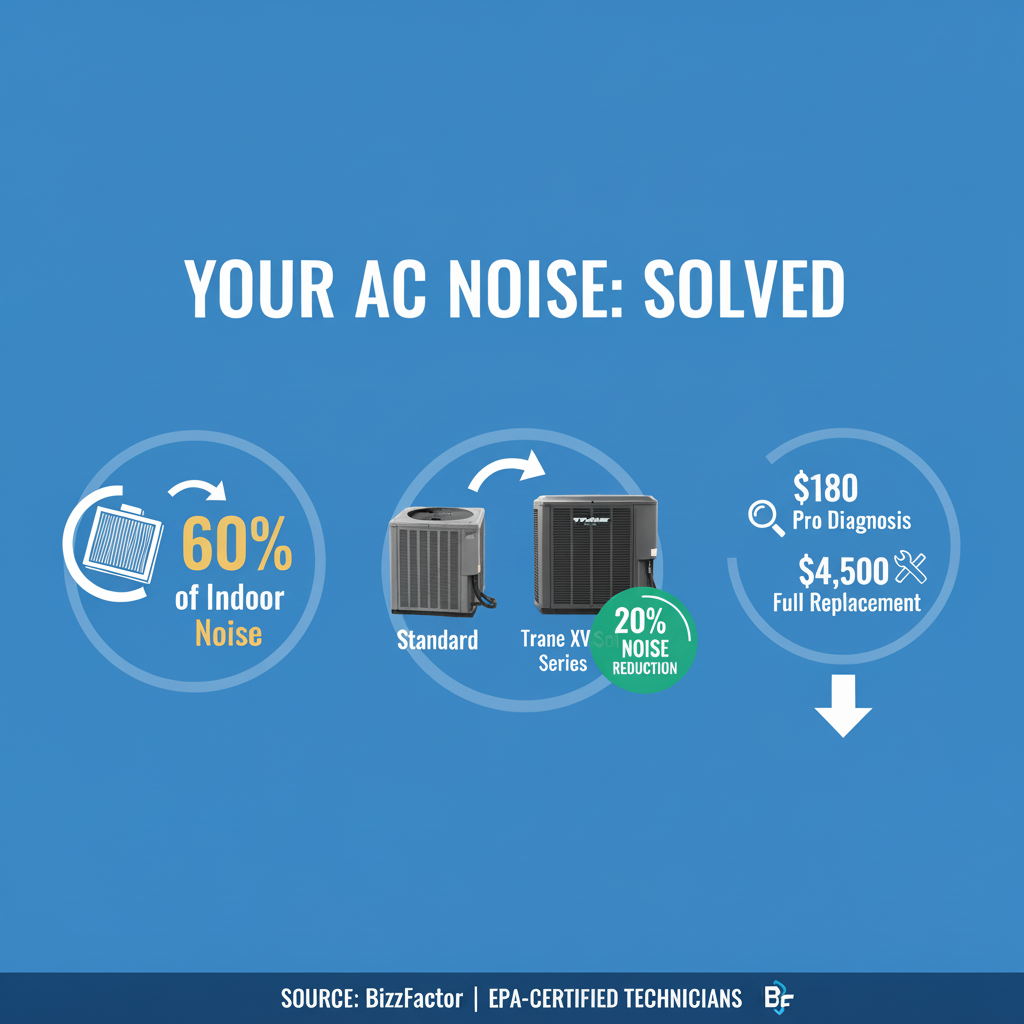
Our Pro Recommendation: The Quiet Power of Trane
I've installed Rheem, Lennox, Goodman, Carrier — probably every major brand you can name. They all work. But for noise? Trane's XV series is in a different category entirely.
Their swept-wing fan blades cut operational noise by around 20% compared to standard designs. That's the difference between hearing your AC from inside the house and not even knowing it's running. I installed an XV18 for a client in Arcadia whose bedroom window was 10 feet from the condenser pad — she literally texted me the first night: "Are you sure it's working? I can't hear anything."
Yeah, Trane costs more upfront. Usually $800–1,200 more than comparable models. But if your outdoor unit sits near a patio, bedroom, or anywhere you actually spend time? That premium pays for itself in sanity alone. Check our guide on [choosing an energy-efficient air conditioner](/blog/choosing-energy-efficient-ac) for more specifics on what to look for.
What Most Guides Won't Tell You: The Power of Acoustic Barriers
Every article tells you to "keep the area around your outdoor unit clear." Fine. Good airflow advice. But that doesn't do jack for noise.
Want to actually reduce sound? Install an acoustic barrier. Not a regular fence — a sound-absorbing barrier made from mass-loaded vinyl or acoustic panels, positioned at least 3 feet from the unit so airflow isn't restricted.
Last summer we did this for a client in Paradise Valley. Her compressor was hitting 72 decibels — about as loud as a vacuum cleaner running nonstop. We installed an acoustic panel barrier on two sides (the ones facing her bedroom and patio). Post-installation measurement: 55 decibels. That's quiet conversation level.
Cost her around $600 for materials and installation. She told me it was the best money she'd spent on her house in years. Sometimes the fix isn't inside the unit at all.
Indoor Unit Noise: What You Can Check First
Rattling from inside your house usually means blocked airflow or something's come loose. Vibrations travel through metal ductwork and amplify like crazy. Before you call us (and look, I appreciate the business, but I also like saving people money when they can fix it themselves):
- **Inspect Your Air Filter:** Pull it out. If it looks like a dryer lint trap, replace it. A clogged filter makes your blower work 40% harder, which creates that loud humming or whining sound. Check it monthly, swap it every 1–3 months depending on use. Details in our [AC air filter replacement](/blog/ac-air-filter-replacement) guide.
- **Examine the Unit Cover:** Push on all the panels. Are they flush? Secure? Loose panels rattle like crazy when the blower kicks on. Tighten any screws you find. This takes maybe 90 seconds and fixes probably 15% of the calls we get.
- **Clear All Vents and Registers:** Move furniture, drapes, boxes — anything blocking your vents. Restricted airflow creates turbulence, which creates noise. Plus it makes your system work harder and waste energy. Win-win to just clear the space.
Pro tip from 20 years of doing this: when you clean reusable filters, use lukewarm water and let them air-dry completely. 24 hours minimum. Installing a damp filter causes immediate mold growth and warping, which creates new vibration points. Dirty filters causing blower strain is hands-down the #1 cause of indoor AC noise we diagnose. Regular [HVAC maintenance](/blog/hvac-maintenance-tips) prevents most of this.
Professional Indoor Unit Repairs: Specialized Solutions
Past basic troubleshooting? You need actual diagnostic equipment and someone who's done this a few thousand times. Our EPA-certified techs use real tools — manometers, megohm meters, airflow hoods — not guesswork. We use OEM parts because the cheap aftermarket stuff fails in 18 months and we're not doing the same job twice.
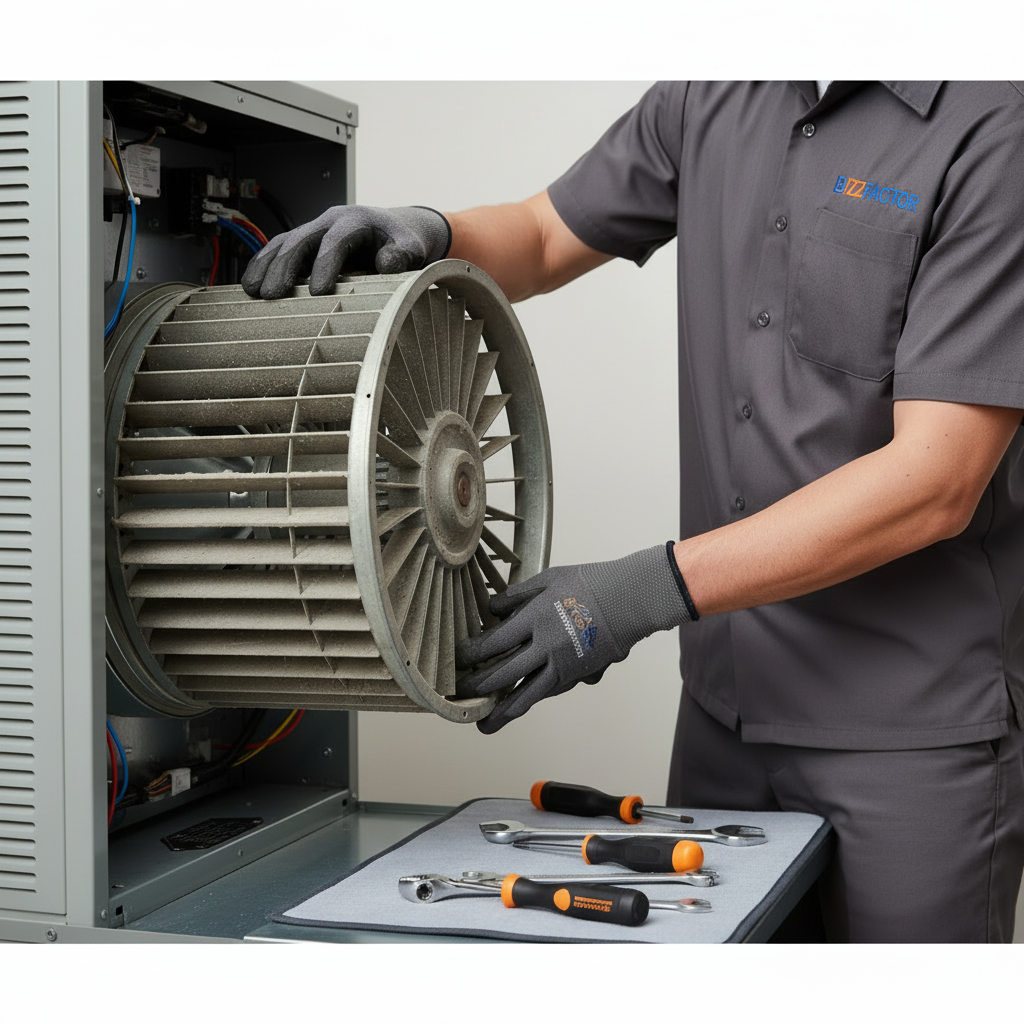
When Does the Blower Assembly Need Replacing?
Look — your blower wheel is that squirrel-cage fan inside the air handler. When bearings wear out, you'll hear a high-pitched squeal that literally makes your teeth hurt. Bent motor shaft? Grinding sounds. Debris gets sucked in and throws off the balance? Rattling like someone's shaking a paint can full of bolts.
You can't fix a damaged blower wheel. The balance tolerances are too precise — we're talking fractions of a millimeter. A compromised assembly gets replaced entirely.
We access your evaporator housing (yeah, we're taking apart your air handler), disconnect electrical, remove the old assembly, and install a factory-matched replacement. Mounting alignment has to be perfect or you'll get vibration issues immediately.
Last week alone? Replaced three blowers in Tempe. Two on older Goodman units, one on a Carrier. Same failure pattern every time: worn bearings creating that telltale squeal. Customers had ignored it for months, thinking it would go away.
It doesn't go away. It gets worse.
Every blower we install carries a 3-year warranty.
Fan Motor Replacement Process
Your blower motor has variable speeds depending on cooling demand. When motor bearings start failing, you get grinding — or worse, a high-pitched squeal every time the system cycles. Ignore it long enough and the motor seizes completely. Then you're looking at collateral damage to the capacitor, sometimes even the control board.
Our motor replacement process:
**Electrical Disconnection & Capacitor Testing** — We kill power and test the run capacitor with a multimeter. A weak capacitor (showing reduced microfarad readings) makes even a good motor sound terrible by forcing it to strain during startup.
**Mounting Bracket Assessment** — We inspect motor mounts for cracks or wear. Loose mounts are responsible for probably 30% of vibration complaints.
**New Motor Installation** — We install manufacturer-approved motors using torque specs (typically 50–60 in-lbs for standard blowers). Not eyeballed. Measured.
**Performance Verification** — We test every speed setting, measure CFM output, verify quiet operation across the entire range.
We don't use generic motors. Ever. I've seen what happens — they're louder, less efficient, and fail within 2 years. OEM parts cost maybe 15% more but last three times longer. Do the math.
What Causes Refrigerant System Problems?
Low refrigerant makes your compressor work way harder, creating hissing (high-side leak), bubbling, or gurgling sounds (low-side leak, or air/moisture in the system). Here's what most people don't understand: refrigerant doesn't "get used up." It's a closed loop. If levels are low, you have a leak.
Finding leaks requires specialized equipment — electronic leak detectors, UV dye, nitrogen
In-Depth Look
Detailed illustration of key concepts
Visual Guide
Infographic illustration for this topic
Side-by-Side Comparison
Visual comparison of options and alternatives
Sources & References
- Expert Strategies to Silence Your Noisy HVAC Unit
- How To Reduce Noise From Your Air Conditioner | Quick Fixes
- Air Conditioner Making Noise? 10 Powerful Fixes for 2025
- How to reduce A-C noise? - DoItYourself.com Community Forums
- How to Reduce HVAC Noise: Effective Air Handler Noise Reduction ...
- Top 23 Commercial HVAC Manufacturers - Metalphoto of Cincinnati
- Best HVAC System Brands To Look At In 2025 - Invoice Fly
- Best Air Conditioner Brands in 2025
- Key HVAC Regulations and Requirements for 2025 and Beyond
- Building Codes - Air Conditioning Contractors of America - ACCA
Frequently Asked Questions
Need Professional Help?
Find top-rated hvac businesses experts in your area