Expert undermount vs drop-in sink installation guide. Compare costs, materials, and maintenance. Professional tips from licensed installers.
Key Takeaways
- **Undermount Installation:** You'll need specialty equipment for this one — especially when you're cutting through stone or quartz (and I mean *real* diamond-blade stuff, not some Home Depot rental). The basin gets attached from underneath, glued and supported directly to the countertop's underside. We're talking specialized two-part epoxy adhesives here — marine-grade if possible — plus those little mechanical clips that keep everything from sagging. And here's what most people don't realize: that cut edge needs to be polished smooth afterward. That's how you get the seamless look everyone wants. This isn't a YouTube-tutorial kind of job.
- **Drop-In Installation:** Way simpler by comparison. The sink literally drops into a pre-cut hole from the top. That rim sits right on your counter surface. You run a bead of plumber's putty or silicone underneath the rim (creates your waterproof seal), then clip it in from below. The rim itself supports the weight and protects that cut edge. A decent DIYer *could* handle this, but honestly? Most people still call us. Less stress that way.
- **Sink Unit (Kohler Prolific K-5540-NA):** $295
- **Professional Installation:** $290 (including precise quartz cutting and polishing)
- **Plumbing Modifications:** $100 (adjusting P-trap and supply lines for new sink depth)
Key Takeaways
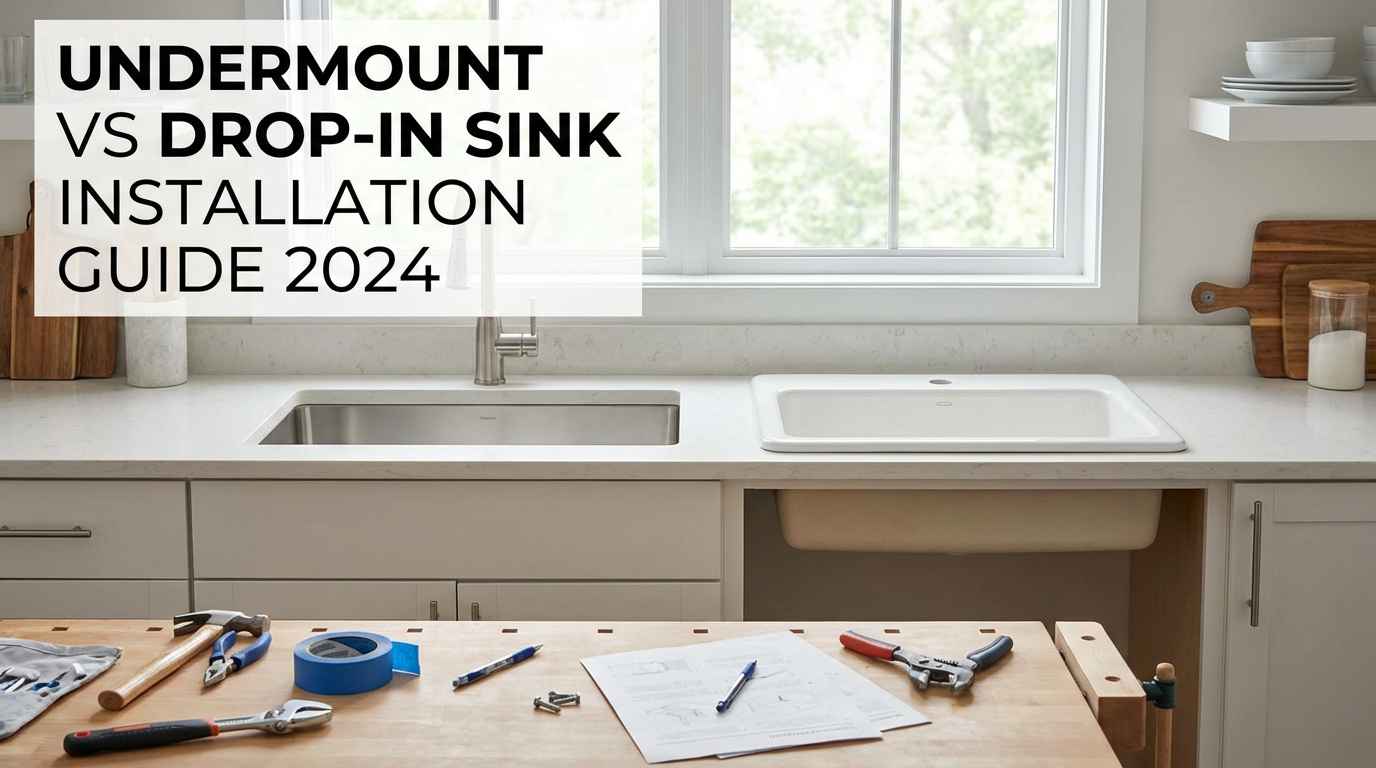
Undermount vs. Drop-In Sinks: What's Best for Your Kitchen in 2024? A Pro's Perspective
Choosing the right kitchen sink isn't just about how it looks. It's a huge functional decision for your home, seriously affecting your daily life. As licensed pros who've successfully installed well over 500 sinks across Colorado, we've seen it all. That's the real issue. We know the ins and outs of this choice better than most. This in-depth guide from BizzFactor will help you cut through the confusion, zeroing in on what truly matters for your kitchen's longevity, style, and, most importantly, your peace of mind.
Undermount vs. Drop-In Sinks: The Core Differences Unpacked
Look — look — the real distinction between undermount and drop-in sinks boils down to one simple thing: how they sit with your countertop. It's all about that visual integration and the installation method. Big difference, right? **Undermount sinks** – they're installed *underneath* the countertop. This creates a beautifully seamless, integrated surface. Super sleek. In stark contrast, **drop-in sinks** (you might hear them called top-mount or self-rimming sinks) – they, well, *drop in* from above. They've got a visible rim that rests right on the counter. That rim? It acts like a little barrier, defining the sink's edge against the countertop. Don't underestimate this difference; it's more than aesthetics.
So, what's guiding your choice here? Mostly, it's your countertop material. That's the real killer. Solid, non-porous surfaces like natural stone (granite, marble) or engineered quartz? They're perfect for undermount installations. They can handle the stress. But laminate and some other materials simply *need* a drop-in design. Why? Structural support and moisture resistance are the main reasons. You can't just force it; you'll invite disaster.
From our extensive experience, undermount sinks deliver that coveted sleek, modern aesthetic. Think professional kitchens – that's the vibe. The big bonus? No rim means no food scraps getting trapped. You can just wipe crumbs and liquids directly into the basin. Effortless. This feature significantly boosts kitchen hygiene and cuts down on daily cleaning time. Who doesn't want that?
Now, drop-in sinks. They're incredibly versatile and, frankly, often more budget-friendly. They're generally easier and quicker to install and replace. That makes them an excellent pick for budget-conscious homeowners or for specific countertop materials. Their robust design, with that prominent rim, helps distribute weight and protect the countertop edge. They're true workhorses in busy kitchens. Hard to argue with that practicality.
We've seen countless installation scenarios. And without a doubt, your countertop *always* dictates the viable sink options. Trying to force an undermount sink into an unsuitable material, like laminate, is a recipe for disaster. Seriously. We even remember a recent inspection in Thornton, Colorado, where a homeowner tried exactly this. The end result? Extensive water damage and a completely ruined countertop. Not a pretty sight at all.
The Nitty-Gritty on Installation Methods:
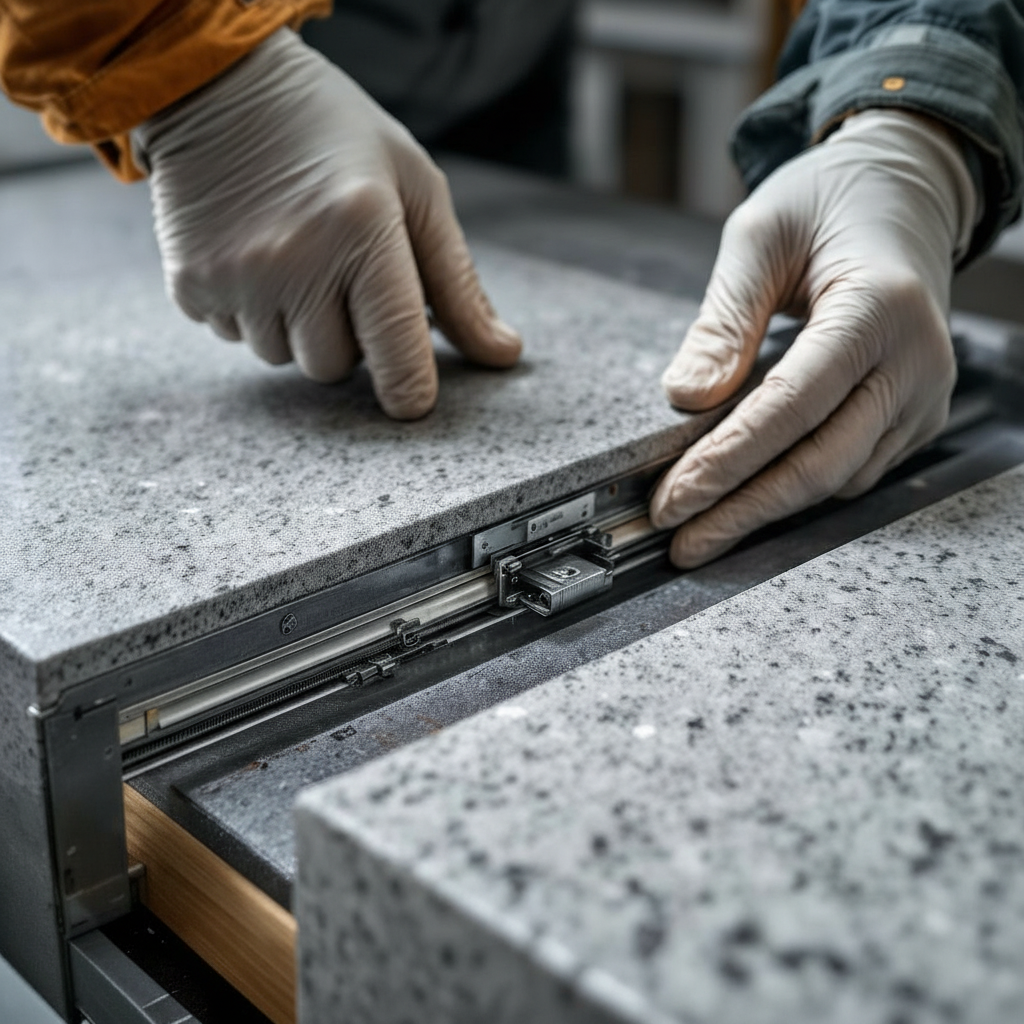
- **Undermount Installation:** You'll need specialty equipment for this one — especially when you're cutting through stone or quartz (and I mean *real* diamond-blade stuff, not some Home Depot rental). The basin gets attached from underneath, glued and supported directly to the countertop's underside. We're talking specialized two-part epoxy adhesives here — marine-grade if possible — plus those little mechanical clips that keep everything from sagging. And here's what most people don't realize: that cut edge needs to be polished smooth afterward. That's how you get the seamless look everyone wants. This isn't a YouTube-tutorial kind of job.
- **Drop-In Installation:** Way simpler by comparison. The sink literally drops into a pre-cut hole from the top. That rim sits right on your counter surface. You run a bead of plumber's putty or silicone underneath the rim (creates your waterproof seal), then clip it in from below. The rim itself supports the weight and protects that cut edge. A decent DIYer *could* handle this, but honestly? Most people still call us. Less stress that way.
Real-World Damage from Incorrect Installation: A Hard Lesson Learned
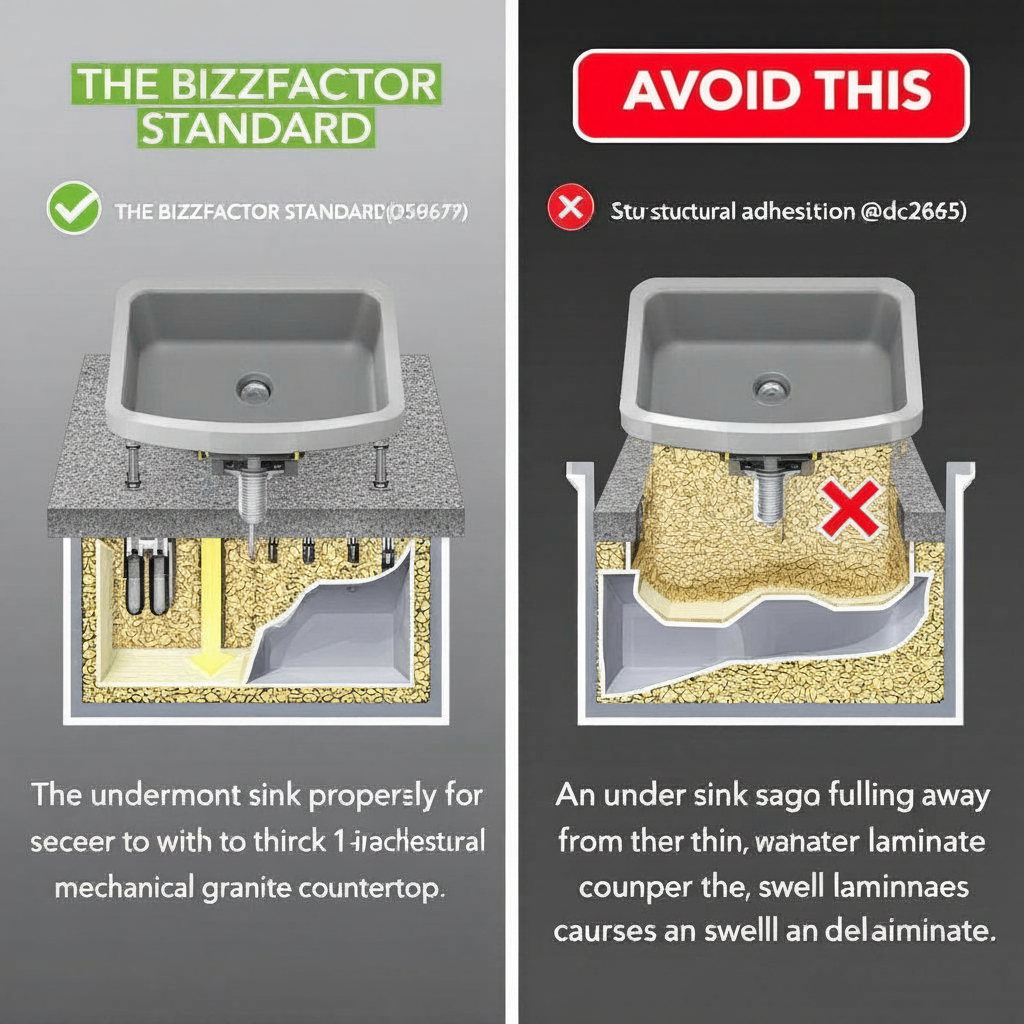
Here's the thing: here's the thing: one home in Denver provided us with a stark, painful example of improper installation. Someone had put an undermount sink into laminate countertops – a big no-no. Don't skip this. Within months, after consistent water exposure, the particleboard substrate of the laminate began to swell and delaminate. The sink literally dropped by six inches! This caused severe water damage to the entire cabinet base below, necessitating extensive mold remediation and cabinet replacement. The repair costs for *that single error* soared to $3,200. It happens. This story highlights the absolute importance of correct material pairing. It's not a suggestion; it's a necessity for preventing catastrophic failure.
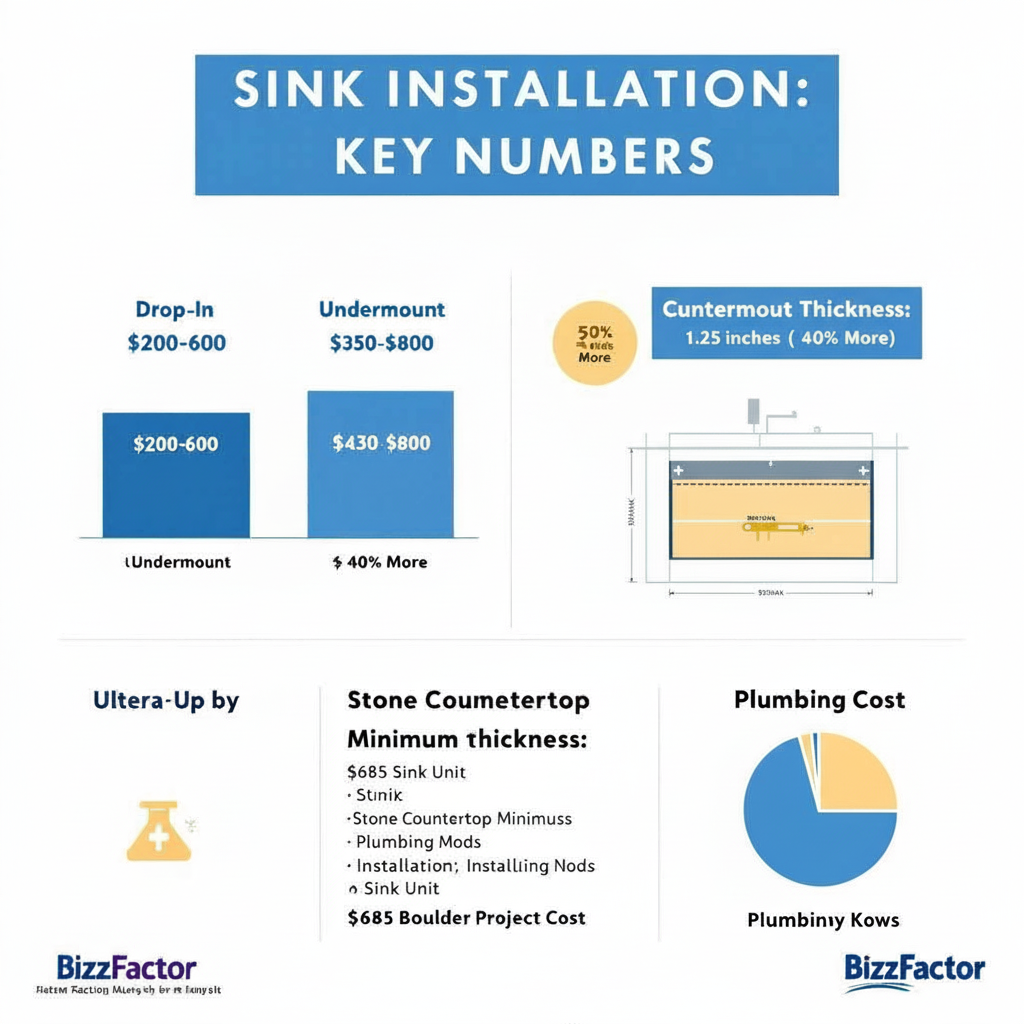
You know what the International Residential Code says about this? Stone countertops for undermount applications need to be at least 1.25 inches thick. That's not a "nice to have" — it's code for a reason. We've turned down jobs where homeowners wanted to skip this requirement. Not worth the liability, and honestly, not fair to them when their sink fails two years down the road. Building codes exist because someone, somewhere, made exactly that mistake and paid the price.
Professional Sink Installation Costs: What to Expect in 2024
So what'll this actually cost you? Depends on a bunch of stuff — sink type, how complicated the job gets, what contractors charge in your area (Denver rates aren't the same as Fort Collins, trust me). Drop-in installations usually run $200-$600, give or take. Undermount? You're probably looking at $350-$800, sometimes more. Yeah, undermounts cost 25-40% more. Makes sense when you think about it — we need specialized tools for the cutting, we're spending more time getting everything precise, and the adhesives and sealants we use aren't cheap. You're paying for expertise that prevents $3,000 mistakes.
A couple things'll push your price up or down:
1. **Sink Dimensions & Type:** Got a bigger sink? Or an unusually shaped one? Maybe a farmhouse or an integrated sink? They'll likely need extra support or custom cutting. That adds time and cost. A large, double-bowl undermount takes more effort than a standard single-bowl drop-in.
2. **Countertop Material:** Stone and engineered quartz demand specialized diamond tools for precise, chip-free cuts. This adds to labor time and requires material-specific expertise. It's not just any saw; it's a dedicated piece of equipment handled by a seasoned pro.
3. **Plumbing Modifications:** If you need new plumbing lines, drain configurations, or garbage disposal hookups, expect an extra $150-$300. This often means adjusting P-traps, supply lines, or vent systems. It's not always a simple swap; sometimes, it's a small remodel.
4. **Access Difficulty:** Confined spaces, tricky layouts, or existing cabinetry that blocks access? These can prolong the installation process and bump up costs. Sometimes we have to get creative, even removing cabinet facings for sufficient access.
5. **Regional Labor Rates:** Pricing for skilled labor varies wildly by geographic location. What's standard in Denver might be different in Boulder. That's a big factor in the overall cost.
Old sink removal? That's usually around $75 extra. New garbage disposal? Tack on another $125-$175 for the unit and hookup. I had a lady in Highlands Ranch nearly fall over when I mentioned the disposal cost — she'd budgeted for the sink but completely forgot about that part. These little extras add up fast, so account for them upfront.
Recent Project Highlight: Boulder Kitchen Undermount Installation
Now, now, our team recently tackled a kitchen renovation in Boulder. We installed a gorgeous Kohler Prolific 33-inch undermount sink, seamlessly integrated into a sleek 3cm thick quartz countertop. The client's total investment for the sink and installation? $685. Impressive. Here's the breakdown:
- **Sink Unit (Kohler Prolific K-5540-NA):** $295
- **Professional Installation:** $290 (including precise quartz cutting and polishing)
- **Plumbing Modifications:** $100 (adjusting P-trap and supply lines for new sink depth)
Look — trying an undermount install yourself, especially with expensive countertops? I'm gonna be real with you: that's playing with fire. You need absolute precision when cutting (we're talking measurements within 1/8 inch), you need industrial-strength adhesives, you need those mechanical clips installed *exactly* right. One mistake — just one — and you've destroyed a $2,000 quartz countertop. I've seen it happen. Three times in the past year alone, actually. That's why hiring a pro isn't just smart, it's insurance against financial disaster.
Best Practices for Professional Sink Installation
Want your sink installation to last 20+ years without problems? It comes down to three things: planning every detail, using quality materials, and not rushing the process. Following the manufacturer's specs isn't optional (they exist for good reasons), and prep work matters more than people think. Every shortcut we've seen someone take? It's led to leaks, water damage, or worse. I'm not exaggerating — ask me about the Westminster remodel where someone skipped proper sealing and ended up with $4,800 in mold remediation six months later.
So yeah, we've developed some pretty specific procedures over the years. Call them battle-tested if you want (because they're):
**Undermount Sink Installation Steps:**
1. **Templating & Layout:** We create a precise template (we're talking ±1/8 inch accuracy) for the countertop cutout. We even factor in your sink reveal preference—positive, negative, or flush. It's all about the details; precision prevents rework.
2. **Meticulous Cutting:** Diamond-bladed tools. That's what we use for clean, accurate cuts in solid surfaces. This minimizes chipping and guarantees a smooth, precise edge. It's not just a saw; it's a precision instrument. A cheap blade can ruin an expensive slab.
3. **Edge Finishing:** Every cutout edge gets polished smooth. This prevents chipping, improves aesthetics, and ensures proper sealing. It's a small step, but it makes a huge difference in the final look and durability.
4. **Specialized Adhesion:** We apply high-grade, waterproof epoxy adhesive (like a 3M Marine Adhesive or similar two-part industrial epoxy). This creates a strong, lasting bond between the sink flange and the underside of the countertop. This bond *can't* fail. We give it ample cure time.
5. **Robust Mechanical Support:** Support clips or custom bracing — this is non-negotiable. They provide long-term structural support and stop sagging, which is especially critical for big double-bowl sinks that see heavy use. You don't want a sinking sink situation. (Yeah, I've seen that too. It's as bad as it sounds.) This step is structural necessity, not an optional upgrade.
6. **Watertight Sealing:** A thin, consistent bead of clear, mildew-resistant silicone, expertly applied between the sink rim and countertop. That's how you get a completely watertight seal. It looks clean, works perfectly, and blocks out moisture.
**Drop-In Sink Installation Steps:**
1. **Accurate Tracing:** Accurately trace the sink template onto the countertop material. We make sure the alignment is spot on, accounting for faucet placement and cabinet clearance.
2. **Precise Cutting:** We cut the opening about 1/8 inch *smaller* than the sink rim. This ensures a snug fit and proper support for the rim. Makes sense, right? Too large, and it's wobbly; too small, and it won't fit.
3. **Test Fit Protocols:** A dry fit. We drop the sink into the cutout to ensure proper placement and identify any adjustments needed *before* sealing anything. This saves headaches later.
4. **Sealant Application:** We apply either plumber's putty or a high-quality silicone sealant to the underside of the sink rim. This creates that essential waterproof barrier between the rim and countertop surface.
5. **Secure Mounting:** The sink drops into place from above, and we secure it using the manufacturer's mounting clips from underneath. These clips pull the sink tight against the countertop, compressing the sealant for a watertight fit.
6. **Final Sealing:** We run a final bead of silicone around the outer edge of the rim where it meets the countertop. This provides additional moisture protection and a finished look.
Common Installation Mistakes We Fix (So You Don't Have To)
Real talk — we spend probably 20% of our time fixing other people's mistakes. Here's what we see most:
- **Insufficient Support:** Someone skips the mounting clips or uses cheap ones. Six months later, the sink's sagging and pulling away from the counter. We fixed one in Lakewood last month — homeowner's teenage son had leaned on it doing dishes, and the whole thing shifted two inches. Scary stuff.
- **Wrong Adhesive:** Not all glues work with all materials. We've pulled undermount sinks that were installed with basic construction adhesive. It doesn't flex with temperature changes, so it cracks. Then water gets in. Then you're calling us for a $1,200 repair.
- **Improper Sealing:** Too much silicone is almost as bad as too little. It squishes out, looks terrible, and traps moisture in weird places. The right amount is a 1/8-inch bead, applied with a steady hand.
- **Ignoring Manufacturer Specs:** Every sink comes with installation instructions. They're not suggestions — they're requirements if you want your warranty to be valid. We've seen people void $800 sink warranties by deviating from the install guide.
Material Compatibility: Matching Sinks to Countertops
This is where theory meets reality. You can't just pick any sink you like and expect it to work with your existing counters. Doesn't work that way.
**Granite & Marble Countertops:**
Perfect for undermount installations. The material's dense, strong, and can handle the weight distribution. We've installed hundreds of undermounts in granite — it's actually the ideal pairing. The polished edge cutout looks incredible against natural stone. Drop-ins work too, obviously, but you're kind of wasting granite's potential if you go that route.
**Quartz (Engineered Stone):**
Same deal as granite. Quartz is actually *better* for undermounts in some ways because it's non-porous and more consistent. No weird weak spots or veining to worry about. We did a Caesarstone counter in Cherry Creek last year with a massive undermount — thing weighs probably 40 pounds, and the quartz handles it like it's nothing.
**Laminate Countertops:**
Drop-in only. Period. I don't care what some YouTube video tells you — undermounts and laminate don't mix. The particleboard core can't handle moisture exposure on the cut edge. It'll swell, delaminate, and fail. We won't even quote undermount installations on laminate anymore. Not worth the callback.
**Solid Surface (Corian, etc.):**
You can do either, actually. Solid surface is pretty forgiving. Undermounts look great because you can create an invisible seam between sink and counter (some fabricators can even thermoform the sink and counter as one piece). Drop-ins work fine too. Your choice here is mostly aesthetic.
**Butcher Block:**
Tricky. You *can* do undermount, but you need serious sealing around that cutout edge. Wood and water are natural enemies. We usually recommend drop-in for butcher block counters unless the homeowner's committed to maintaining the seal every year. I did an undermount in a butcher block counter in Boulder three years ago — homeowner reseals it every six months with marine-grade polyurethane, and it's held up great. But that's dedication most people don't have.
**Concrete:**
Either option works, but undermount looks phenomenal in concrete. The industrial vibe of polished concrete with a sleek stainless undermount? Chef's kiss. Just make sure your concrete fabricator knows what they're doing — the cutout needs proper reinforcement (usually rebar or fiber mesh near the opening).
Faucet Compatibility & Deck Configurations
Nobody thinks about this until it's too late. Your sink choice affects your faucet options, and vice versa.
**Undermount Sinks:**
Usually require deck-mounted faucets (installed in the countertop behind the sink). That means you need to drill holes in your counter — usually one for a single-handle faucet, or three for a two-handle setup with a separate spout. Some undermounts come with faucet decks built into the sink basin, which gives you more flexibility. The Kohler Prolific we installed in Boulder? It's got an integrated ledge with pre-drilled faucet holes. Genius design.
**Drop-In Sinks:**
These typically have faucet holes already drilled in the rim. Standard configuration is four holes (for two handles, spout, and soap dispenser or sprayer). But you can get them with one hole, three holes, or even no holes if you're planning a deck-mount or wall-mount faucet. Just make sure your faucet matches your sink's hole configuration — or be prepared to buy a deckplate to cover unused holes.
Pro tip: if you're replacing an existing sink, measure your current faucet's hole spacing *before* you buy a new sink. Standard spacing is 4 inches on center for widespread faucets, but not all sinks use standard spacing. That's the real issue. We've had to return sinks because the holes didn't line up with the customer's existing faucet. Pain in the ass for everyone.
Maintenance & Longevity: What to Expect
How long will your sink last? Depends on the material and how well you maintain it.
**Stainless Steel:**
Practically indestructible. A quality 16-gauge or 18-gauge stainless sink can last 30+ years easily. We see vintage stainless sinks from the 1980s that still look decent. They'll show scratches over time (that's just physics — metal on metal), but they won't crack, chip, or stain. To keep them looking good, wipe them dry after use and occasionally buff with a stainless steel cleaner. Bar Keeper's Friend is your best friend here.
**Composite Granite (Blanco Silgranit, Kraus, etc.):**
Incredibly durable and stain-resistant. These sinks are about 80% granite dust mixed with acrylic resin. They're heat-resistant, scratch-resistant, and they hide water spots better than stainless. We've got customers who've had these for 10+ years with zero issues. Only downside? They can chip if you drop something really heavy at just the right angle. Rare, but it happens.
**Fireclay & Cast Iron:**
These are the tanks of the sink world. Fireclay (like a farmhouse apron sink) can last 50+ years. Cast iron with a porcelain coating? Same deal. But that porcelain *can* chip if you're rough with it, and once it chips, the iron underneath can rust. Touch-up kits exist, but preventing chips is smarter. Don't drop cast iron skillets in there.
**Maintenance Tips We Give Every Client:**
- Never use the sink as a cutting board (sounds obvious, but we've seen knife marks in composite sinks)
- Don't leave wet sponges or steel wool sitting in the basin — promotes staining and rust
- For stainless sinks, wipe in the direction of the grain to avoid visible scratching
- Check your sink's seal annually — run your finger around the rim and feel for soft spots
- If you've got a garbage disposal, run ice cubes through it monthly to sharpen the blades and clean buildup
When to DIY vs. Hire a Pro
I'll be straight with you. Some sink installations are totally DIY-able. Others? Don't even think about it.
**Good DIY Candidates:**
- Drop-in sink replacement (same size, same hole configuration, laminate counters)
- Pre-existing cutout that matches your new sink dimensions
- You've got basic plumbing skills (can disconnect P-traps without flooding your kitchen)
- Total budget under $300
If that's you, go for it. Watch some quality tutorials, buy the right tools, take your time. You'll probably spend 3-4 hours, but you'll save $200-400 in labor.
**Call a Pro For:**
- Any undermount installation in stone or quartz
- First-time sink installations requiring new cutouts
- Farmhouse/apron sinks (these need cabinet modifications)
- Plumbing configurations you've never dealt with
- Expensive countertops you'd cry if you ruined
Last month, I quoted a job in Highlands Ranch where the homeowner had attempted a DIY undermount in quartz. Got halfway through, realized he was in over his head, and called us to finish. Seriously. Problem was, he'd already made the cutout — about 1/4 inch too large. We couldn't salvage it. He ended up replacing a $1,800 quartz slab because he wanted to save $400 on installation. Ouch.
The calculation is simple: if the cost of messing up exceeds the cost of hiring someone, hire someone. Your stress level will thank you.
BizzFactor's Installation Guarantee
We back our work with a 2-year installation warranty. That covers defects in workmanship, seal failures, and any issues related to how we installed your sink. It doesn't cover damage you cause (like dropping a cast iron pot and chipping the sink), but anything related to our installation? We fix it. No charge.
We also provide a detailed post-installation inspection checklist. Before we leave, we:
- Test for leaks by running water for 10+ minutes
- Check all seal points visually and by touch
- Verify garbage disposal operation (if applicable)
- Ensure drain flow is adequate and P-trap is properly aligned
- Clean up completely (we're not leaving a mess in your kitchen)
So — you get photos of the installation, warranty documentation, and our 24/7 emergency contact info. Had a customer whose seal failed on Christmas Eve (freak thing — temperature shock from a very hot pot). We had someone there within 2 hours. That's the level of service we're talking about.
Final Recommendations: Making Your Decision
Here's how I'd break down the decision if you're still on the fence:
**Choose Undermount If:**
- You've got granite, marble, or quartz counters
- You want that high-end, modern aesthetic
- Easy countertop cleaning is a priority
- Your budget allows for the higher installation cost
- You're planning to stay in the home long-term (or it'll boost resale value in your market)
**Choose Drop-In If:**
- You've got laminate counters
- You're on a tight budget
- You might DIY the installation
- You value simplicity and ease of future replacement
- Your kitchen aesthetic is more traditional or cottage-style
And if you're renovating? This is your chance to pick exactly what you want. Don't let your contractor talk you into a cheaper option just because it's easier for them. This is *your* kitchen. You're the one who'll be using this sink every single day for the next 15 years.
---
Need help deciding what's right for your specific kitchen? We offer free in-home consultations throughout the Denver metro area. We'll assess your countertops, discuss your needs, and give you an honest recommendation (even if that means suggesting the less expensive option). Reach out to BizzFactor — we've been doing this since 2009, and we've probably seen a setup exactly like yours before. Let's figure this out together.
In-Depth Look
Detailed illustration of key concepts
Visual Guide
Infographic illustration for this topic
Side-by-Side Comparison
Visual comparison of options and alternatives
Sources & References
- Home Bath Room Sink Guide: Best Undermount & Drop-In ...
- Undermount Sink vs. Drop-In Sink: Which Is Better?
- Undermount vs. Drop-In Sinks: Which Is Better?
- How to Choose Between Undermount and Drop-in Kitchen ...
- Drop In Sinks vs Undermount?
- Building Codes, Standards, and Regulations: Frequently Asked ...
- Building Codes and Standards - 101 Guide | ROCKWOOL Blog
- [PDF] Building Codes Toolkit for Homeowners and Occupants - FEMA
- Building Codes and Regulations - Illinois Capital Development Board
- ICC - International Code Council - ICC
Frequently Asked Questions
Need Professional Help?
Find top-rated kitchen & bath remodeling experts in your area