Learn when DIY siding repairs work vs. hiring pros. Expert guide covers costs, safety, permits & red flags. Save money or protect your investment?
Key Takeaways
- Loose panels that just need re-securing
- Small cracks (no structural compromise)
- Faded areas needing fresh paint
- Ground-level access only
- Warranty coverage on labor and materials
Key Takeaways
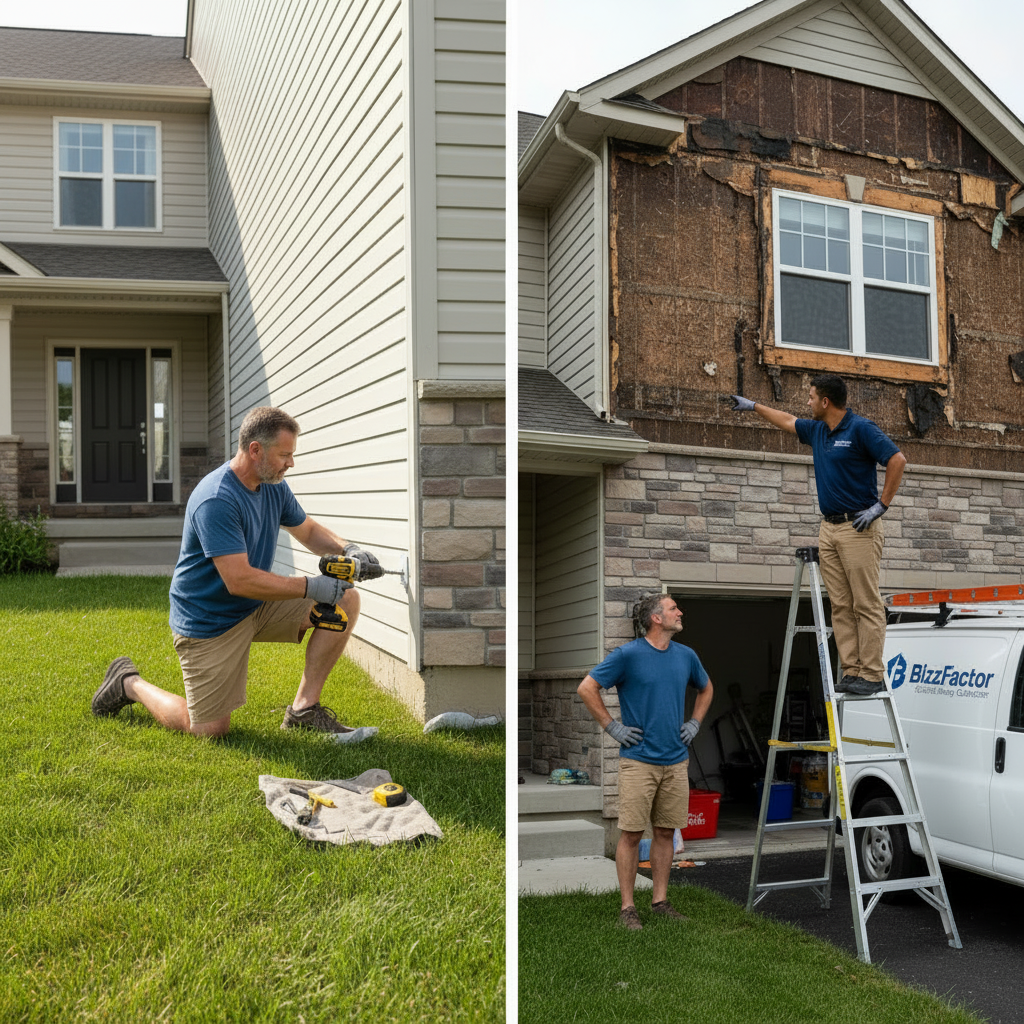
DIY vs Pro Siding Repairs: When to Call Experts
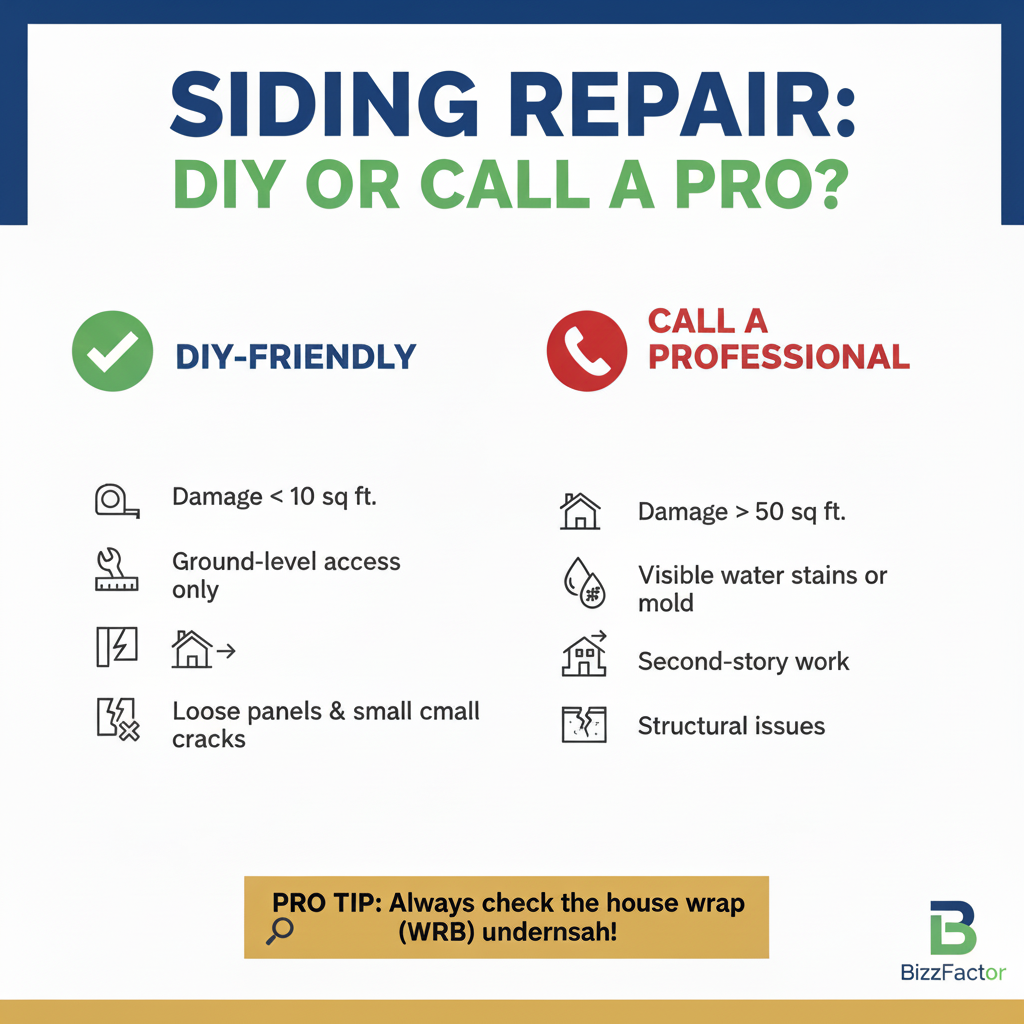
Wondering whether to fix that damaged siding yourself or call the pros? Here's the reality: DIY works for small, surface-level repairs under 10 square feet at ground level. But structural damage, water issues, or second-story work? You'll want certified contractors with 20+ years experience handling those jobs.
What Siding Repairs Can You Actually Handle?
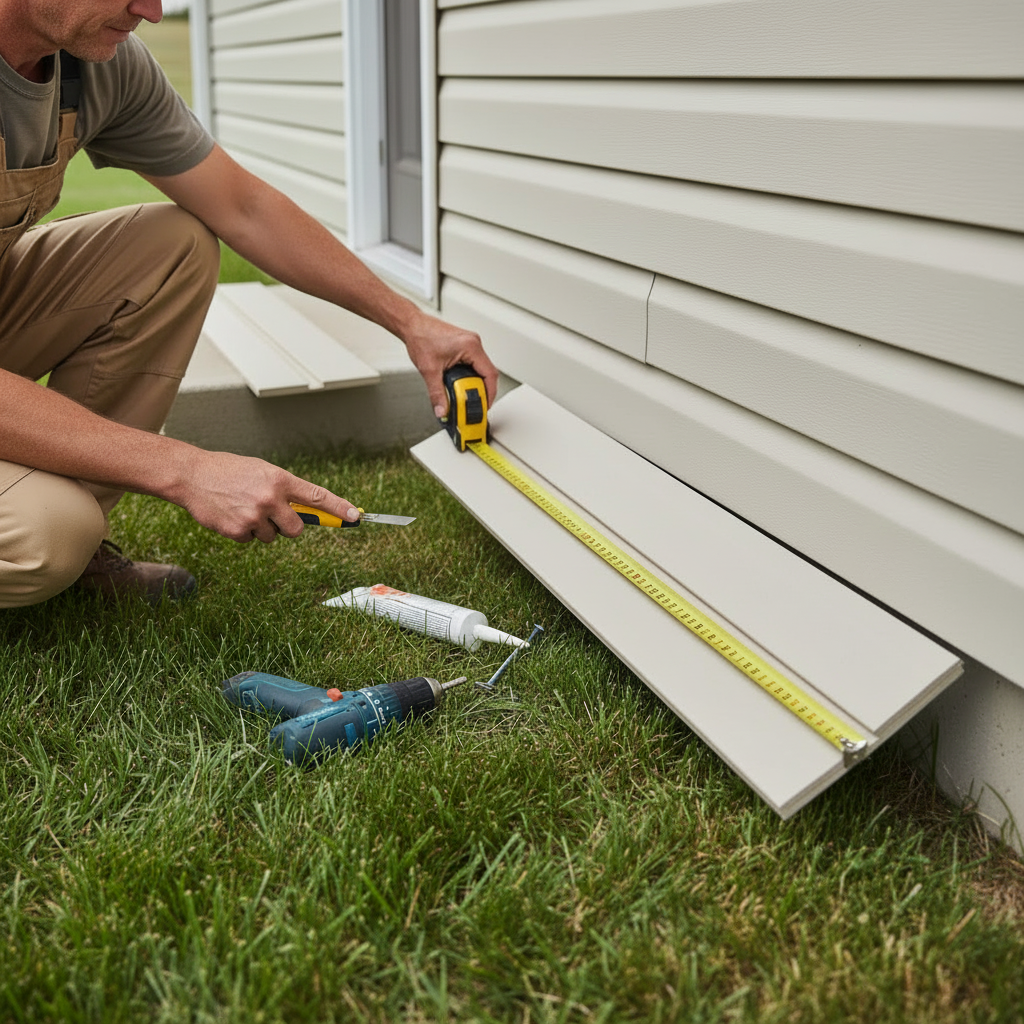
**Simple answer:** Basic DIY siding fixes include replacing single vinyl panels, caulking small gaps, and touching up paint scratches - but only if damage covers less than 10 square feet and doesn't involve structural changes.
In our experience, we've seen too many homeowners bite off more than they can chew. Our team inspected a ranch home last month where the owner successfully replaced three loose panels. Simple projects like this work well for damage you can reach from the ground.
Here's what makes a good DIY project:
- Loose panels that just need re-securing
- Small cracks (no structural compromise)
- Faded areas needing fresh paint
- Ground-level access only
You'll need basic tools: utility knives, cordless drills, measuring tape. Most hardware stores carry materials from CertainTeed, James Hardie, or Mastic. (Bring a sample for color matching - trust us on this one.)
DIY repairs typically cost $50-200 in materials versus $300-800 for professional service. Sound like a good deal? Maybe.
⚠️ Here's What Most Guides Won't Tell You
Most homeowners make a rookie mistake - focusing only on the visible panel. Many folks rush to nail up new siding without checking the house wrap underneath. We're talking about the Weather-Resistive Barrier (WRB) - that's your actual waterproofing system.
A perfect-looking patch can hide a compromised barrier. Water channels into your walls, causing thousands in rot damage. Always inspect that barrier first.
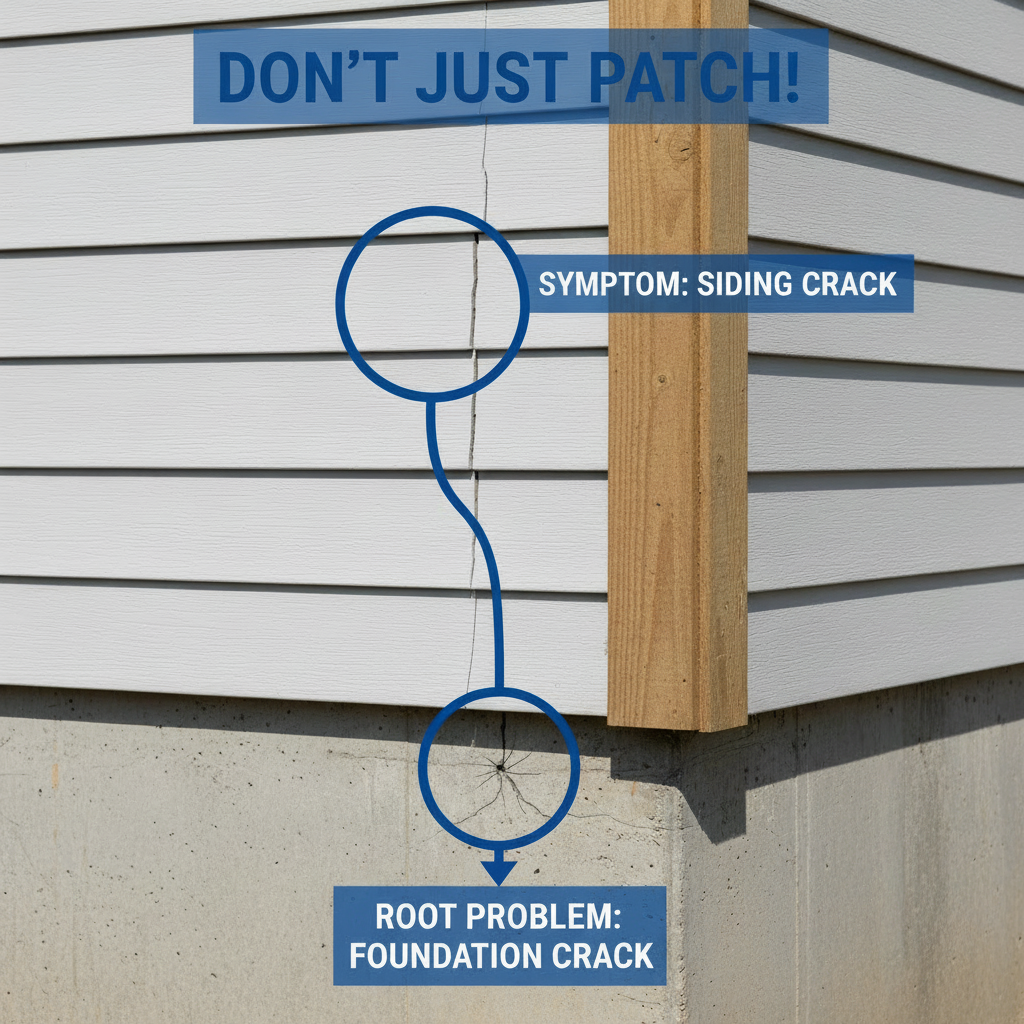
Our Pro Recommendation
If siding cracks from foundation settlement, you're treating symptoms, not the cause. Our partner A-1 Concrete Leveling uses polyurethane foam injection - it's precise and minimally invasive compared to old-school mudjacking methods. Why patch siding if your foundation keeps moving?
What's the Real Deal on Color Matching?
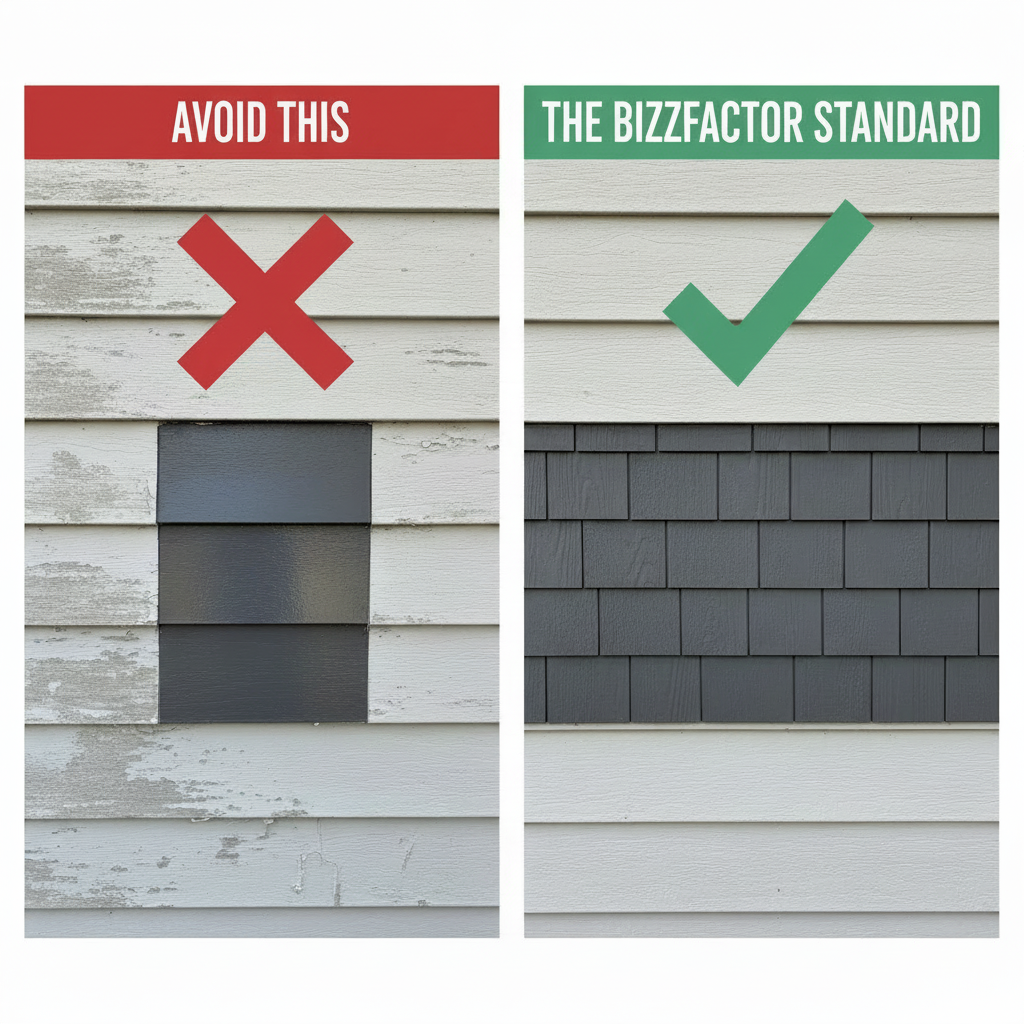
Stop chasing perfect color matches for single faded panels. It'll always look "off." Better approach? Turn that flaw into a feature. Replace the damaged area with an intentional accent panel - maybe decorative shake or board-and-batten. Looks way better than a bad match.
When Should You Definitely Call the Pros?
**Direct answer:** Structural damage, water infiltration, or deterioration beyond 50 square feet requires immediate professional assessment to prevent costly secondary damage throughout your home's building envelope.
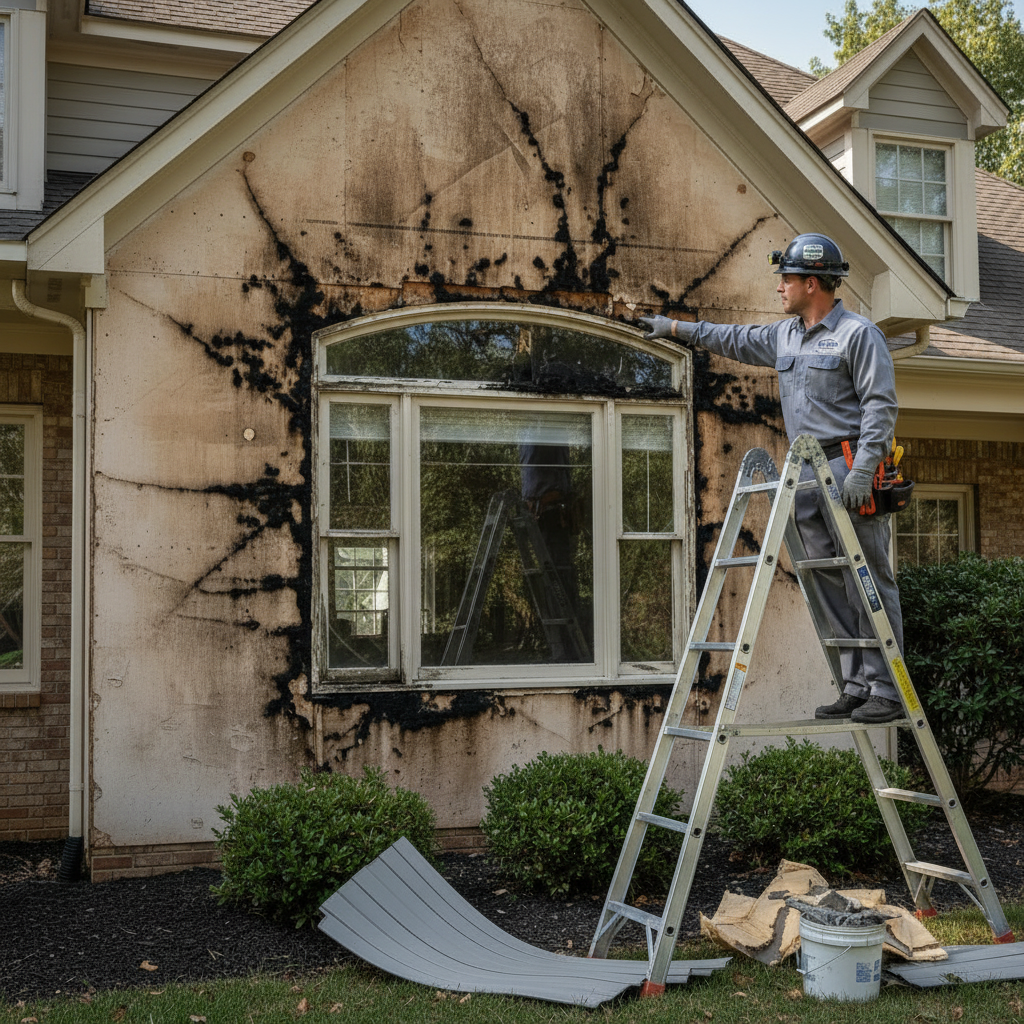
Our certified technicians encounter these warning signs regularly during inspections. Here's what screams "call the pros":
1. Siding damage over 50 square feet
2. Visible water stains or mold behind panels
3. Warped sections (indicates structural movement)
4. Any damage above second-story level
5. Work involving roofing, windows, or electrical systems
Water damage creates the biggest headaches. Moisture penetration compromises insulation, framing, and interior finishes. We use thermal imaging and moisture meters to find hidden damage that homeowners often miss.
Building codes affect your project more than you think. Modern codes require specific techniques for different materials. Take fiber cement siding - it demands precise cutting methods to prevent silica dust exposure. You'll also need specialized fasteners rated for the material's weight.
What Happens When DIY Goes Wrong?
Our team recently inspected a two-story colonial where DIY went sideways. Got started with simple panel replacement but found rotted sheathing and compromised house wrap underneath.
What began as a $300 DIY project became a $4,500 professional remediation. Without proper moisture barriers and structural repairs, that DIY approach would've created major water intrusion problems.
Here's the thing - surface damage often signals deeper structural issues requiring specialized knowledge and equipment.
How Much Will This Actually Cost You?
**Bottom line:** DIY siding repairs cost 60-75% less in materials alone, but this calculation excludes tools, time, and potential rework costs that can quickly add up.
A basic vinyl panel replacement might cost $30 in materials versus $200 professionally installed. But here's what that comparison misses:
Professional contractors provide:
- Warranty coverage on labor and materials
- Proper building code compliance
- Insurance protection against installation errors
- Access to contractor-grade materials
- Structural damage identification
So what's better - saving $170 upfront or protecting your home's integrity? Our BizzFactor Standard emphasizes proper moisture management and long-term durability over short-term savings.
What Tools Do You Actually Need for Success?
**Essential answer:** Successful DIY siding repair requires measuring tools, saws for precise cuts, drill/driver with appropriate bits, level for alignment, and safety equipment including eye protection.
We've seen too many projects fail because folks skipped proper tools. Here's your must-have list:
- Measuring tape and chalk line (accurate layout)
- Circular saw or miter saw (precise cuts)
- Drill/driver with right bits for your siding
- Level (proper panel alignment)
- Safety gear (eye protection, dust masks)
Material selection proves crucial for lasting repairs. Match existing thickness, texture, and expansion characteristics. Companies like A-1 Concrete Leveling often find foundation settlement affects siding performance - another reason to address underlying problems first.
Quality fasteners matter too. Stainless steel or galvanized screws resist corrosion better than standard hardware. Follow manufacturer spacing - typically 16 inches on center for vinyl applications.
Do You Need Permits for Siding Work?
**Permit requirements:** Most jurisdictions require permits for siding projects exceeding 100 square feet or involving structural modifications, based on International Building Code standards with local amendments.
Building codes regulate installation to ensure structural integrity, fire safety, and energy efficiency. International Building Code (IBC) and International Residential Code (IRC) provide baseline standards, but local amendments create variations.
Key code requirements include:
1. Proper flashing around windows and doors
2. Vapor barrier installation (climate-dependent)
3. Fire-resistant materials (wildfire-prone areas)
4. Minimum clearances from grade level
Permit processes involve plan submission, inspection scheduling, and final approval. Professional contractors handle these routinely, while DIY projects require navigating bureaucratic processes yourself.
Risk of skipping permits? Violating codes creates liability for insurance claims and resale transactions. Unpermitted work often requires costly remediation to achieve compliance.
When Does Weather Actually Matter?
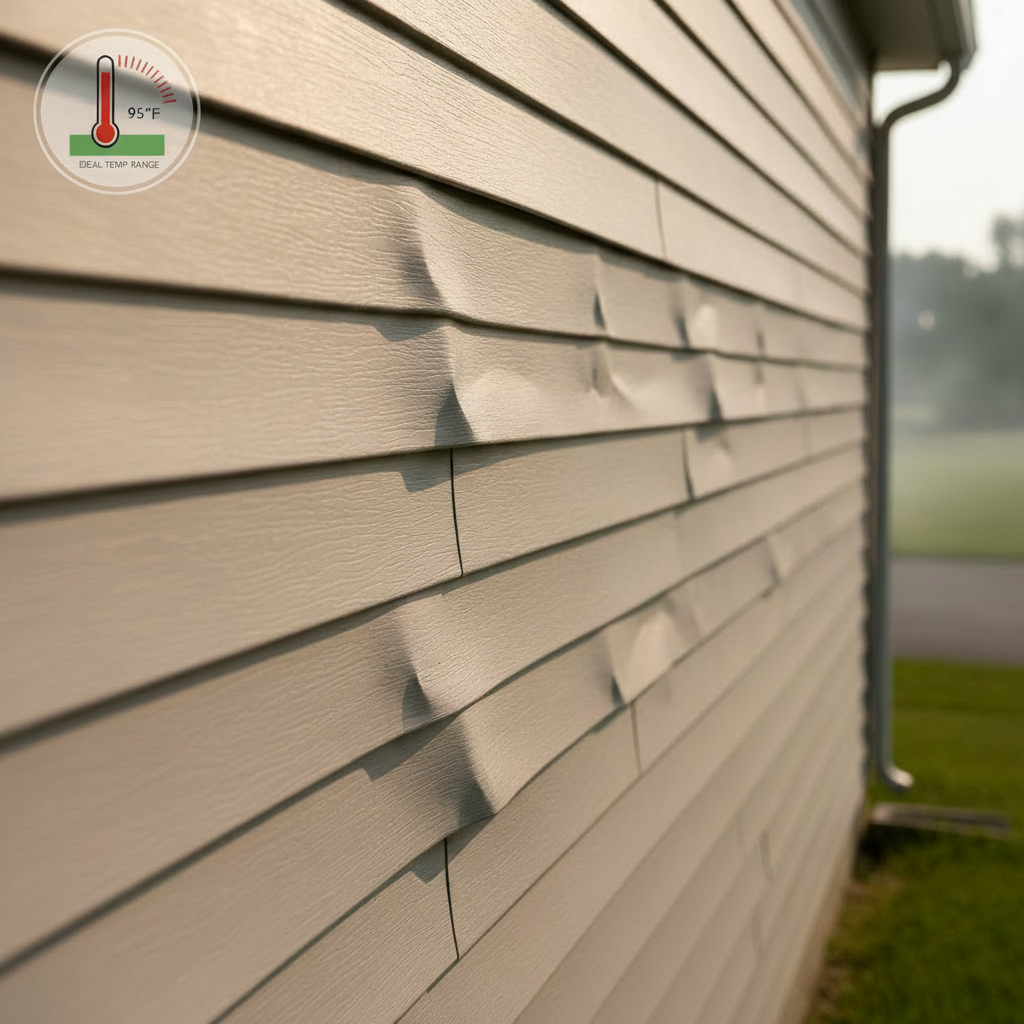
**Timing is everything:** Optimal installation occurs between 45-80°F with low humidity and minimal wind, as temperature extremes affect material performance and installation quality.
Vinyl siding expands and contracts with temperature changes. Summer installations above 85°F require looser panel attachment for thermal expansion. Winter work below 40°F makes vinyl brittle and crack-prone.
Ideal conditions include:
- Temperatures between 45-80°F
- Low humidity levels
- Minimal wind (safety and accuracy)
- Dry conditions for proper adhesion
Emergency repairs might need temporary weatherproofing until proper conditions return. Professional contractors like A1 Concrete maintain emergency response capabilities for urgent situations.
Seasonal scheduling affects material availability and contractor pricing. Spring and fall represent peak demand with higher costs and longer lead times.
How Do You Choose the Right Contractor?
**Selection criteria:** Choose contractors based on valid licensing, insurance coverage, local experience, and verifiable references rather than lowest bid pricing that often indicates corner-cutting practices.
Our certified professionals recommend these essential qualifications:
- Valid contractor license in your jurisdiction
- General liability and workers compensation insurance
- Established local business presence
- Manufacturer certifications for specific products
- Better Business Bureau accreditation
Request detailed written estimates including material specifications, labor breakdown, timeline, and warranty terms. Compare at least three qualified contractors to establish market pricing.
Verify references by contacting recent customers. Quality contractors welcome scrutiny and provide extensive work history documentation.
Reputable companies like Concrete Pro and Concrete Renovations maintain similar standards, emphasizing proper preparation, quality materials, and customer satisfaction.
In-Depth Look
Detailed illustration of key concepts

Visual Guide
Infographic illustration for this topic
Side-by-Side Comparison
Visual comparison of options and alternatives
Sources & References
- DIY vs Professional Vinyl Siding in Louisiana: Costs & Risks
- Siding Repair: DIY Tips vs. Professional Services - Cutter Construction
- DIY vs. Professional Siding Replacement: The Pros And Cons
- DIY vs. professional: When to hire a specialist for repairs
- DIY vs. Professional Home Repairs: A Clear Guide for Everyday ...
- Building Codes, Standards, and Regulations: Frequently Asked ...
- Building Codes and Standards - 101 Guide | ROCKWOOL Blog
- [PDF] Building Codes Toolkit for Homeowners and Occupants - FEMA
- ICC - International Code Council - ICC
- [PDF] Introduction to Model Codes - eird.org
Need Professional Help?
Find top-rated home services experts in your area