Quick Answer
Okay, so here's the quick version. Your fridge feels warm and your electric bill is making you sweat? Nine times out of ten, it's because the condenser coils are caked in dust and pet hair. It's like making the poor thing run a marathon with a plastic bag over its head. It can't breathe, so it can't get rid of heat. Cleaning them is dead simple, costs you almost nothing but 30 minutes of your time, and can save you from a thousand-dollar repair bill down the road. Seriously, this is the first thing you should check.
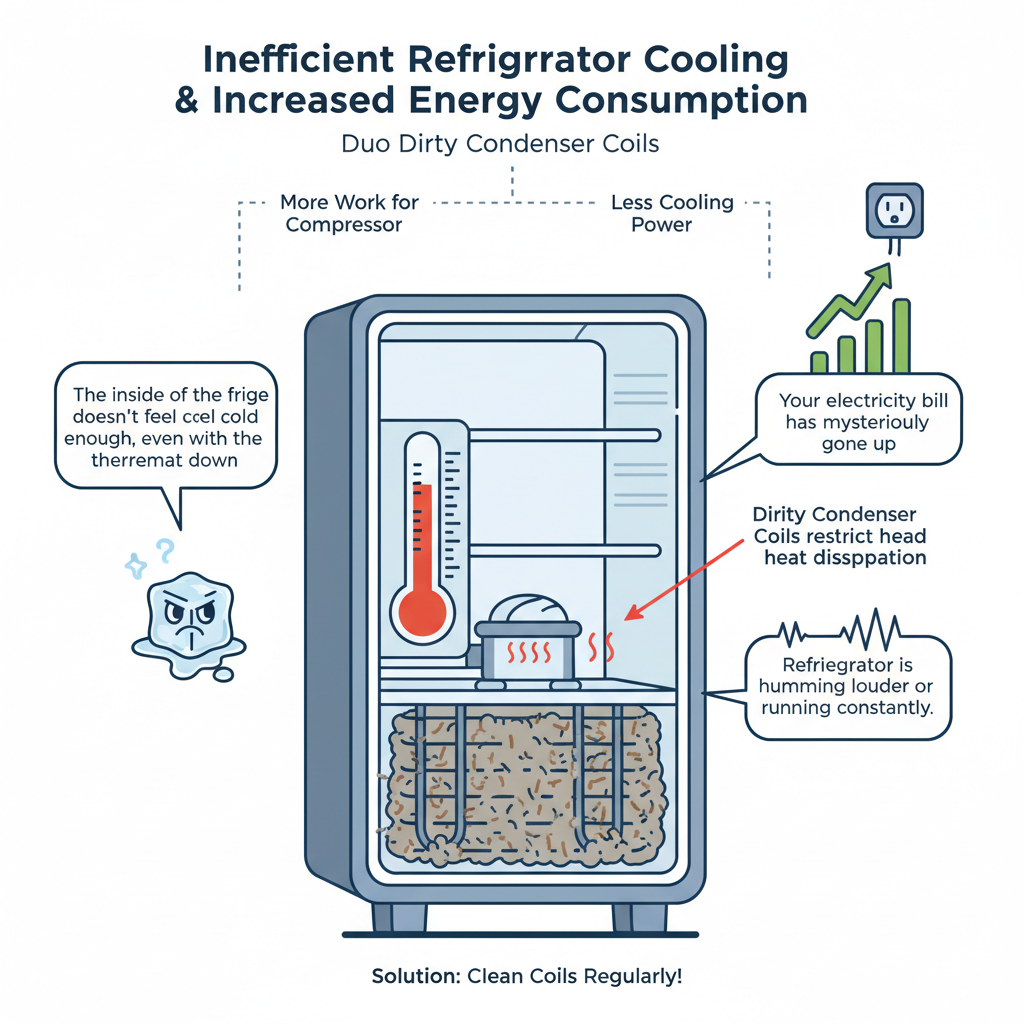
Common Symptoms
Possible Causes
Step-by-Step Diagnosis
Step 1
First, just listen and feel. Is the fridge running non-stop? Does the side of the unit feel warm? That's your first clue.
Step 2
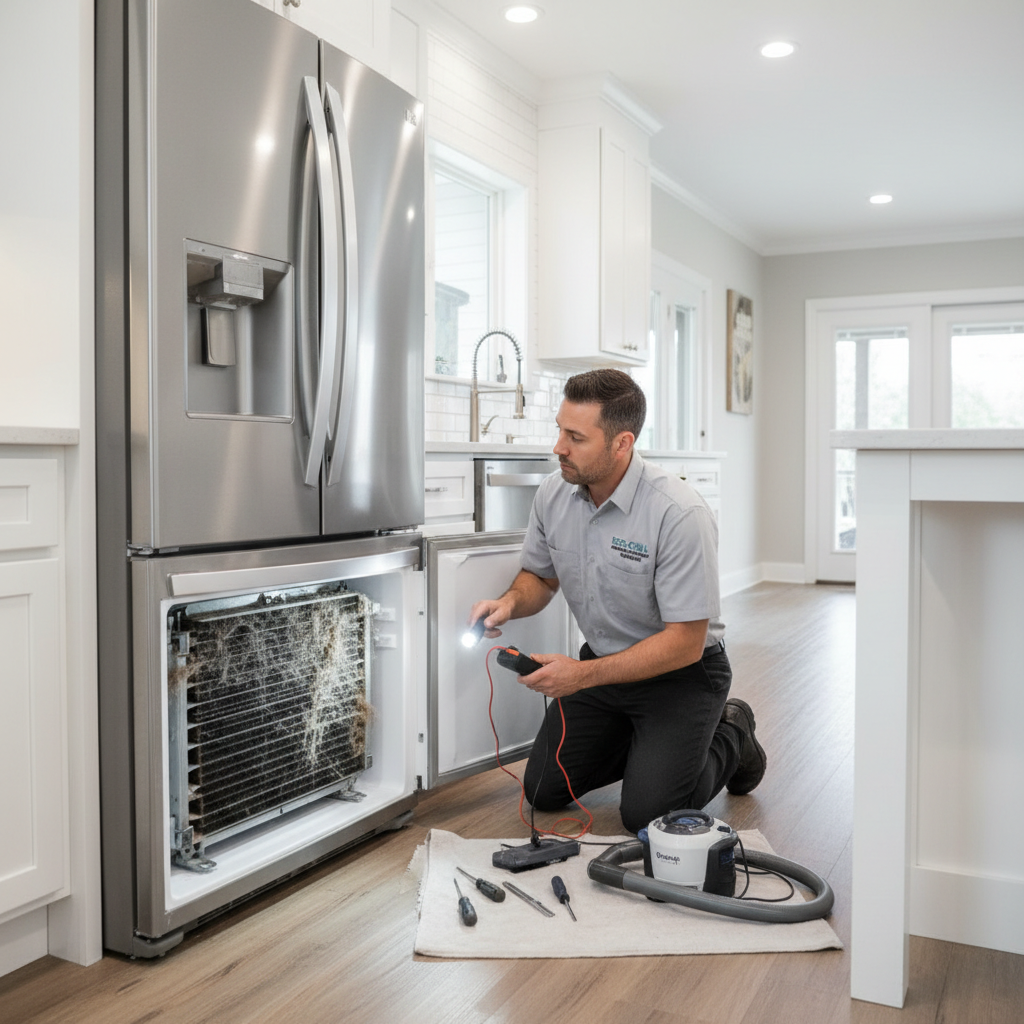
Unplug the refrigerator from the walloutlet. I can't stress this enough - safety first.
Step 3
Locate the coils. Check the back of the fridge first. If not there, pop off the kick plate at the bottom front and look underneath with a flashlight.
Step 4
Visually inspect them. If you see a carpet of gray dust and hair instead of black metal fins, you've found the issue. It'll be obvious.
DIY vs Professional Costs
| Repair Type | DIY Cost | Professional Cost | Time Required |
|---|---|---|---|
Condenser Coil Cleaning | $0 - $25 | $125 - $200 | 30-45 minutes |
When to Call a Professional Appliance
- You completely cleaned the coils and waited a few hours, but the fridge is still not cooling down. The problem is something else.
- You discover the coils are bent, damaged, corroded, or see an oily substance on them. That's a sign of a refrigerant leak and is not a DIY fix.
- Your refrigerator is a built-in model and you can't easily access the coils without major disassembly. Let a pro handle that headache.
- You're just not comfortable pulling out a heavy appliance and working on it. It's better to pay for a simple service than to cause a bigger problem.
Prevention Tips
- Clean the condenser coils every 6 to 12 months. Set a recurring calendar alert. If you have pets, do it every 3-4 months.
- Make sure there's at least an inch of clearance behind and on the sides of the refrigerator to allow for proper airflow. Don't suffocate your appliance.
- Periodically use your vacuum cleaner's hose attachment to clean the floor and area around the front and back of the refrigerator to reduce debris buildup.

Frequently Asked Questions
Related Guides
DIY Appliance Repair vs. Hiring a Pro: A Technician's Honest Take (Troubleshooting & Fixes)
A veteran tech's guide on when to DIY appliance repair and when to call a pro. Learn the real risks, costs, and what YouTube won't tell you about fixing your stuff.
High utility bills due to inefficient appliance use and lack of energy-saving practices. Troubleshooting & Fixes
Preventing Appliance-Related Fires and Electrical Hazards in the Home Troubleshooting & Fixes (2024 Guide)
A veteran tech's guide to preventing appliance fires. Learn the warning signs, what causes them, and when to call a pro before it's a disaster.
Moving Appliances Without Breaking Them (Or Your Back)
A veteran tech's guide to moving appliances. Learn to disconnect, prep, and move your fridge, washer, or stove safely to avoid costly damage and leaks.
Eco-Friendly Appliance Disposal: What to Do with Your Old Appliances (Beyond Just Trashing Them)
A veteran tech's guide on how to get rid of old appliances. Learn about eco-friendly recycling, junk removal, and free disposal options for your old stuff.
Microwave Runs But Won't Heat (Troubleshooting & Fixes)
Microwave running but not heating your food? A veteran tech explains the common causes, from bad door switches to a failed magnetron, and how to fix it.
Need Professional Help?
Find top-rated appliance experts in your area