Quick Answer
Okay, so listen up. If your basement is a damp, cold cave and your heating bills are nuts, it's almost always due to inadequate insulation and air sealing—or no insulation at all. A crucial first step is typically sealing air leaks around the rim joist and sill plate with foam or caulk. This is a relatively cheap DIY fix. But the most significant improvement for comfort and energy efficiency usually involves adding rigid foam board insulation to your foundation walls. You can DIY a section for under $1000, but a full professional job, done right, is typically going to cost anywhere from $2,000 to over $7,000, depending on the scope and location. It's the most effective way to prevent that cold concrete from robbing heat from your living space.
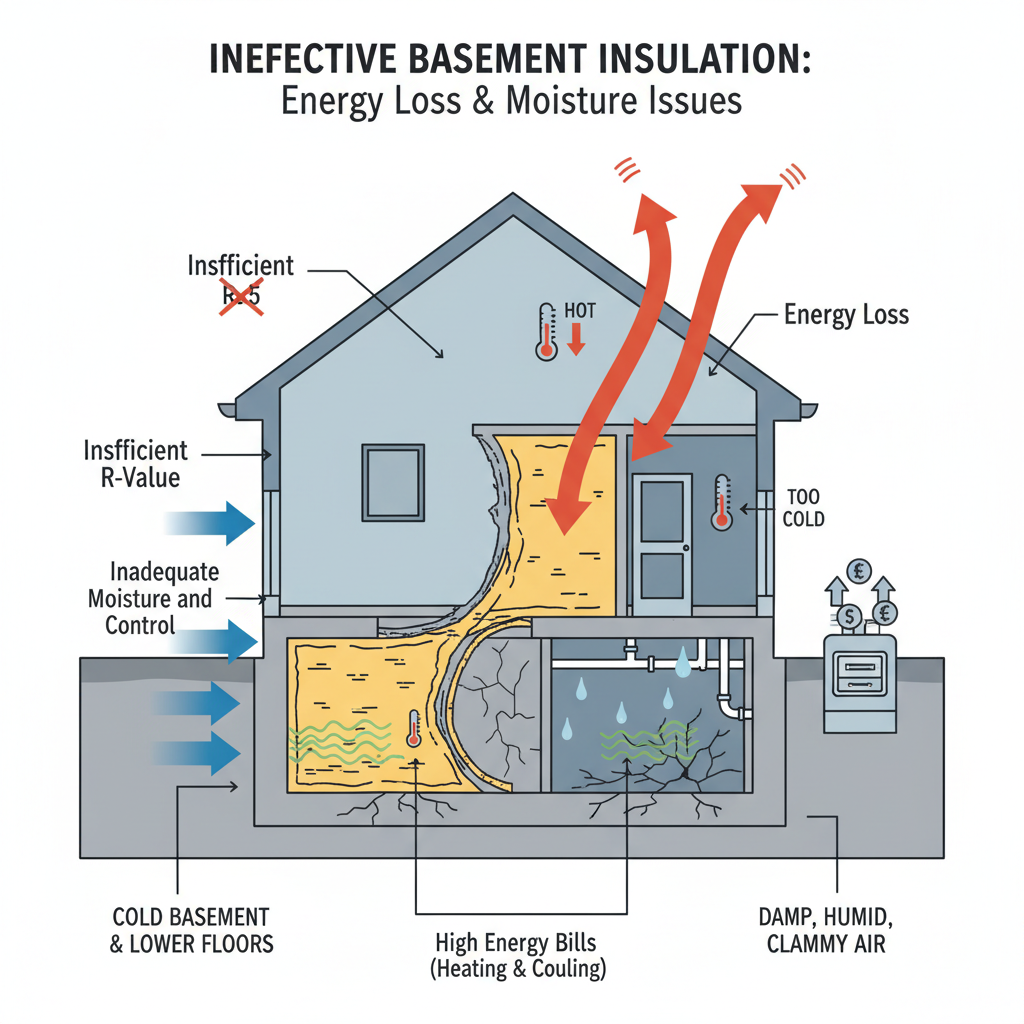
Common Symptoms
Possible Causes
Step-by-Step Diagnosis
Step 1
Perform a simple visual inspection. Look for bare concrete walls, saggy or stained existing insulation, and any obvious signs of water entry.
Step 2
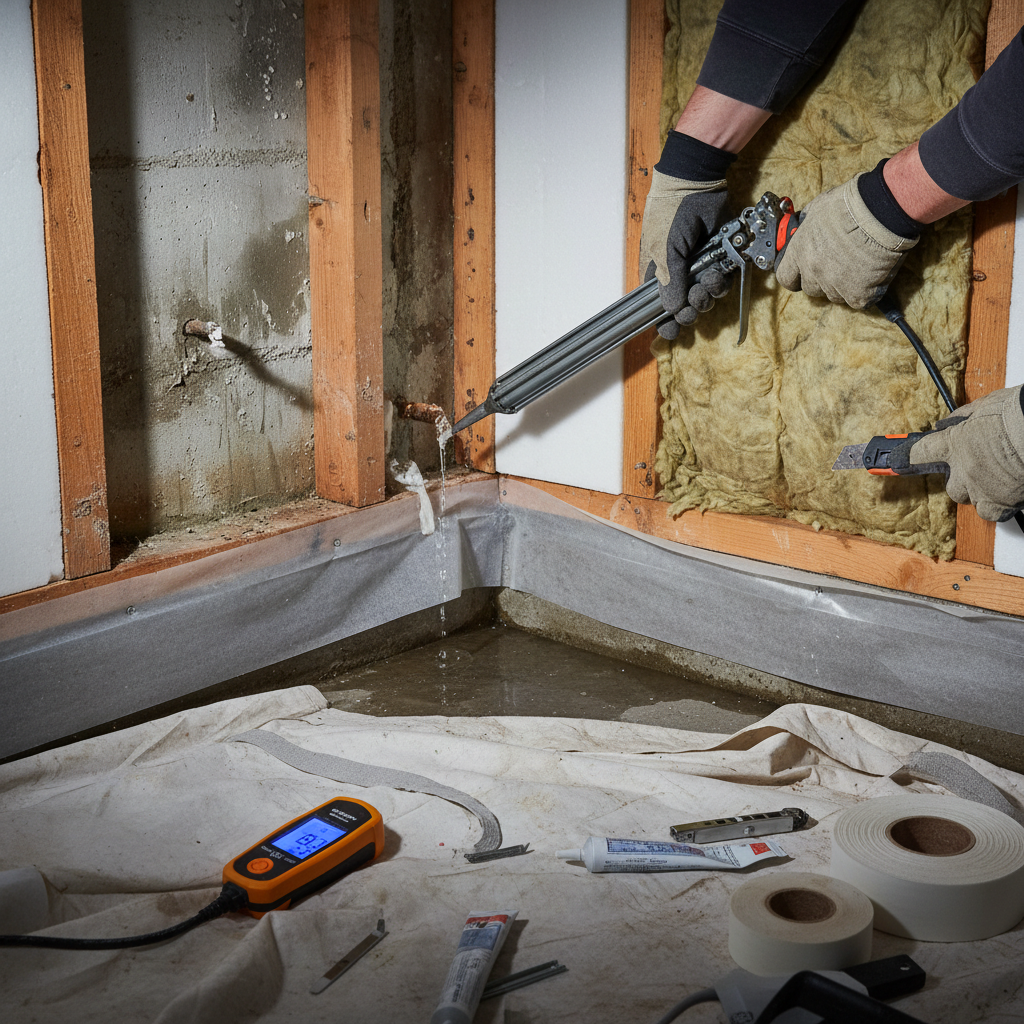
Check for air leaks. On a cold, windy day, run your hand along the rim joist area (where the wood house sits on the concrete foundation) to feel for drafts.
Step 3
Assess for moisture. Look for peeling paint, white chalky efflorescence on the walls, and dark stains. Use your nose; a musty smell is a dead giveaway for moisture.
Step 4
Evaluate existing insulation. If any is present, carefully pull back a section and check if it's damp or if the wall behind it is wet.
Step 5
Identify the insulation type. Is it fiberglass batts, rigid foam, or spray foam? Fiberglass against concrete is a red flag.
Step 6
Consider a professional energy audit. A blower door test combined with thermal imaging is the most definitive way to pinpoint every single air leak and insulation weak spot.

DIY vs Professional Costs
| Repair Type | DIY Cost | Professional Cost | Time Required |
|---|---|---|---|
Air sealing rim joists & gaps | $50 - $150 | $500 - $1,200 | 4-8 hours |
Installing rigid foam insulation on interior walls | $500 - $2,000 | $1,500 - $4,000 | 2-4 days |
Professional closed-cell spray foam insulation | N/A | $3,000 - $7,000+ | 2-4 days |
Addressing major moisture issues (e.g., drain tile) | N/A | $4,000 - $15,000+ | 3-7 days |
When to Call a Professional Insulation
- You have significant moisture problems, like standing water, water trickling down the walls, or consistently damp concrete.
- There is extensive mold growth that requires professional remediation and containment.
- You're uncertain about which materials are right for your situation or how to comply with local building codes.
- The scope of the project is too large or you don't have the time and tools to do it right.
- You want a professional job that comes with a warranty for performance and workmanship.
- The project requires dealing with complex electrical or plumbing penetrations that you're not comfortable modifying.
- You want to use closed-cell spray foam, which is not a DIY product.
Prevention Tips
- Ensure your yard is graded to slope away from the foundation, preventing water from pooling against it.
- Keep gutters clean and extend downspouts to discharge water at least 6-8 feet away from the house.
- Run a dehumidifier in the basement during humid months to keep relative humidity below 50%.
- Seal any visible cracks in the foundation from the exterior using polyurethane caulk or hydraulic cement.
- When you do insulate, choose a moisture-resistant material like closed-cell spray foam or rigid foam board for direct contact with concrete.
- Before finishing a basement, install a proper moisture management system, which could be as simple as foam board or as complex as a full drain tile system.
Frequently Asked Questions
Related Guides
House Remains Cold After Insulation? Troubleshooting Drafts & Hidden Leaks (A Pro's Guide)
Still freezing after adding more insulation? Your problem isn't the insulation, it's hidden air leaks. A 25-year vet explains how to find and fix them.
Ineffective Insulation Troubleshooting & Fixes (2024 Guide)
Feeling cold drafts or seeing huge energy bills? Your home's insulation is probably failing. Here’s a vet tech's guide to finding and fixing the problem.
Ensuring proper attic ventilation after adding insulation to maintain indoor air quality, energy efficiency, and prevent moisture issues. Troubleshooting & Fixes (2024 Guide)
Just added insulation and now have issues? I'll show you how to fix attic ventilation problems, prevent mold, and lower your energy bills. A veteran tech's guide.
Crawl Space Issues Troubleshooting & Fixes (2024 Guide from a Pro)
A veteran tech explains crawl space moisture, mold, and damage. Learn the real causes of musty smells and high energy bills, and how to fix them for good.
Ineffective or insufficient home insulation leading to high energy bills, drafts, and uncomfortable indoor temperatures, often due to aging, improper installation, or inadequate R-value for the climate. Troubleshooting & Fixes
Feeling high energy bills & uncomfortable rooms? Your home insulation might be failing. A veteran tech's guide to diagnosing and fixing it for good.
Identifying insulation gaps and air leaks through a home energy audit to improve energy efficiency, leading to higher utility bills and reduced comfort. Troubleshooting & Fixes
Feeling drafts or seeing high energy bills? Learn to identify and fix insulation gaps and air leaks with our comprehensive home energy audit troubleshooting guide.
Need Professional Help?
Find top-rated insulation experts in your area