Quick Answer
Okay, so here's the quick version. You see water on top of your heater and you're thinking the worst. Slow down. Nine times out of ten, it's not the tank itself. It's usually a cheap part that's failed – the T&P valve, a loose pipe connection, or the seal on the anode rod. You're probably looking at a simple parts swap. If you've got some tools, you might get away with it for under $50. If you call a guy like me, expect to pay a couple hundred bucks. The only time to really panic is if the tank itself is leaking.
Common Symptoms
Possible Causes
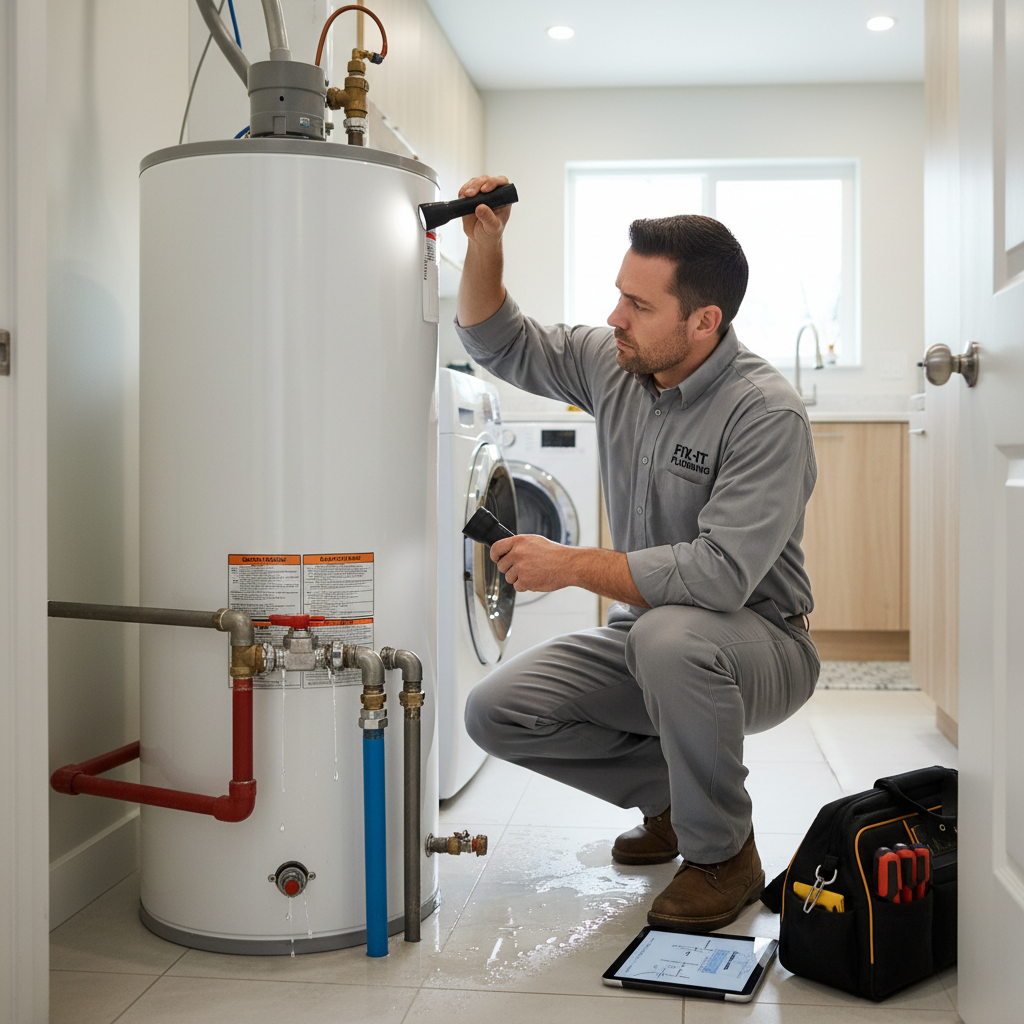
Step-by-Step Diagnosis
Step 1
Immediately turn off the power supply to the water heater at the circuit breaker (for electric) or turn the gas control valve to 'OFF' (for gas).
Step 2
Carefully dry the entire top surface of the water heater and all pipes/fittings using a cloth or paper towels.
Step 3
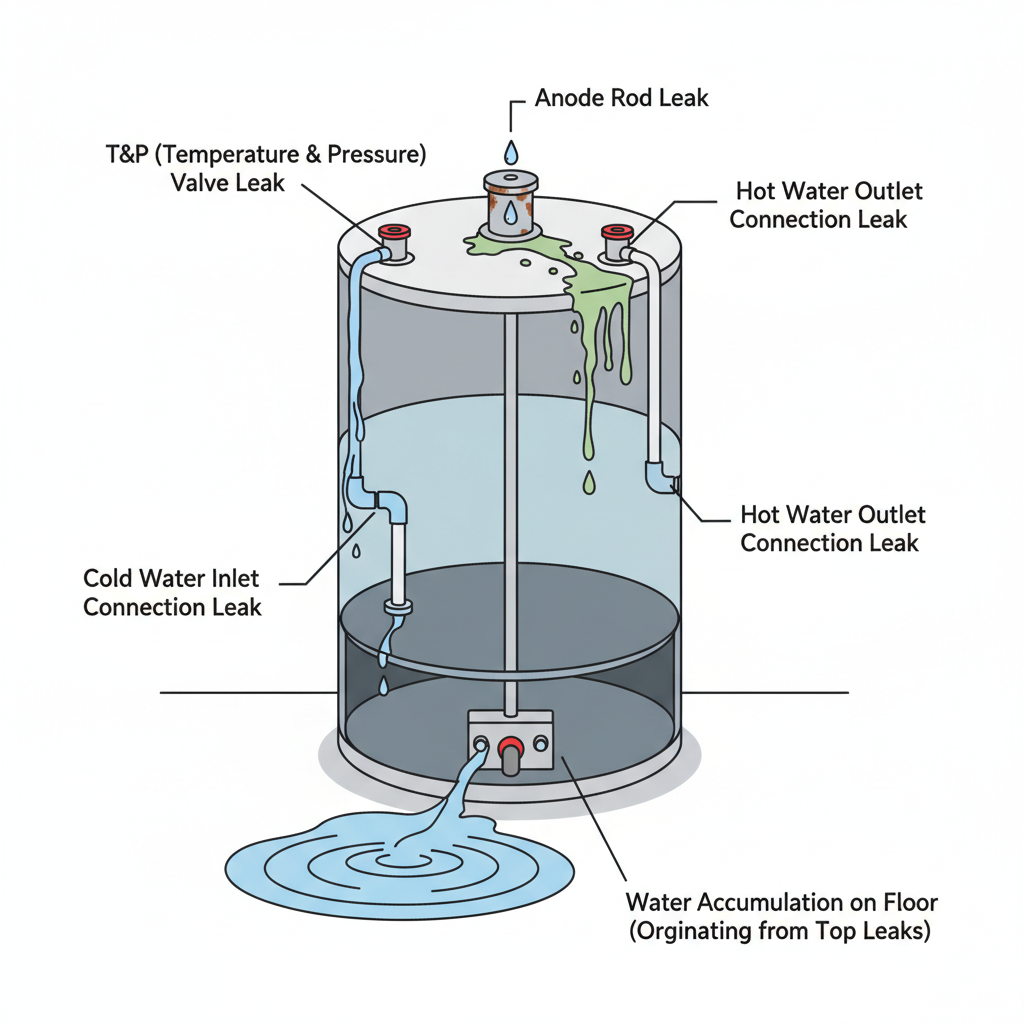
Closely observe the dried areas for new drips. Systematically check each potential source: the T&P valve, the cold water inlet, the hot water outlet, and the anode rod port.
Step 4
Use the 'paper towel trick': wrap a small piece of dry paper towel around each connection point. The one that gets wet first is the source of the leak.
Step 5
If water is coming from the T&P valve discharge pipe, check the water pressure in your home with a pressure gauge. If it's above 80 PSI, high pressure is the likely cause, not a faulty valve.
DIY vs Professional Costs
| Repair Type | DIY Cost | Professional Cost | Time Required |
|---|---|---|---|
Tightening/Resealing Connections | $0 - $5 | $150 - $250 | 30 minutes |
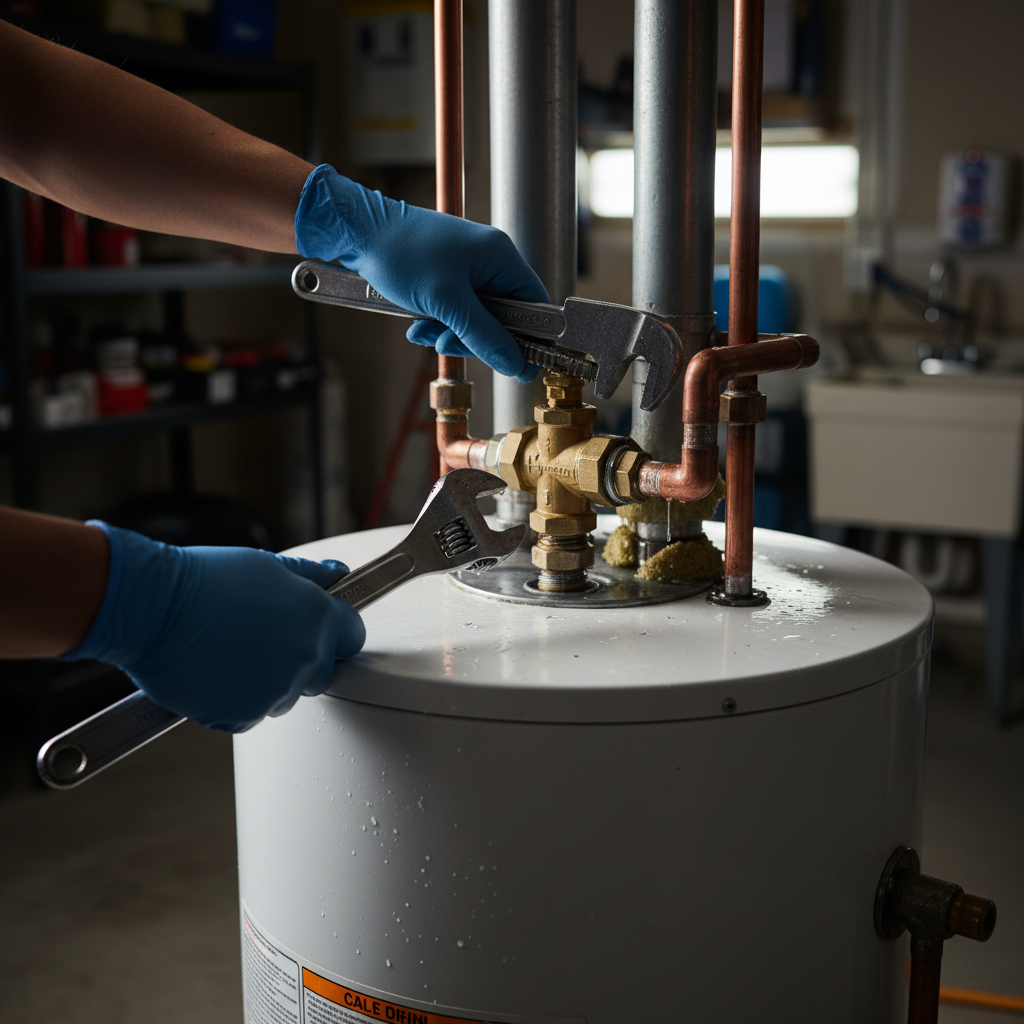
T&P Valve Replacement | $20 - $50 | $175 - $350 | 1-2 hours |
Anode Rod Replacement | $30 - $100 | $300 - $550 | 1-2 hours |
When to Call a Professional Water Heater
- If the leak is directly from the main tank itself, indicating internal corrosion. The unit needs to be replaced.
- If you are uncomfortable performing any of the DIY repairs, especially those involving gas lines.
- If a fitting snaps or breaks when you try to repair it.
- If the water heater is over 10-12 years old, as the cost of repair may not be worth it compared to investing in a new unit.
Prevention Tips
- Periodically inspect the top of the water heater for any signs of moisture, drips, or corrosion.
- Test the T&P relief valve annually by carefully lifting and releasing the lever, but be aware that old valves may fail to reseal after testing.
- Ensure your home's water pressure is between 40-80 PSI. Install a pressure reducing valve if it's consistently too high.
- Replace the anode rod every 3-5 years to prevent internal tank corrosion, which is the leading cause of catastrophic tank failure.
Frequently Asked Questions
Related Guides
Hot Water Smells Like Rotten Eggs? Here's How to Fix It (Troubleshooting & Fixes)
Stop the rotten egg smell in your hot water! This guide identifies the causes (bacteria, anode rod, water quality) and provides DIY fixes, from flushing and shock chlorination to anode rod replacement. Learn when to call a pro.
Water Heater Expansion Tank Problems: Diagnosis, Fixes & Prevention Guide
Is your water heater's T&P valve dripping or pipes banging? Our expert guide helps you diagnose and fix common water heater expansion tank problems, including waterlogging and pressure issues. Learn how to prevent leaks and significantly extend the life of your plumbing system.
Water Heater Inefficiency: Diagnosing and Fixing Poor Insulation for Lower Energy Bills
Stop energy waste and high utility bills! Learn to diagnose and fix inefficient water heater insulation with our expert guide. Discover easy DIY steps to insulate your tank and pipes for significant savings. Find out when to call a professional.
Tankless Water Heater Installation: DIY vs. Professional Guide (2024)
Considering a tankless water heater? This guide explains the significant challenges and dangers of DIY installation compared to hiring a professional, covering gas line upgrades, venting, electrical demands, and code compliance for safe and efficient operation.
Water Heater Not Hot Enough: Troubleshooting & Fixes (2024 Guide)
Tired of lukewarm showers? A veteran tech explains why your water heater isn't hot enough and how you can fix it. Troubleshooting tips for gas and electric.
Water Heater Leaking from Top: Troubleshooting & Fixes from a 25-Year Pro
Water heater leaking from the top? Learn to diagnose common culprits like T&P valves, loose connections, or the anode rod. Expert tips for DIY fixes and when to call a pro.
Need Professional Help?
Find top-rated water heater experts in your area