Quick Answer
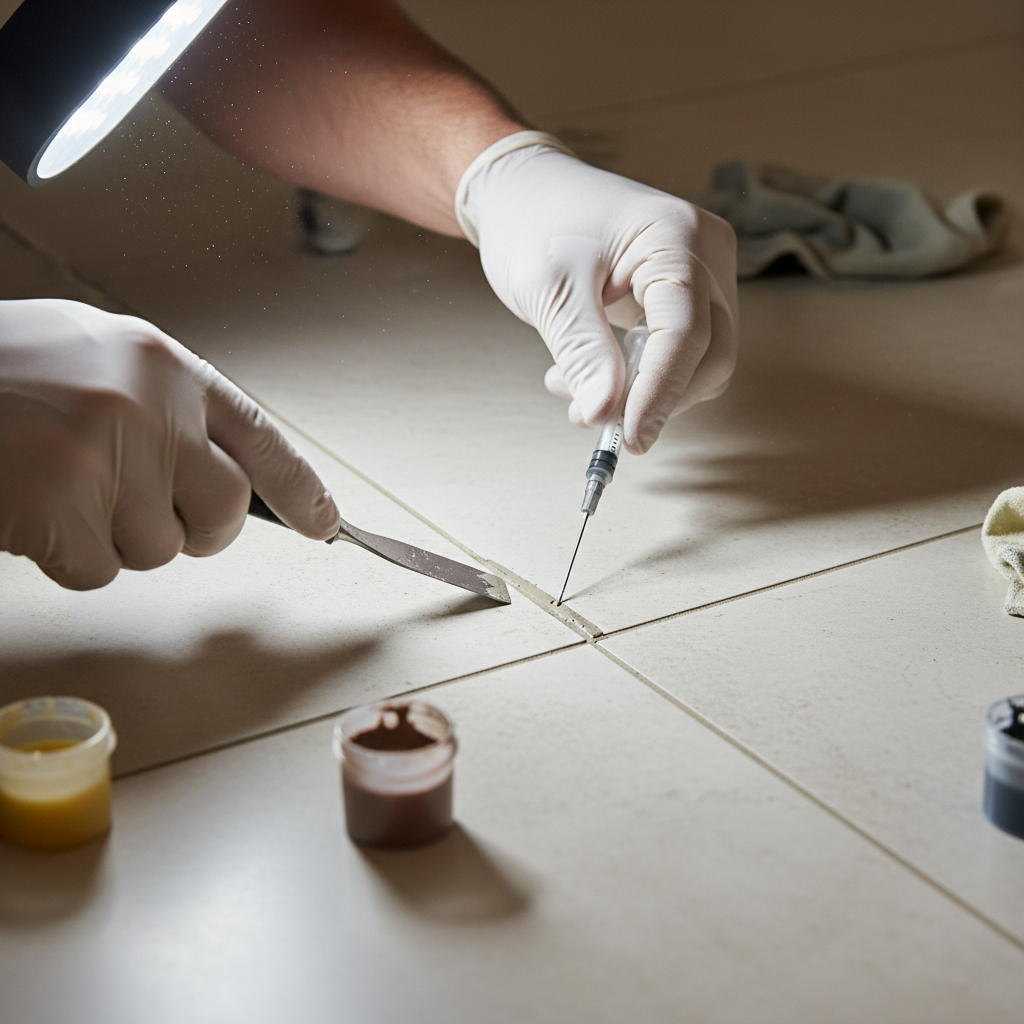
Dealing with a cracked floor tile? For slender hairline cracks, a high-quality clear super glue or cyanoacrylate adhesive can offer a quick, temporary fix. For anything wider or more significant, a two-part epoxy tile repair kit is your best bet. Start by thoroughly cleaning the crack to remove dirt and debris. Carefully mix the epoxy according to the manufacturer's instructions and apply it into the crack, ensuring it's completely filled. Use a putty knife or razor blade to scrape the surface flat before the epoxy cures. This DIY repair typically costs $15-$40 for materials and can significantly improve the tile's appearance and functionality, often saving you the hassle and expense of full tile replacement. Always address the underlying cause to prevent recurrence.
Common Symptoms
Possible Causes
Step-by-Step Diagnosis
Step 1
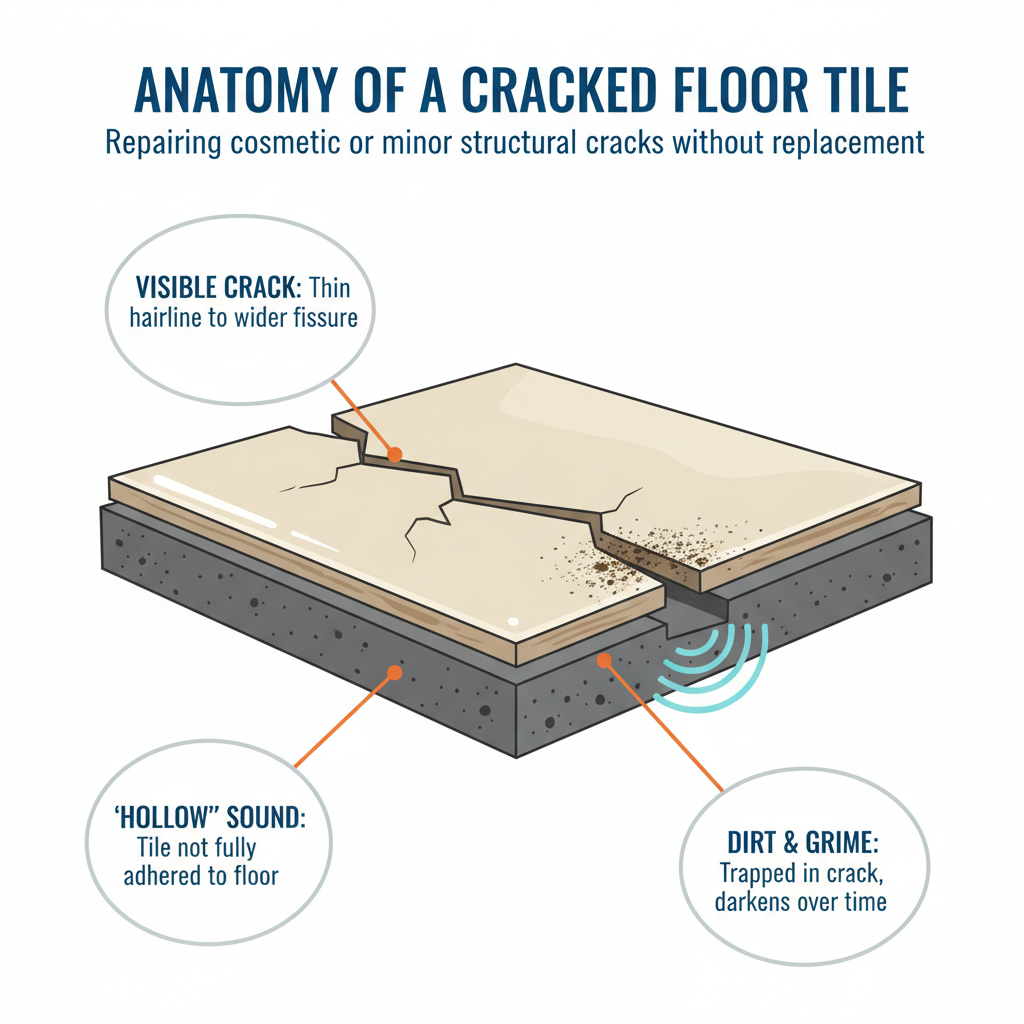
Visually examine the crack's pattern (hairline, spiderweb, straight line across multiple tiles) and location.
Step 2
Perform the 'tap test' with a knuckle or small mallet to listen for hollow sounds indicating voids under the tile.
Step 3
Inspect adjacent grout lines for cracks, crumbling, or looseness.
Step 4
Check the overall subfloor stability in the area by walking on it for bounciness, squeaks, or deflection.
Step 5
Look for signs of moisture (stains, mold, dampness) around the cracked tile which can weaken the subfloor and adhesive.

DIY vs Professional Costs
| Repair Type | DIY Cost | Professional Cost | Time Required |
|---|---|---|---|
Hairline Crack Repair (Super Glue) | $5 - $10 | ~$75 (minimum fee) | 15 minutes |
Wider Crack Repair (Epoxy Kit) | $15 - $40 | $100 - $175 per tile | 1-2 hours |
Color-Matched Epoxy Repair | $25 - $50 | $150 - $250 per tile | 2-3 hours |
When to Call a Professional Tile
- If a crack runs in a straight line across multiple tiles, indicating a potential subfloor or structural issue.
- When numerous tiles sound hollow or feel loose, suggesting widespread installation defects or subfloor problems.
- If there are clear signs of water damage (mold, swelling, persistent dampness) beneath the tile.
- For any suspected structural concerns like a bouncy, sagging, or visibly deflecting subfloor.
- If the cracked tile is expensive, rare, or discontinued, requiring a specialized and precise repair or replacement.
- When you lack the confidence, tools, or time to perform the repair effectively yourself.
Prevention Tips
- Place felt or rubber pads under heavy furniture and appliances to distribute weight.
- Be careful to avoid dropping heavy items on tile floors, especially in kitchens.
- During new installations, ensure professional contractors use proper mortar coverage and leave adequate expansion joints.
- Address any subfloor instability, water damage, or leaks immediately to maintain a rigid base for tiles.
- Allow new tiles to acclimate to room temperature and humidity before installation.
Frequently Asked Questions
Related Guides
Mold in Shower Grout (Troubleshooting & Fixes)
A veteran tile tech's guide to killing mold in your shower grout for good. Learn how to identify, clean, and prevent that nasty black stuff from coming back.
Hiring a Tile Guy: How to Not Get Ripped Off (Troubleshooting & Fixes)
Learn how to hire a qualified tile installer and avoid common pitfalls. This guide covers red flags, essential questions, credential verification, and detailed steps for securing a high-quality, lasting tile installation, preventing costly future repairs.
Cleaning Patio Tiles & Slabs: Ultimate Troubleshooting Guide for Moss, Algae & Stains
Revive your outdoor space with our comprehensive guide to cleaning patio tiles and slabs. Learn expert DIY methods for safely removing moss, algae, mold, grease, rust, and other stubborn stains. Includes material-specific advice, prevention tips, and when to call a professional for a pristine, safe patio.
Emergency Tile Repair: Quick Solutions for Cracked and Broken Tiles
Find quick solutions for cracked or broken tiles in your home. This guide helps you diagnose the damage, understand causes, and choose between DIY fixes or professional assistance for durable tile repairs.
Cracked Floor Tile (Troubleshooting & Fixes)
Comprehensive guide to troubleshooting and fixing cracked floor tiles (ceramic, porcelain, stone). Learn to diagnose causes, perform DIY epoxy repairs, and prevent future tile damage effectively. Expert advice for homeowners.
Grout haze is a dull, cloudy film or residue left on the surface of new tile after the grouting process has been completed and the grout has dried. It can obscure the true color and shine of the tile. Troubleshooting & Fixes (2024 Guide)
Got a cloudy film on your new tile? I'll tell you how to get rid of that annoying grout haze for good. A no-nonsense guide from a 25-year pro.
Need Professional Help?
Find top-rated tile experts in your area